
This article describes the steps to be taken in order to Add or Import Payroll Components in the HRMS module.
Prerequisites:
1. You have your Deskera HRMS application URL in place.
2. You are the administrator of the HRMS application
3. Ensure a good internet connectivity
Step 1: Click on Payroll Components on HRMS Dashboard under the Payroll module.
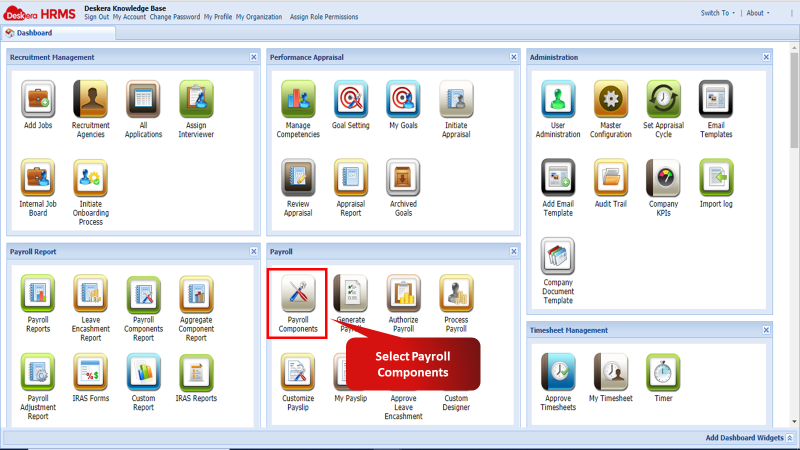
Fig 2.4.1.1.1 Payroll Components
- Add Single Payroll Component
Step 1: To add a single Payroll Component, click on the Add New icon under the Components window.
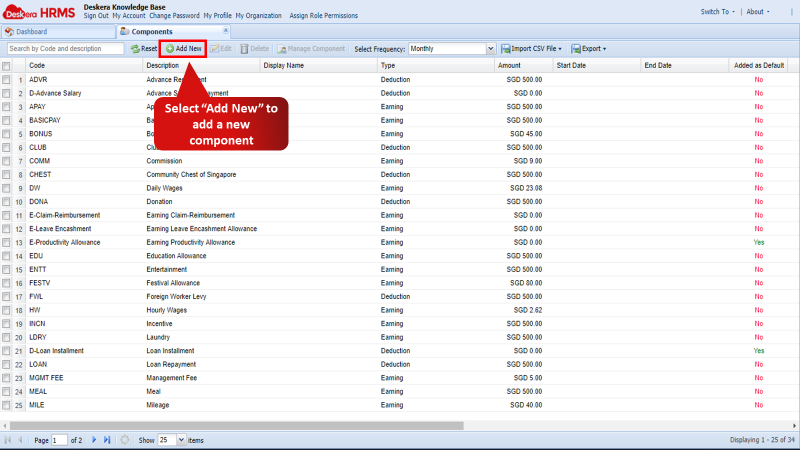
Fig 2. 4..1.1.2 Add New Component
Step 2: The Add Component screen will appear. It will go through three settings. The first will be the Basic Settings wherein the user has to fill in details under Basic Components Settings and Component Optional Settings such as:
- Component’s Code to uniquely identify the component
- Component’s Description
- Display Name in Payslip
- Method through which the component will be calculated such as the direct Amount, as a Percent, through a specified formula or through Add rule to put conditions on the component’s calculation.
- Start Date and End Date for computing the component
- Type of the component, whether it is Employer Contribution, Earning, Deduction, Tax or Additional Remuneration.
- The frequency of the component
Click on next to proceed to the next screen.
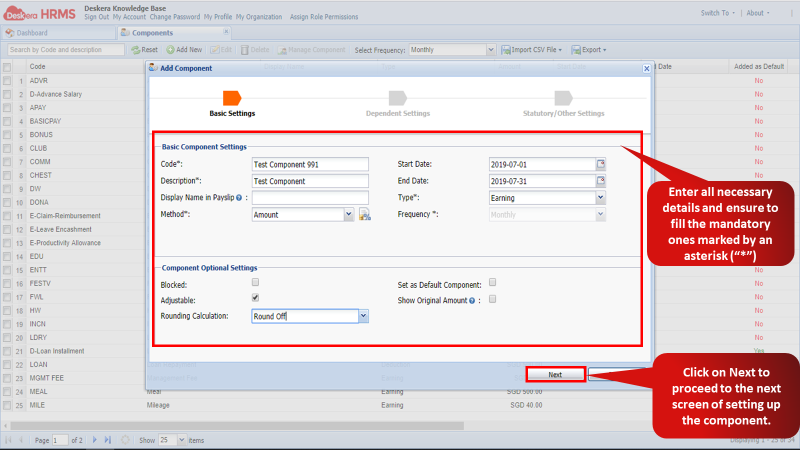
Fig 2. 4..1.1.3 Basic Settings
Step 3: Under the Dependent Settings screen, the user can configure the configure the component based on parameters such as:
- LWP Applicable: Enabling this makes the component applicable for Leave Without Pay.
- Taxable: Enabling this makes the component applicable for tax.
- Undertime Applicable: Enabling this makes the component applicable for Undertime penalty.
- Proration Applicable: Enabling this makes the component applicable for Proration.
- Middle Month Changes: This setting needs to be enabled to carry out Auto Salary change flow.
- Annual Proration: Enabling this makes the component an annually prorated bonus component.
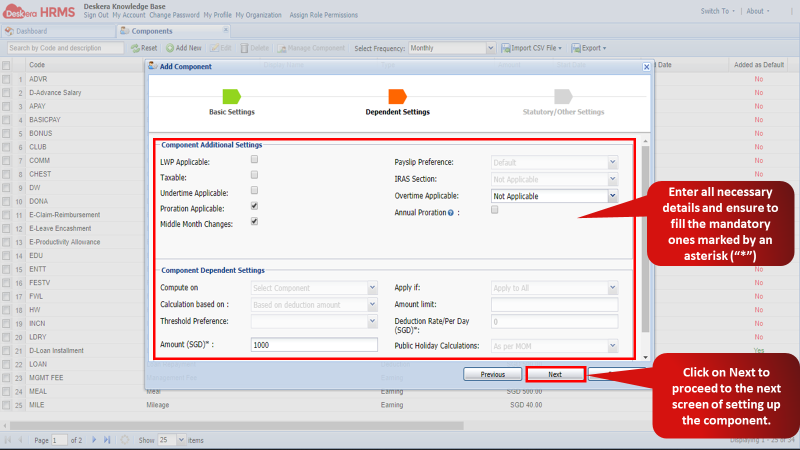
Fig 2. 4..1.1.4 Dependent Settings
Step 4: Under the Statutory/Other Settings screen, the user can configure the component based on parameters such as:
- Wage Type: If the component is an Ordinary or an Additional component.
- CPF Applicable
- NS Pay Applicable
- Pensionable
- SDL Applicable
Click on Submit once you have made all the necessary settings for the component. The component will now be created.
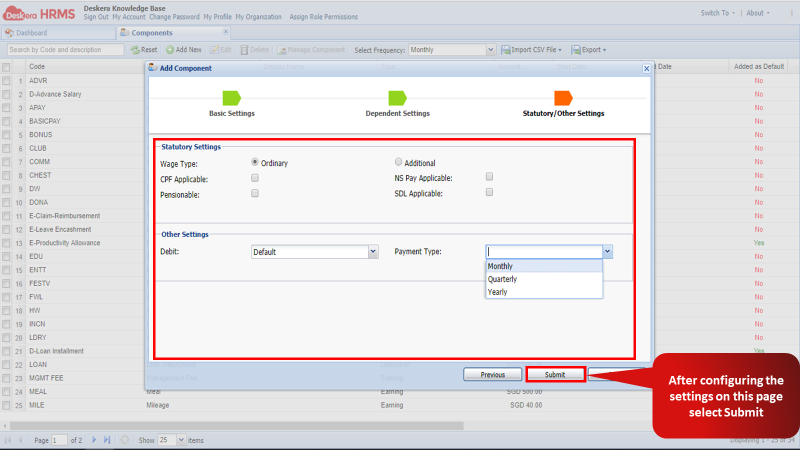
Fig 2. 4..1.1.5 Statutory/Other Settings
- Import CSV File
Step 1: To add multiple payroll components into the system click on Import CSV file, select Import Component Details and then select Import CSV File.
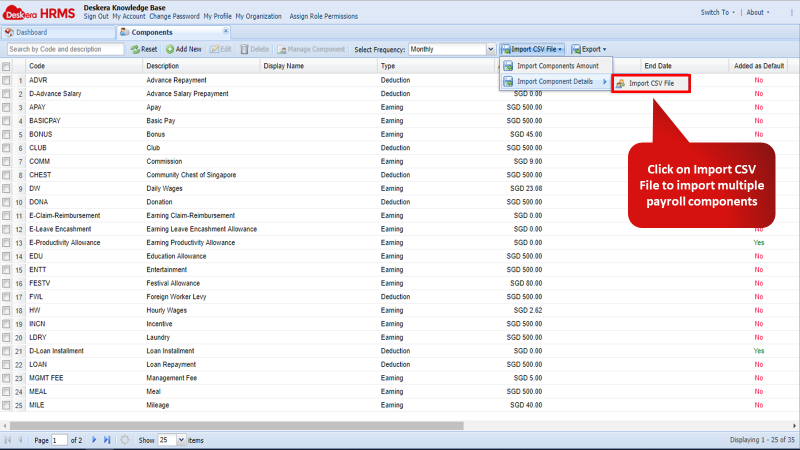
Fig 2. 4..1.1.6 Import CSV File
Step 2: Choose the file you wish to import by clicking on Choose File and selecting the required CSV file to import components. Then click on Next.
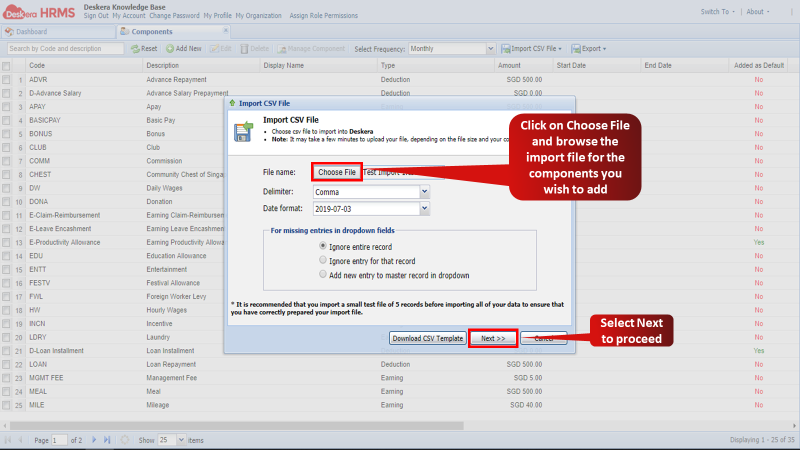
Fig 2. 4..1.1.7 Import CSV File
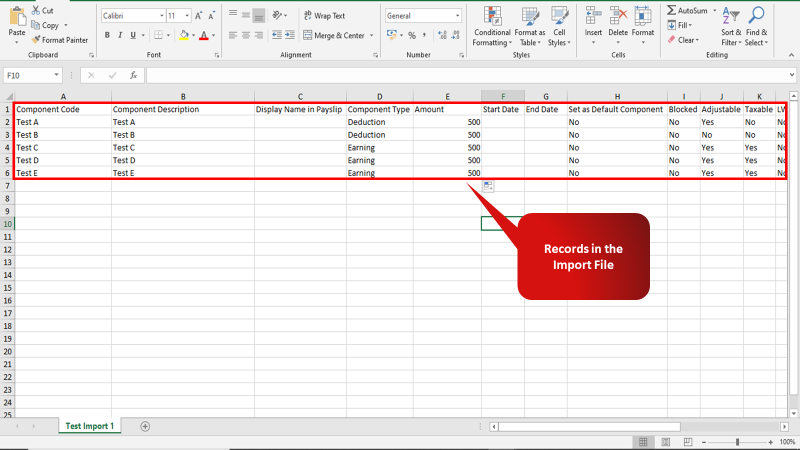
Fig 2. 4..1.1.8 Import CSV File
Step 3: Make sure that the entries under Columns that are in bold are duly filled in the CSV import file as they are mandatory entries. Then click on Auto Map Columns to ensure that the CSV Headers are properly mapped to their respective Columns in the system. Then select Analyze Data.
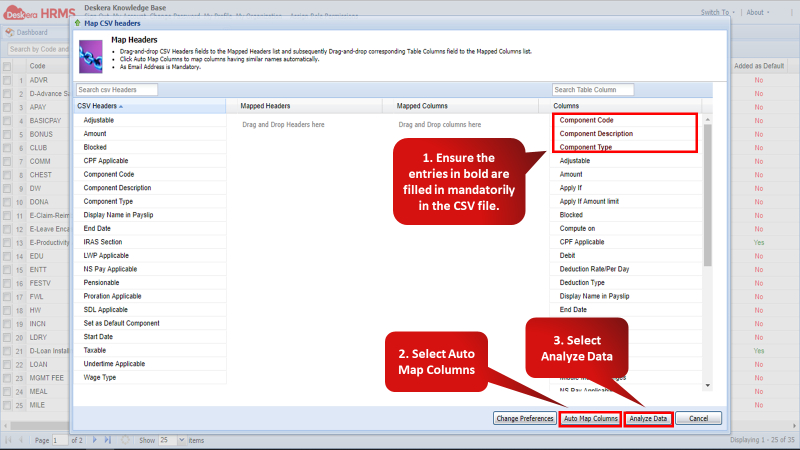
Fig 2. 4..1.1.9 Map CSV Headers
Step 4: The Validation Analysis Report will show if the records in the CSV Import file are valid. Proceed for importing the data by selecting Import Data.
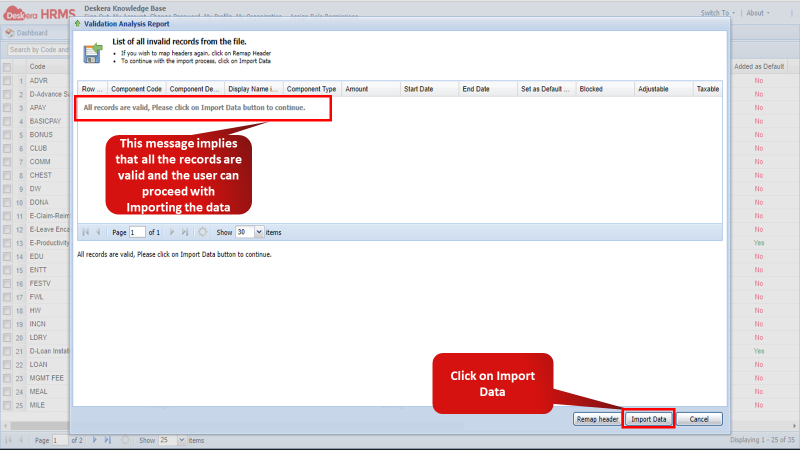
Fig 2. 4..1.1.10 Validation Analysis Report
Step 5: The Validation Analysis Report will show if the records in the CSV Import file are valid. Proceed for importing the data by selecting Import Data.
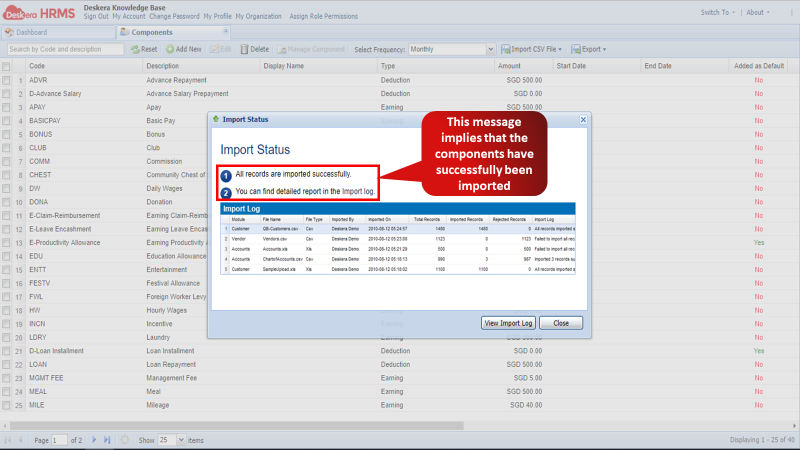
Fig 2. 4..1.1.11 Validation Analysis Report
Comments
0 comments
Please sign in to leave a comment.