
The Import function under the User Administration sub-module of the eLeave Dashboard allows the user to Import files to set approval levels, assign managers and also import details for the access card ID.
Prerequisites:
- You have your Deskera eLeave application URL in place.
- You are the administrator of the eLeave application.
- Ensure Stable Internet Connectivity.
Import Approval Levels
Step 1: On the eLeave Dashboard, click on User Administration under the Administration widget.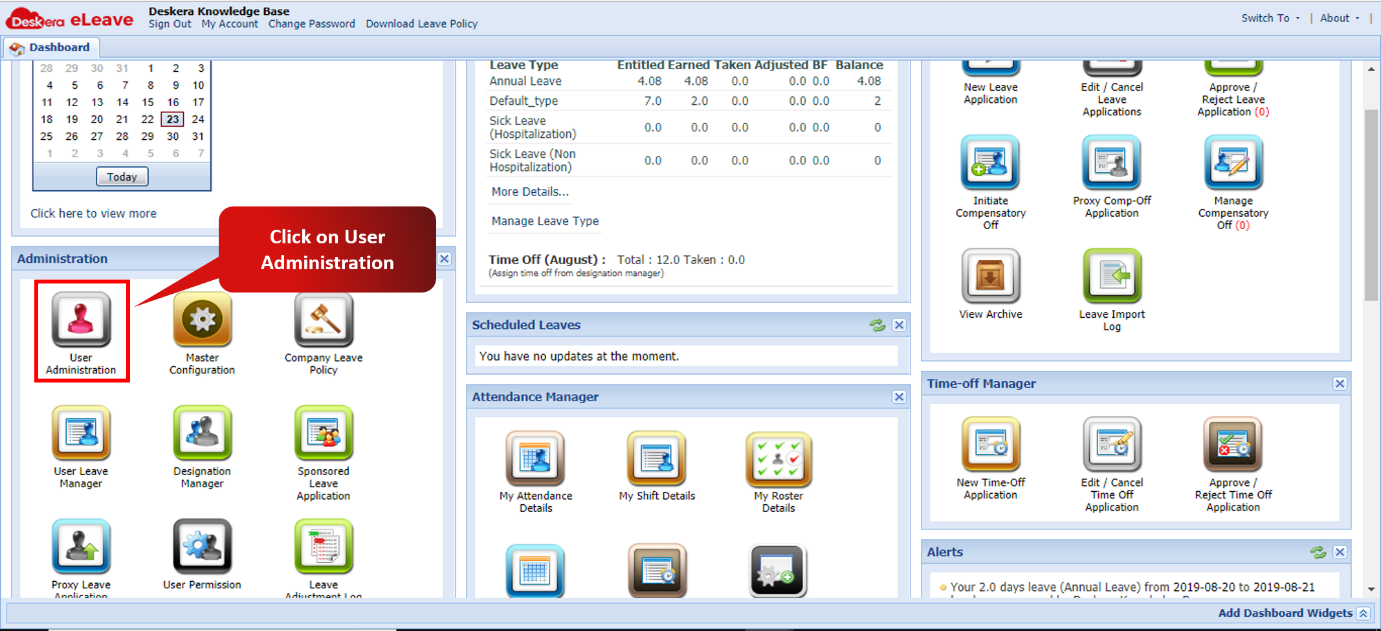 Fig. 3.1.1.8.1 eLeave Dashboard
Step 2: Click on Import and in the drop down menu, choose Import Approval Levels.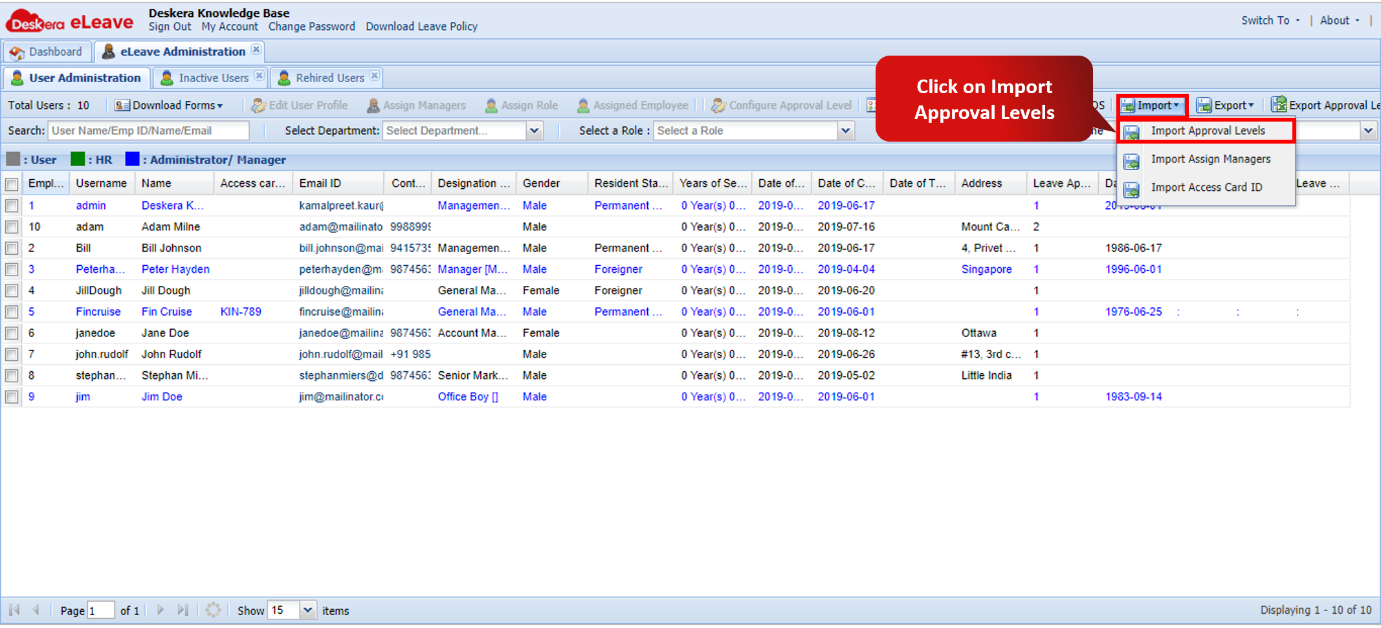 Fig. 3.1.1.8.2 User Management window
Step 3: On the next window click on Download Sample File.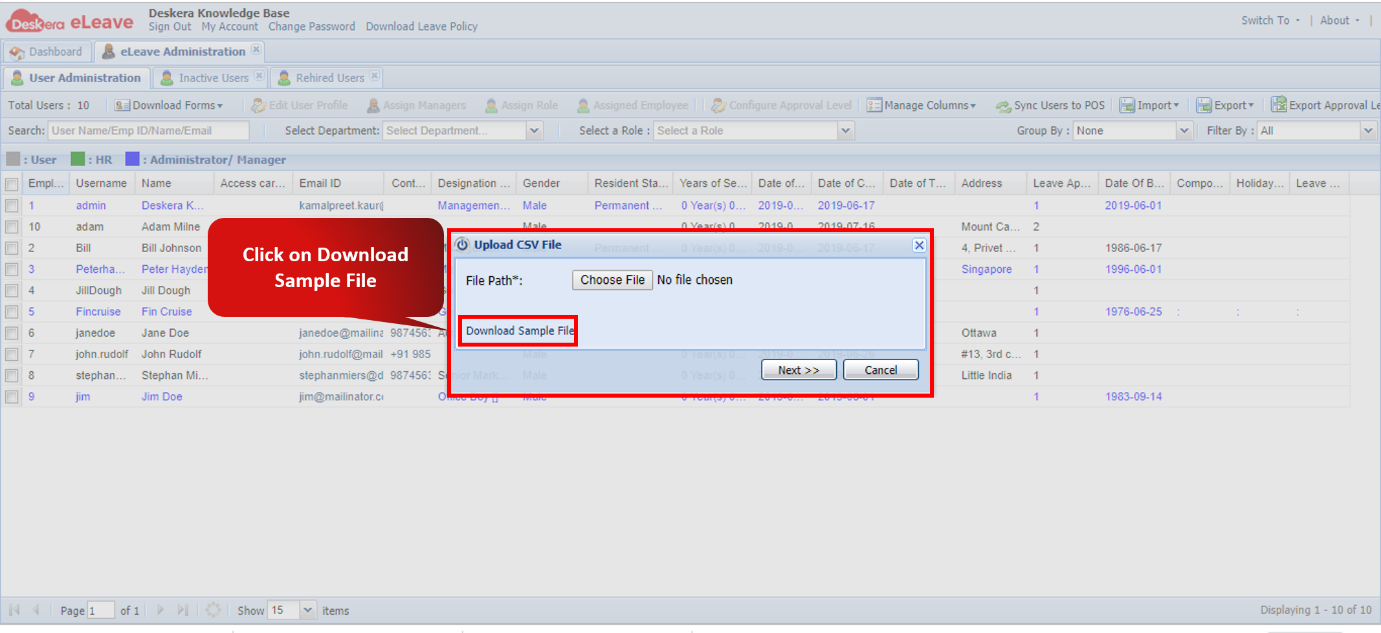 Fig. 3.1.1.8.3 Download Sample File
Step 4: Enter the required data in the Import file and save it.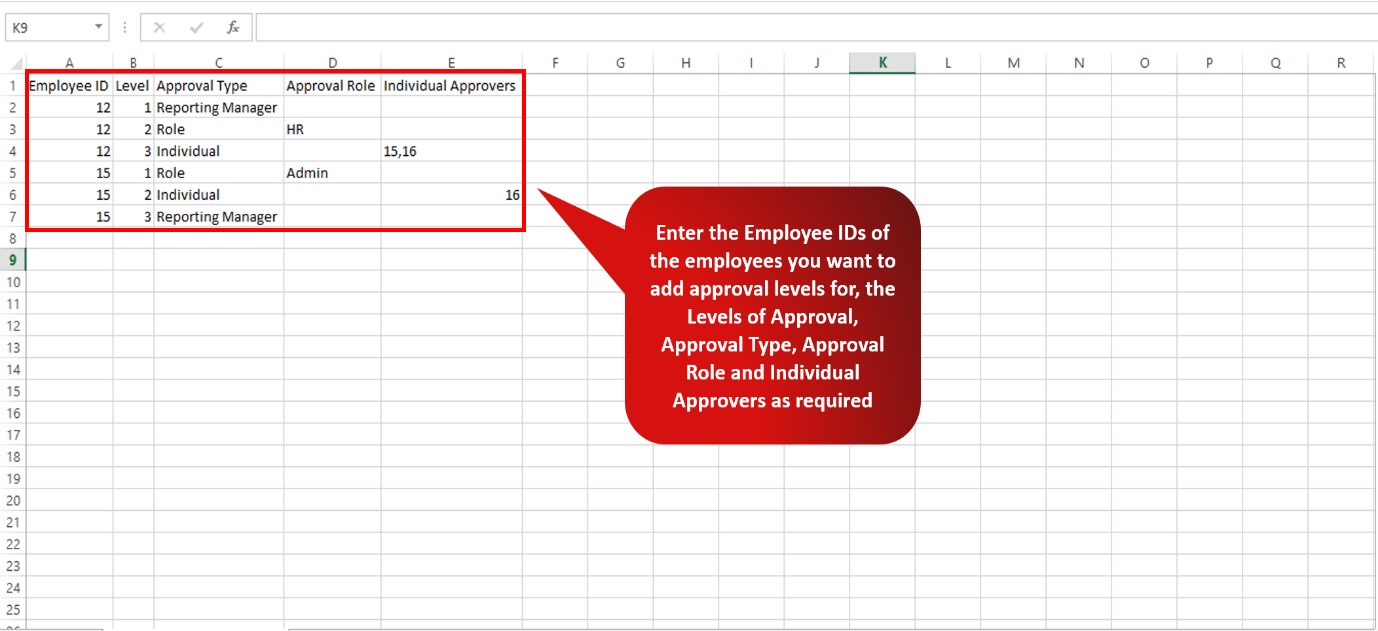 Fig. 3.1.1.8.4 Sample Import File
Step 5: Navigate back to the User Administration window and click on Import Approval Levels.Fig. 3.1.1.8.5 Import Approval Levels
Step 6: Choose the Import file and click on Next. Fig. 3.1.1.8.6 Import Approval Levels
Step 7: Click on Auto Map and the click on Import.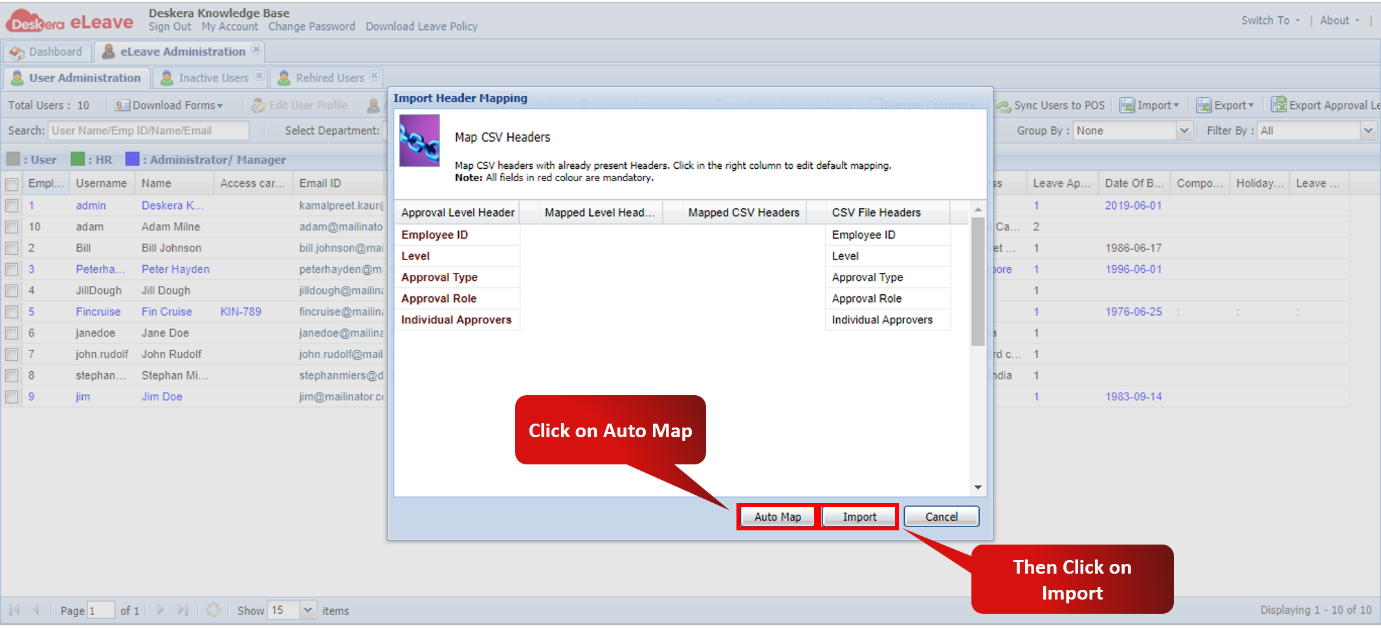 Fig. 3.1.1.8.7 Import Approval Levels
Import Assign Managers
Step 1: On the eLeave Dashboard, click on User Administration under the Administration widget.Fig. 3.1.1.8.8 eLeave Dashboard
Step 2: Click on Import and in the drop down menu, choose Import Assign Managers. Fig. 3.1.1.8.9 User Management window
Step 3: On the next window click on Download Sample File.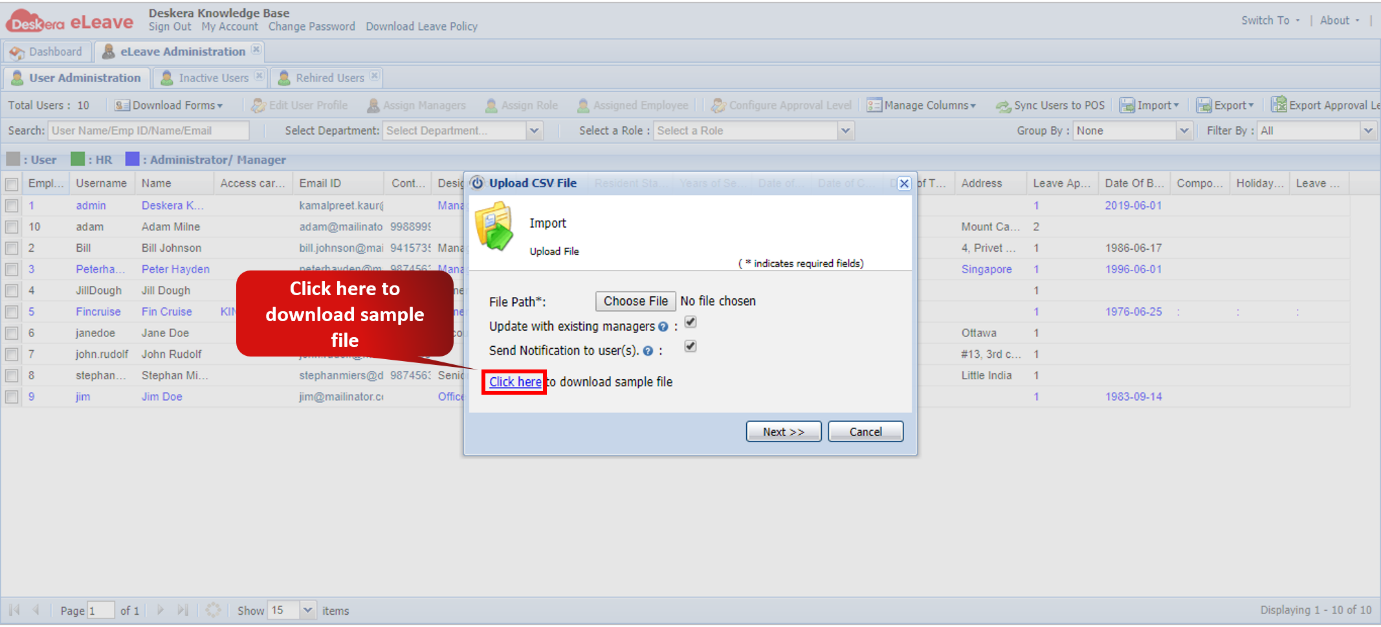 Fig. 3.1.1.8.10 Download Sample File
Step 4: Configure the data in the import file as per requirement and save it. Fig. 3.1.1.8.11 Sample Import File
Step 5: Navigate back to the User Administration window and click on Import Assign Managers.Fig. 3.1.1.8.12 Import Assign Manager
Step 6: Choose the Import file and click on Next.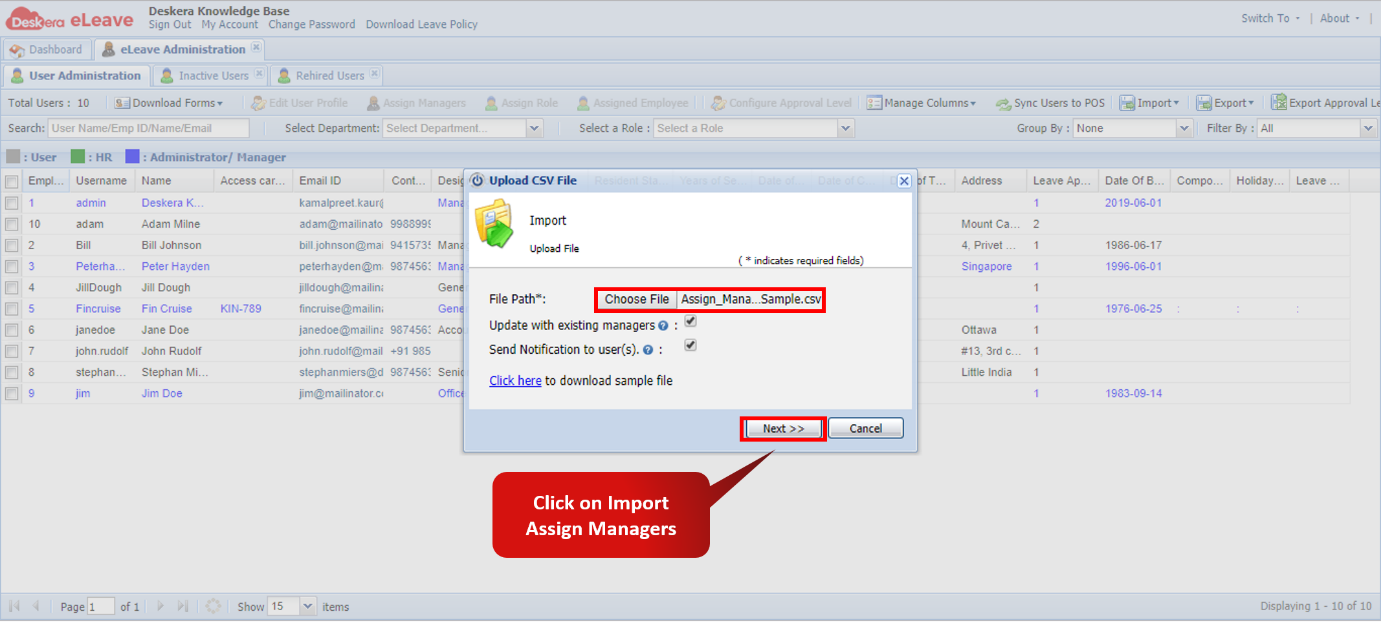 Fig. 3.1.1.8.13 Import Assign Managers
Step 7: Click on Auto Map and the click on Import. The import is now complete.Fig. 3.1.1.8.14 Import Assign Managers
Import Access Card ID
Step 1: On the eLeave Dashboard, click on User Administration under the Administration widget.Fig. 3.1.1.8.15 eLeave Dashboard
Step 2: Click on Import and in the drop down menu, choose Import Assign Managers.Fig. 3.1.1.8.16 User Management window
Step 3: On the next window click on Download Sample File.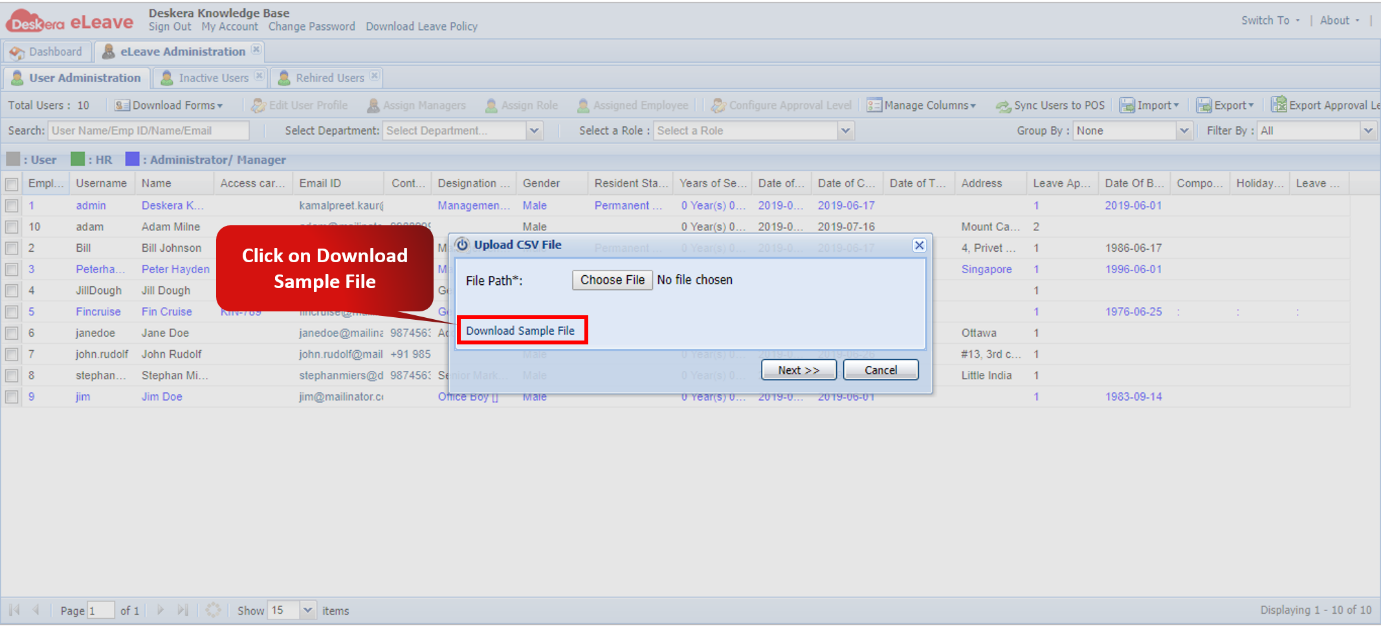 Fig. 3.1.1.8.17 Download Sample File
Step 4: Configure the data in the import file as per requirement and save it. 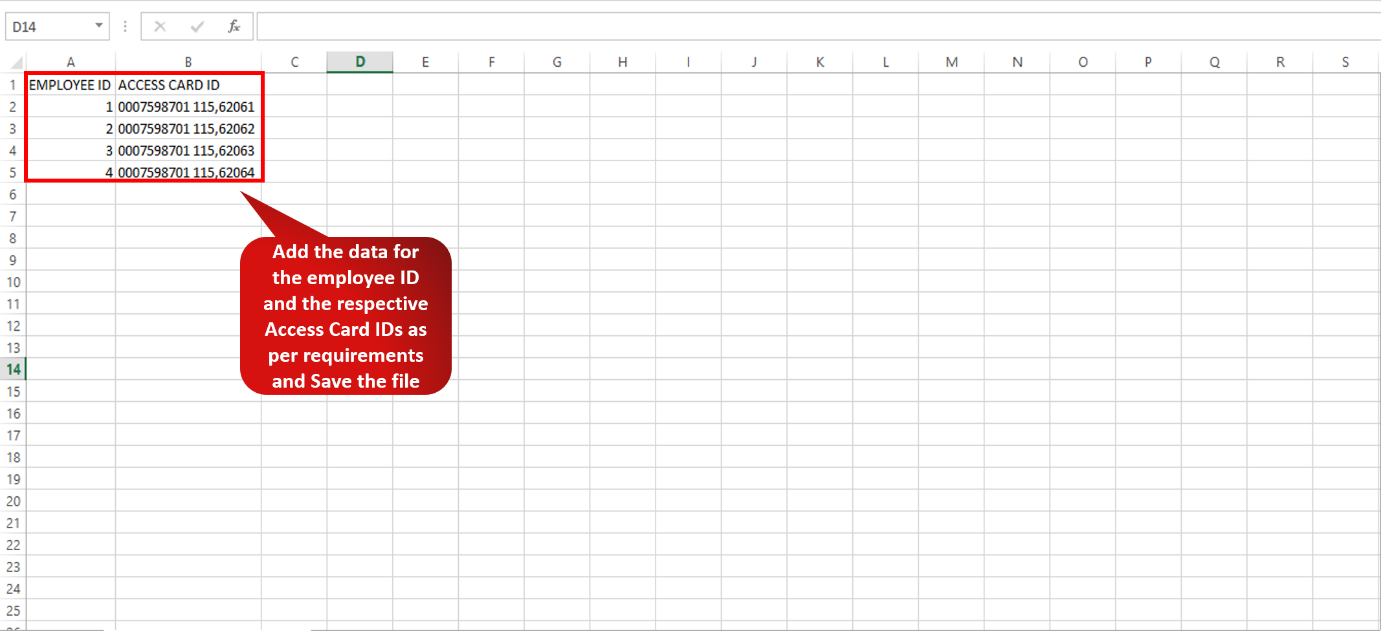 Fig. 3.1.1.8.18 Sample Import File
Step 5: Navigate back to the User Administration window and click on Import Access Card ID.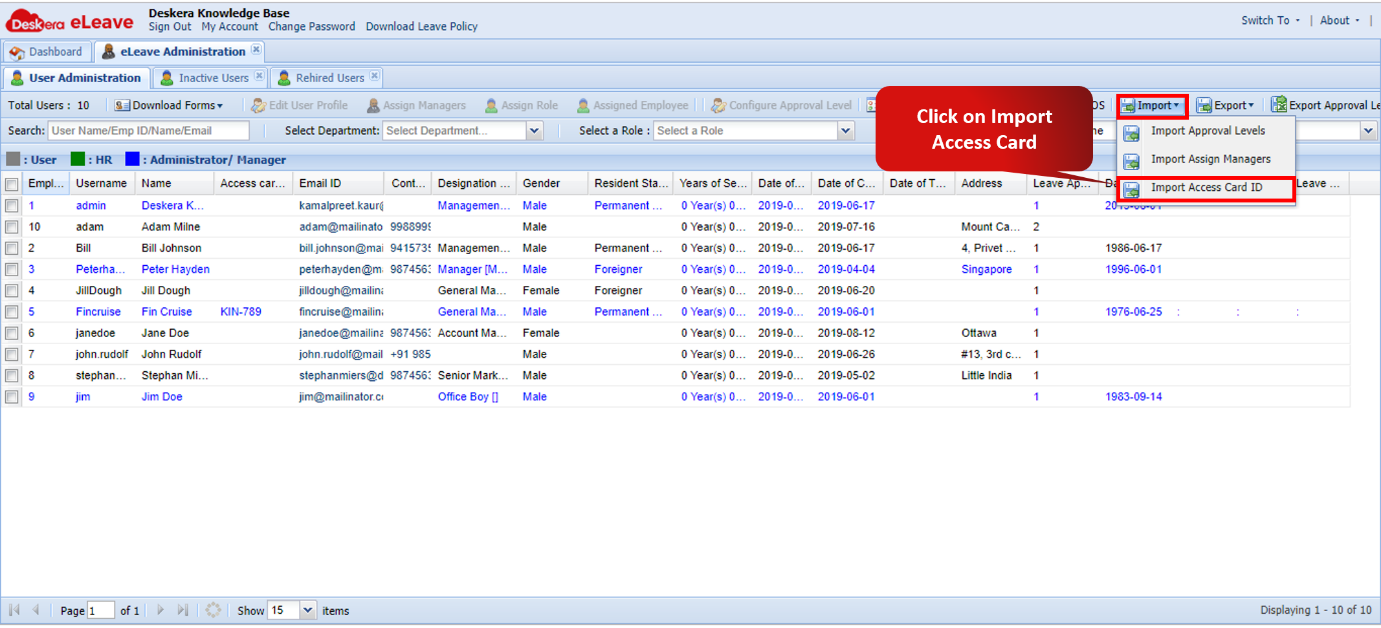 Fig. 3.1.1.8.19 Import Access Card ID
Step 6: Choose the Import file and click on Next.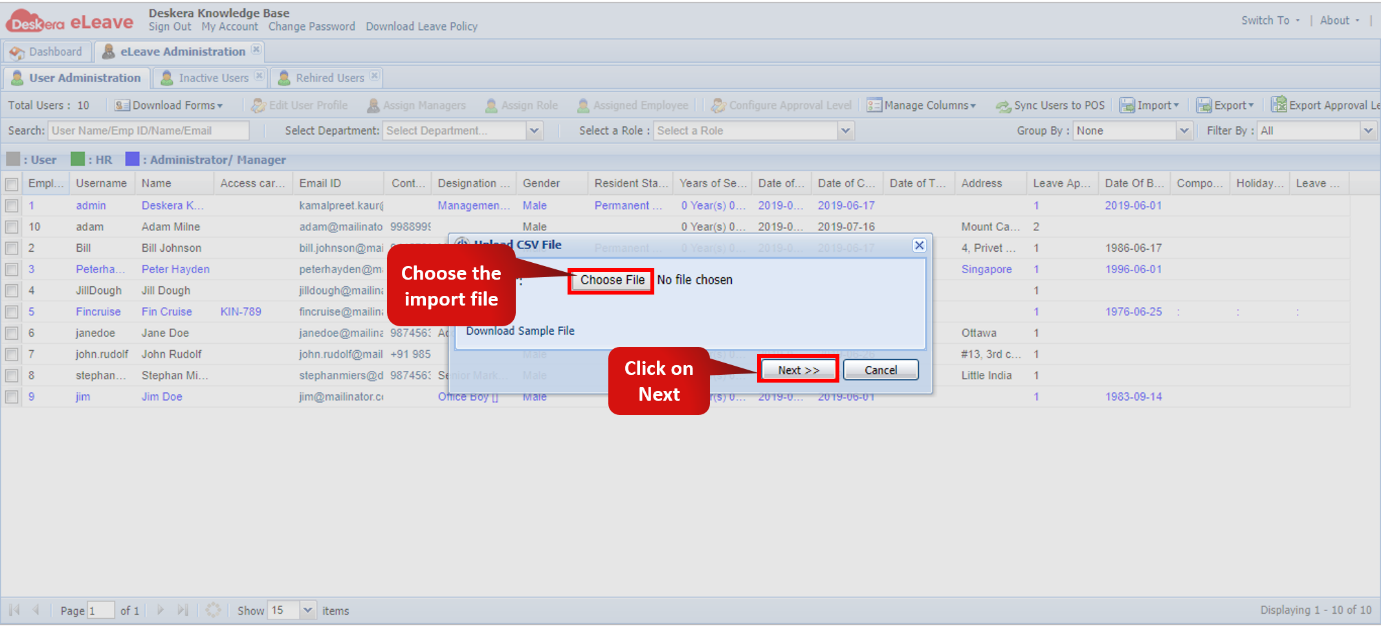 Fig. 3.1.1.8.20 Import Access Card ID
Step 7: Click on Auto Map. Then click on Import. The import is now complete.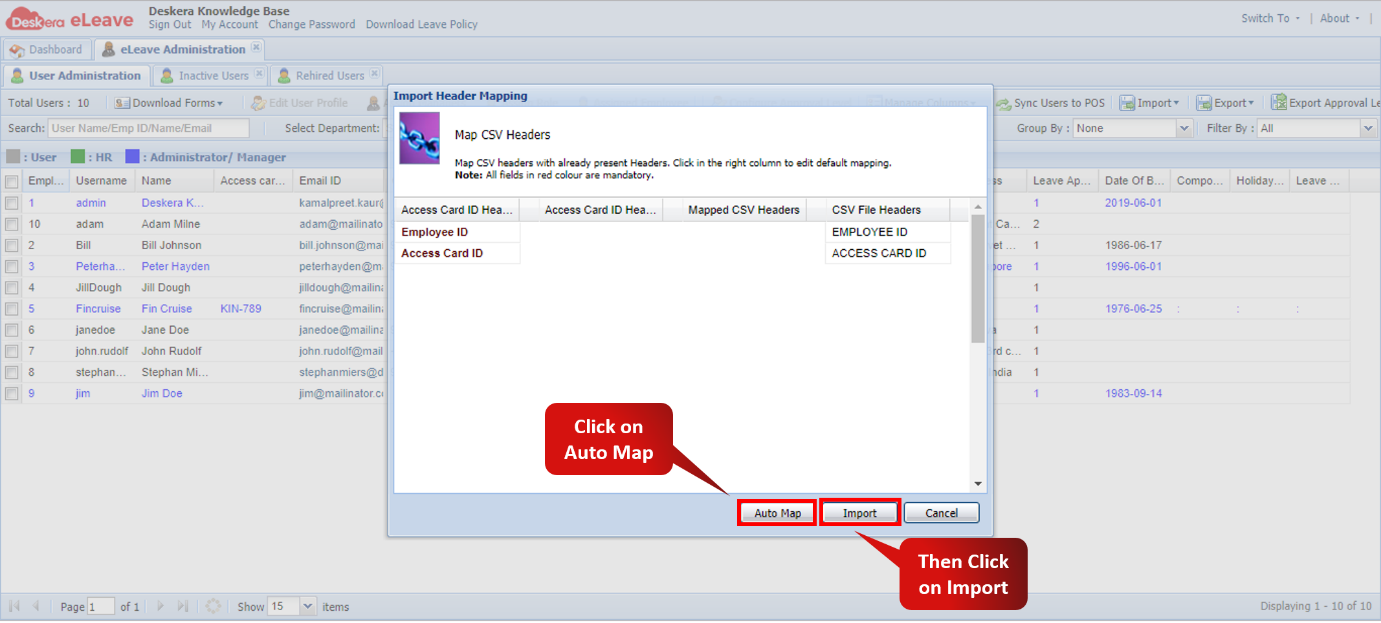 Fig. 3.1.1.8.21 Import Access Card ID
Comments
0 comments
Please sign in to leave a comment.