
Manage Columns include addition, deletion and editing of custom columns created in the Deskera e-eLeave application. The article gives the user an idea of how to manage custom columns in Deskera eLeave application.
Prerequisites:
- You have your Deskera eLeave application URL in place.
- You are the administrator of the HRMS application.
- Ensure Stable Internet Connectivity.
Add Custom Column
Step 1: On the eLeave Dashboard, click on User Administration under the Administration widget. Fig. 3.1.1.6.1 eLeave Dashboard
Step 2: Click on Manage columns and in the drop down menu, choose add custom column.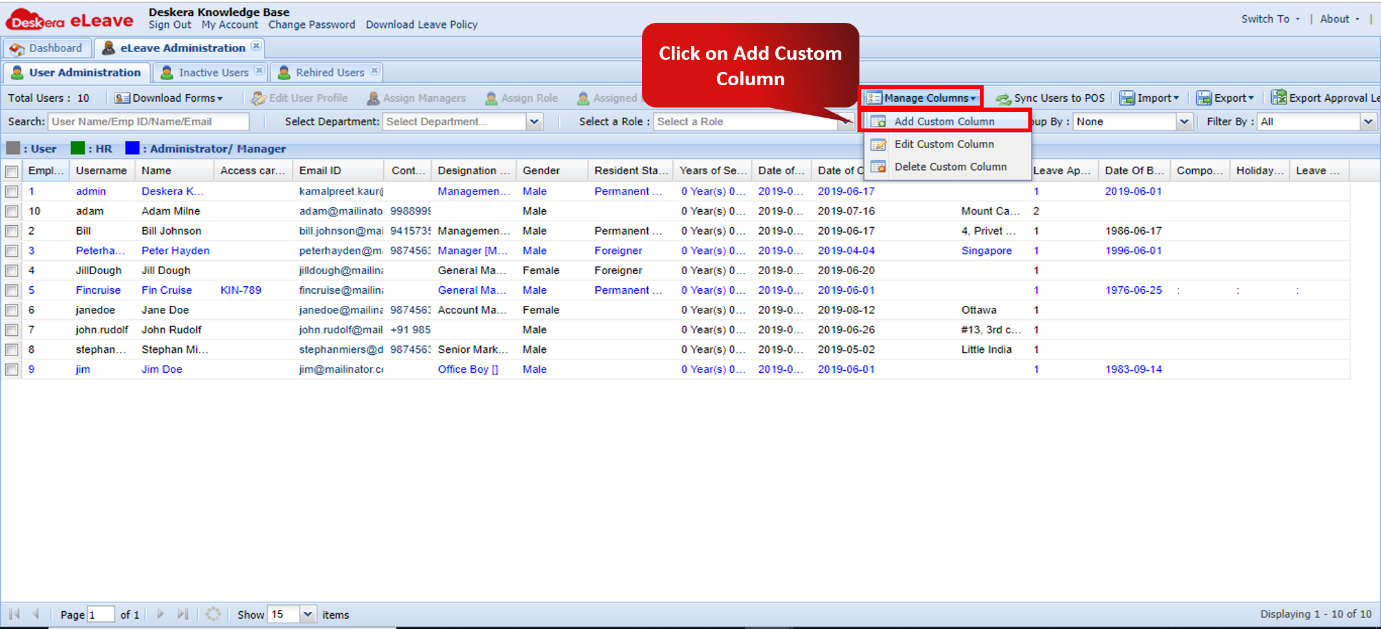 Fig. 3.1.1.6.2 User Management window
Step 3: Add all the details of the custom column and click on create to create a new column.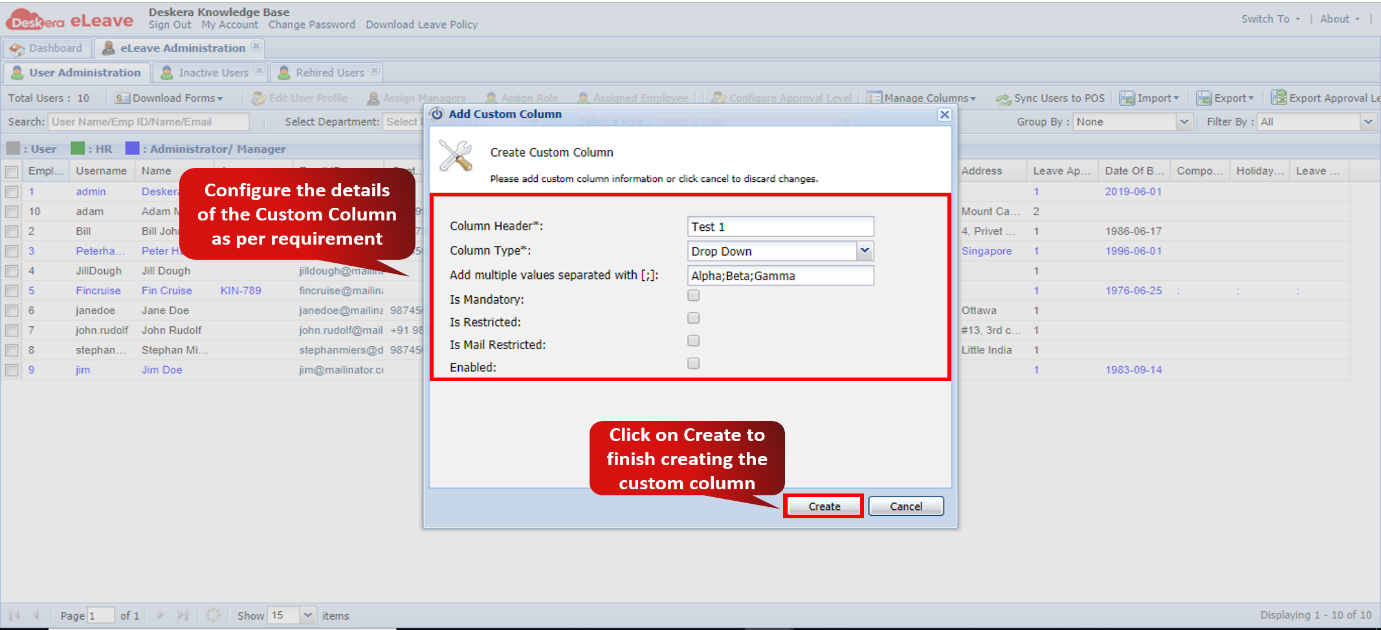 Fig. 3.1.1.6.3 Create custom column Wizard
Edit Custom Column
Step 1: On the eLeave Dashboard, click on User Administration under the Administration widget.Fig. 3.1.1.6.4 eLeave Dashboard
Step 2: Select the Custom Column, click on Manage columns and in the drop down menu, choose edit custom column.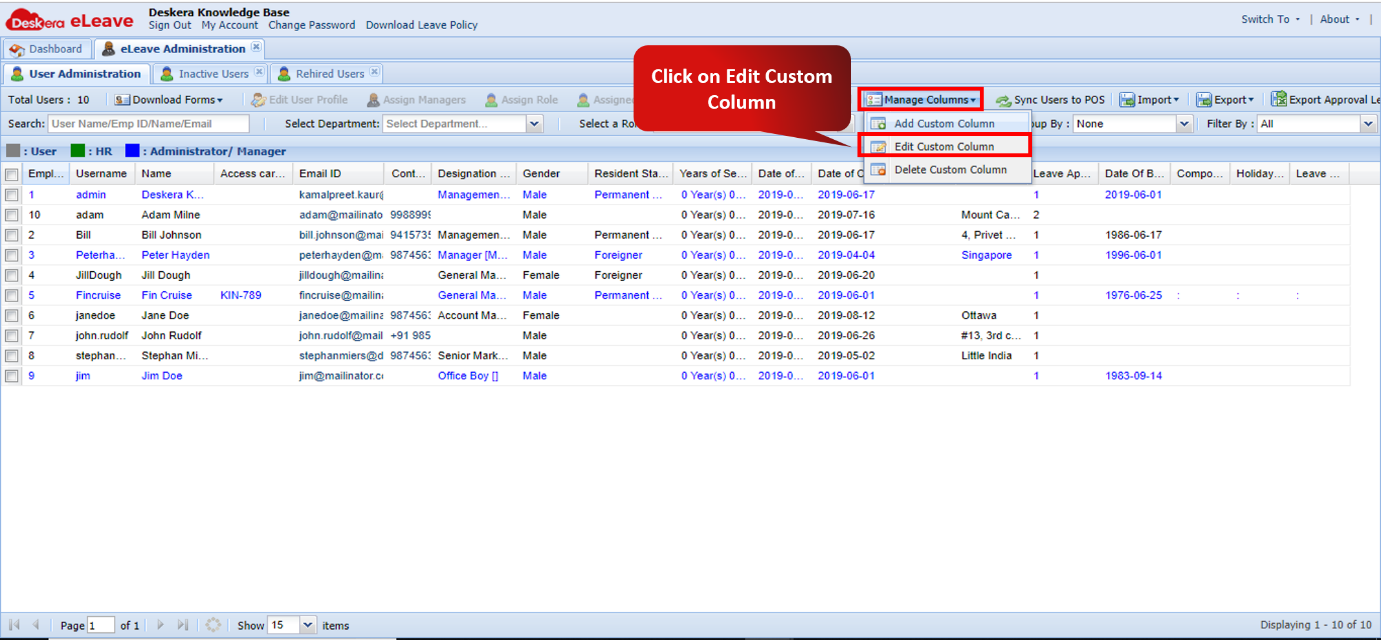 Fig. 3.1.1.6.5 User Management window
Step 3: Update all the details of the custom column and click on Update to update custom column. Fig. 3.1.1.6.6 Edit custom column
Delete Custom Column
Step 1: On the eLeave Dashboard, click on User Administration under the Administration widget.Fig. 3.1.1.6.7 eLeave Dashboard
Step 2: Select the Custom Column, click on Manage columns and in the drop down menu, choose Delete Custom Column.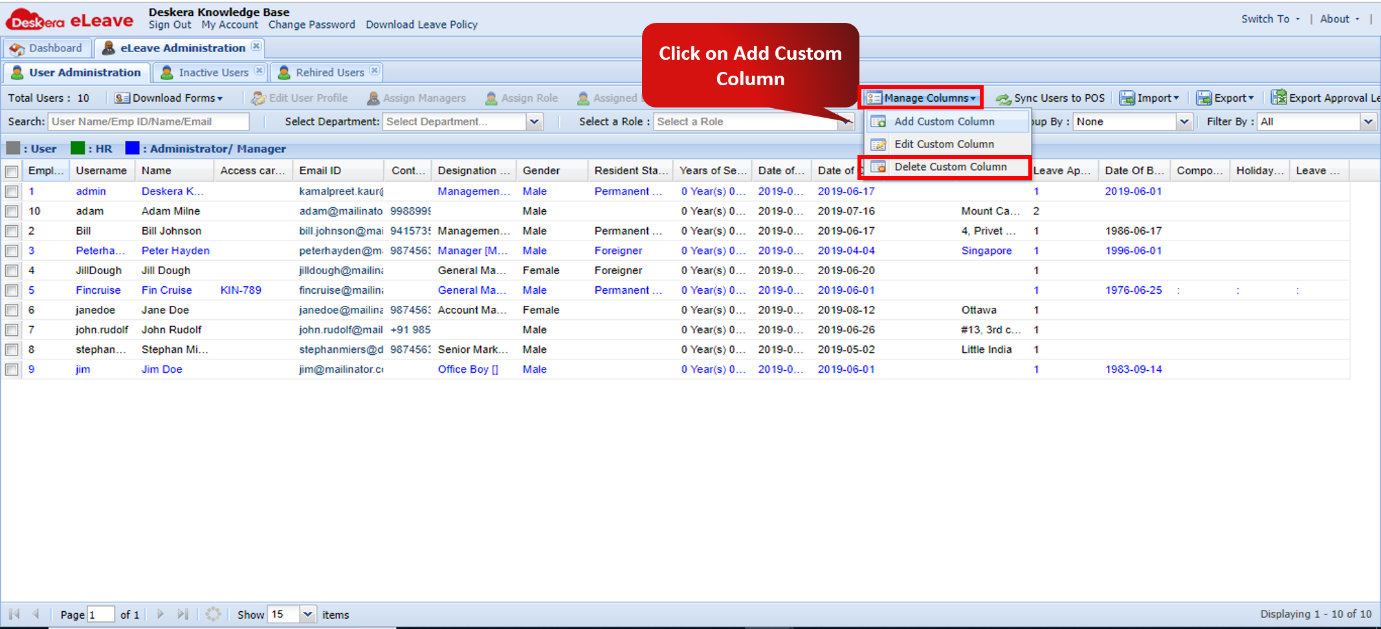 Fig. 3.1.1.6.8 User Management window
Step 3: Select the custom column you wish to delete from the Column Name drop-down. Click on Delete to confirm deletion of the custom column.
Fig. 3.1.1.6.9 Delete custom column Wizard
Comments
0 comments
Please sign in to leave a comment.