
The Import Projects functionality allows the user to add multiple projects to Deskera eClaims at one go.
Prerequisites:
- You have your Deskera eClaims application URL in place
- You are the administrator of the eClaims application
- Ensure a good internet connectivity
Step 1: Click on Manage Projects under Master Settings on the Deskera eClaims Dashboard.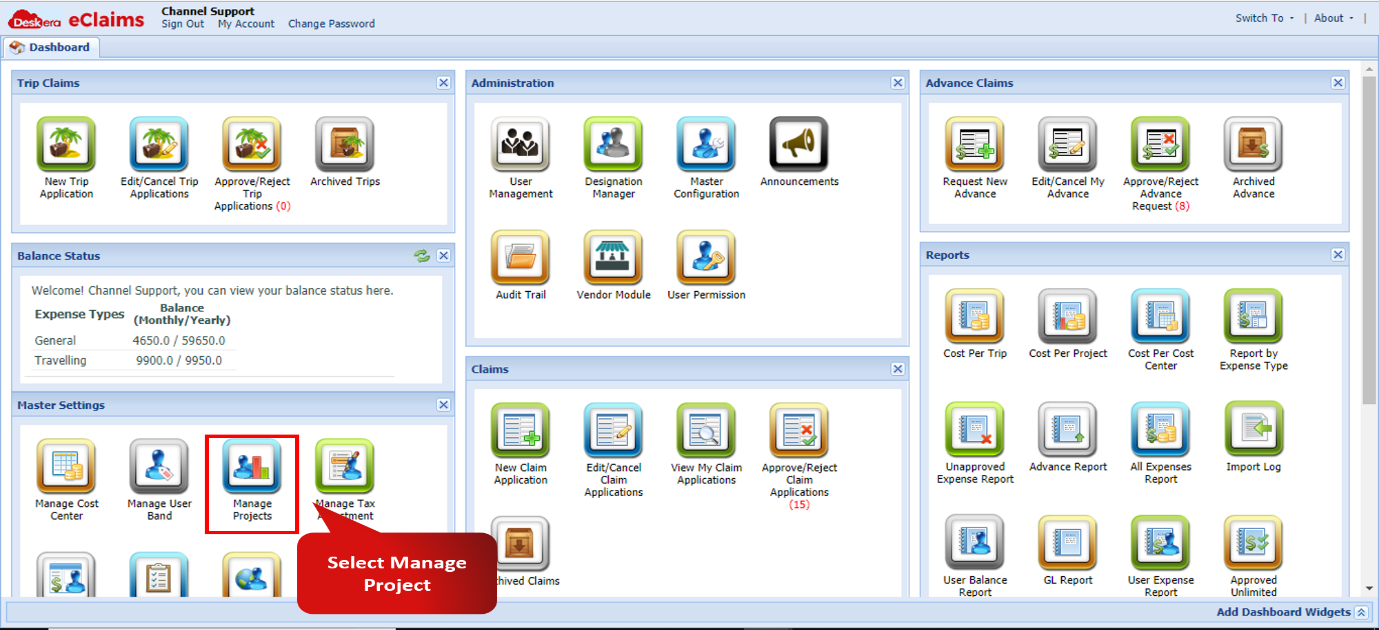 Fig 4.6.3.3.1 Manage Projects
Step 2: Click on Import function and select Sample CSV File. 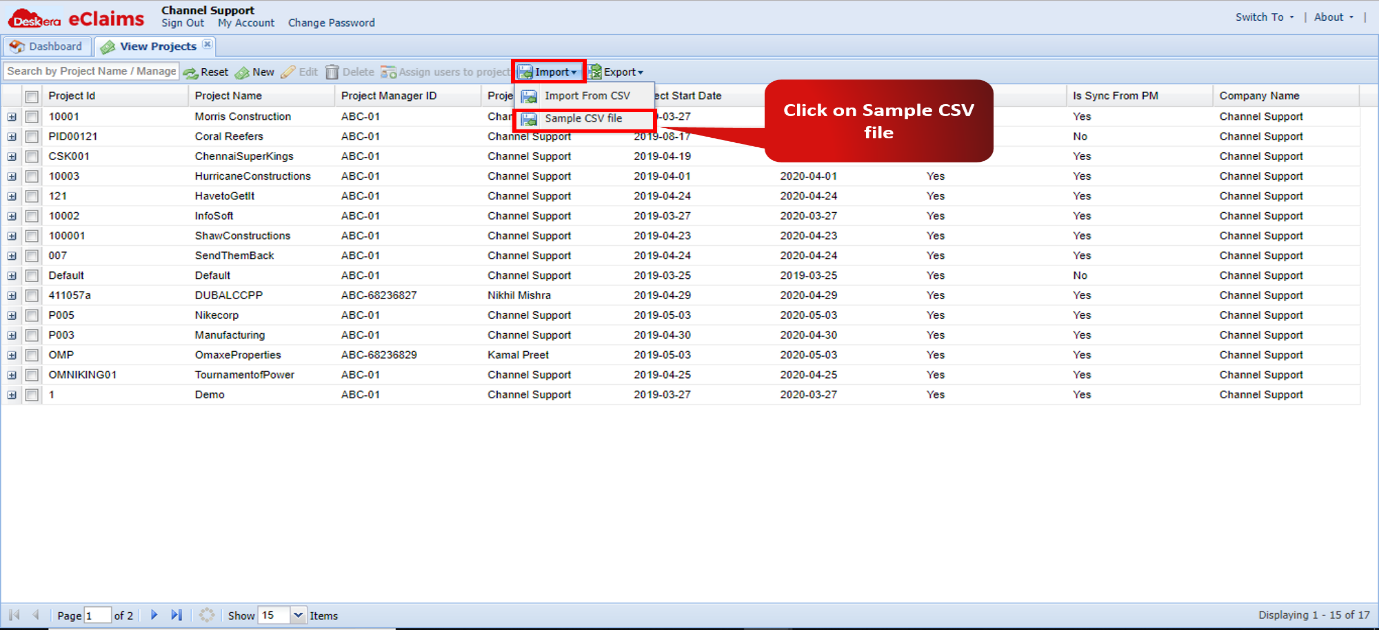 Fig 4.6.3.3.2 Sample CSV File
Step 3: Add the projects and the other required details in the downloaded sample file and save it.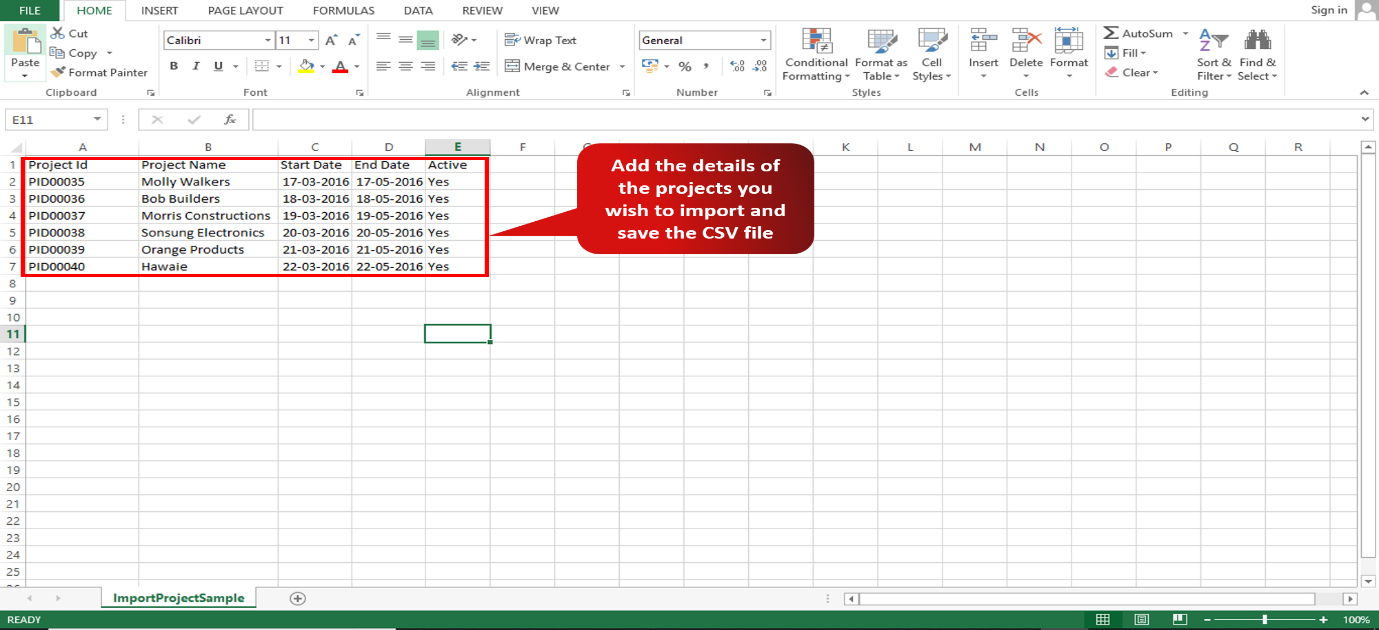 Fig 4.6.3.3.3 Sample CSV File
Step 4: Back on the View Projects screen, click on the Import feature, then click on Import From CSV.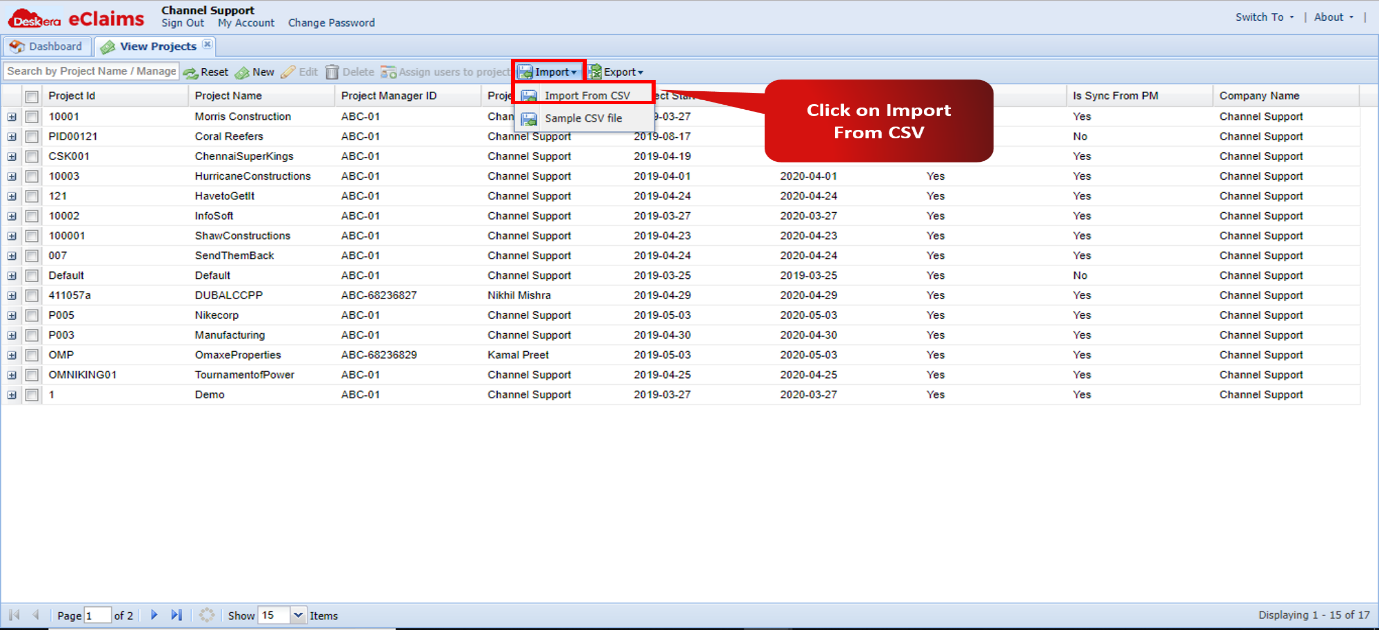 Fig 4.6.3.3.4 Import CSV
Step 4: Choose the Import File and select the date format used in the Import File. Then click on Import to proceed to the next screen.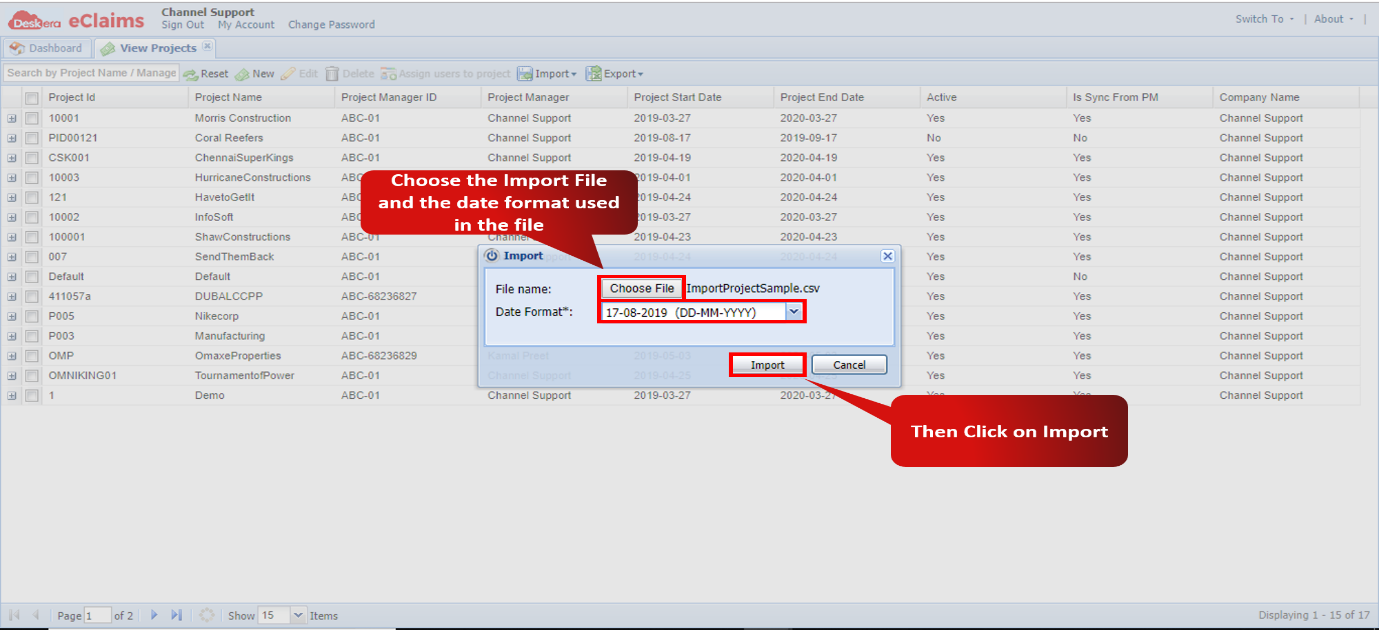 Fig 4.6.3.3.5 Import CSV
Step 5: Manually map the headers of the View Projects screen to the headers of the CSV file. The click on Import to complete the process.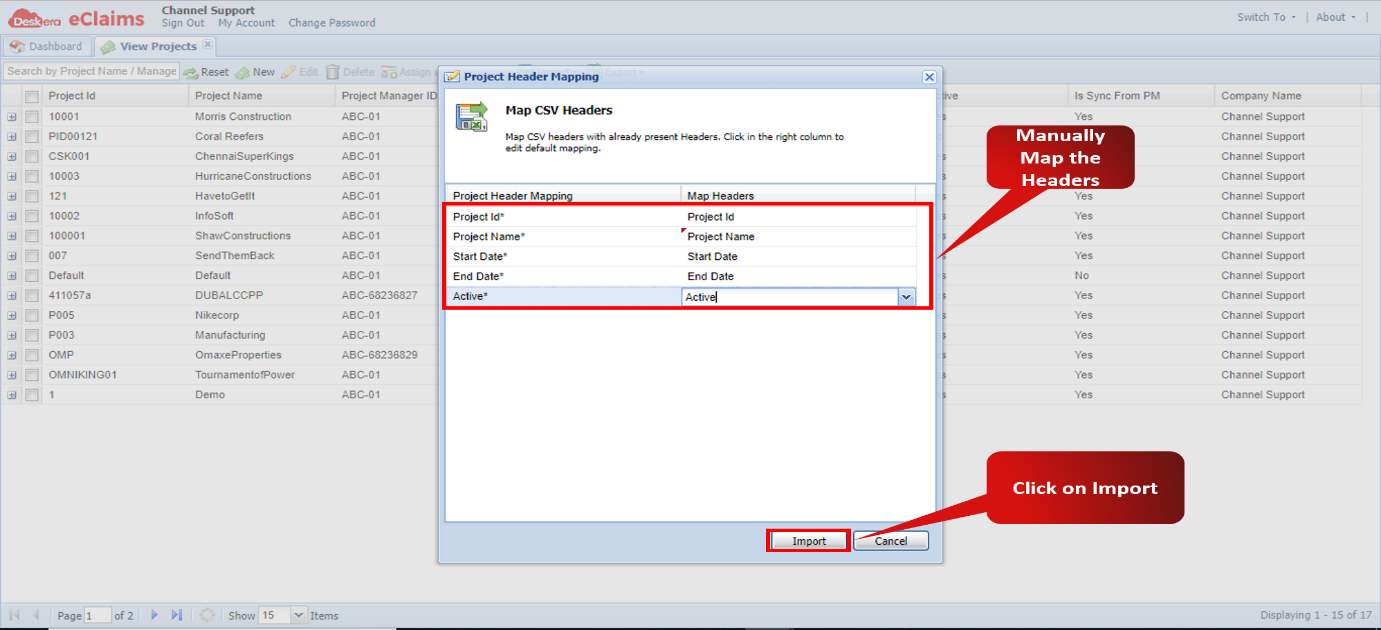 Fig 4.6.3.3.6 Import CSV
Comments
0 comments
Please sign in to leave a comment.