
Prerequisites:
1. You have your Deskera eClaims application URL in place.
2. You are the administrator of the eClaims application.
3. Ensure good internet connectivity.
Import Expense Types
Step 1: Go to Manage Expense Type under Master Setting’s widget in eClaims.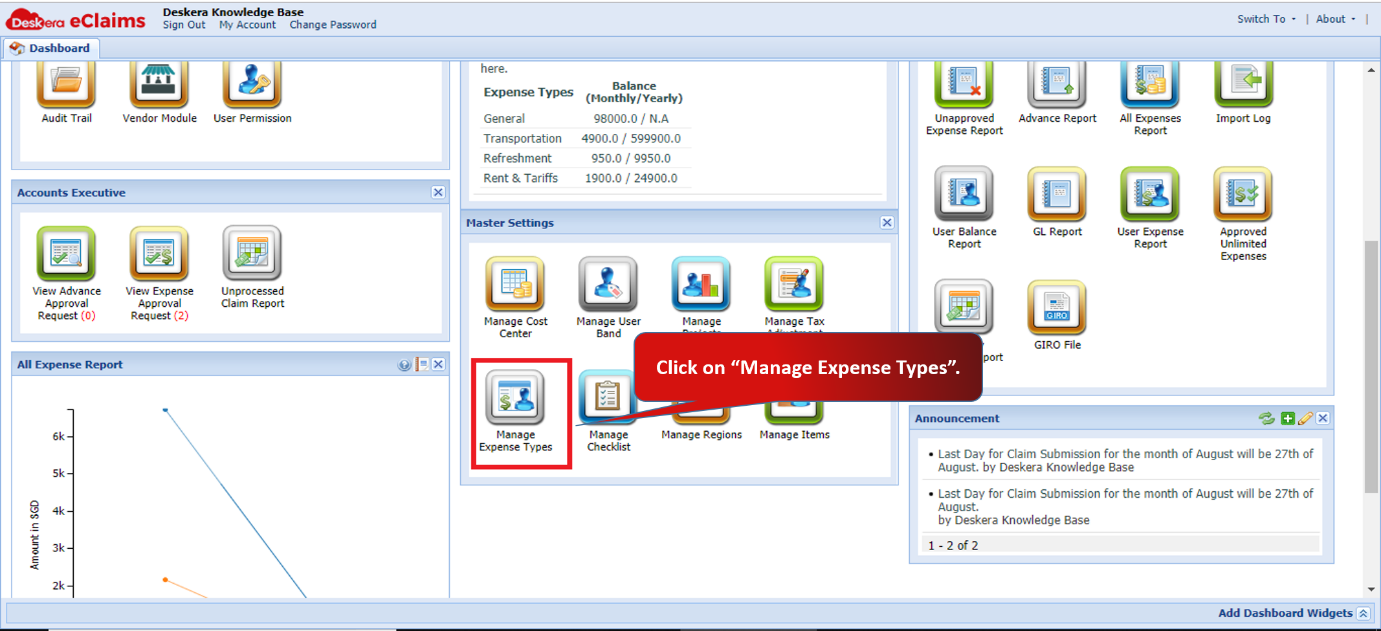 Fig 4.6.5.4.1 eClaims Dashboard
Step 2: Click on Import Expense Types under Inactive Expense Types.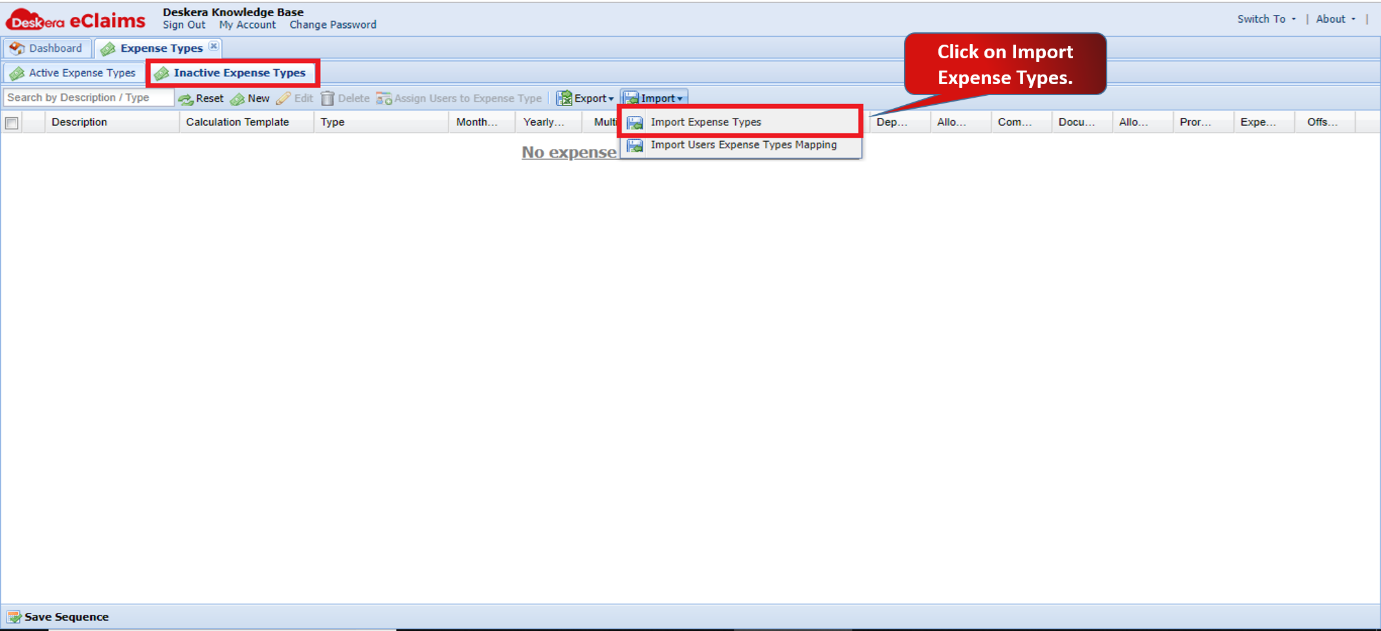 Fig 4.6.5.4.2 Inactive Expense Types
Step 3: You can download the sample file to upload the exact format. Upload the CSV file and select the date format used in the uploaded file. Click on Next. 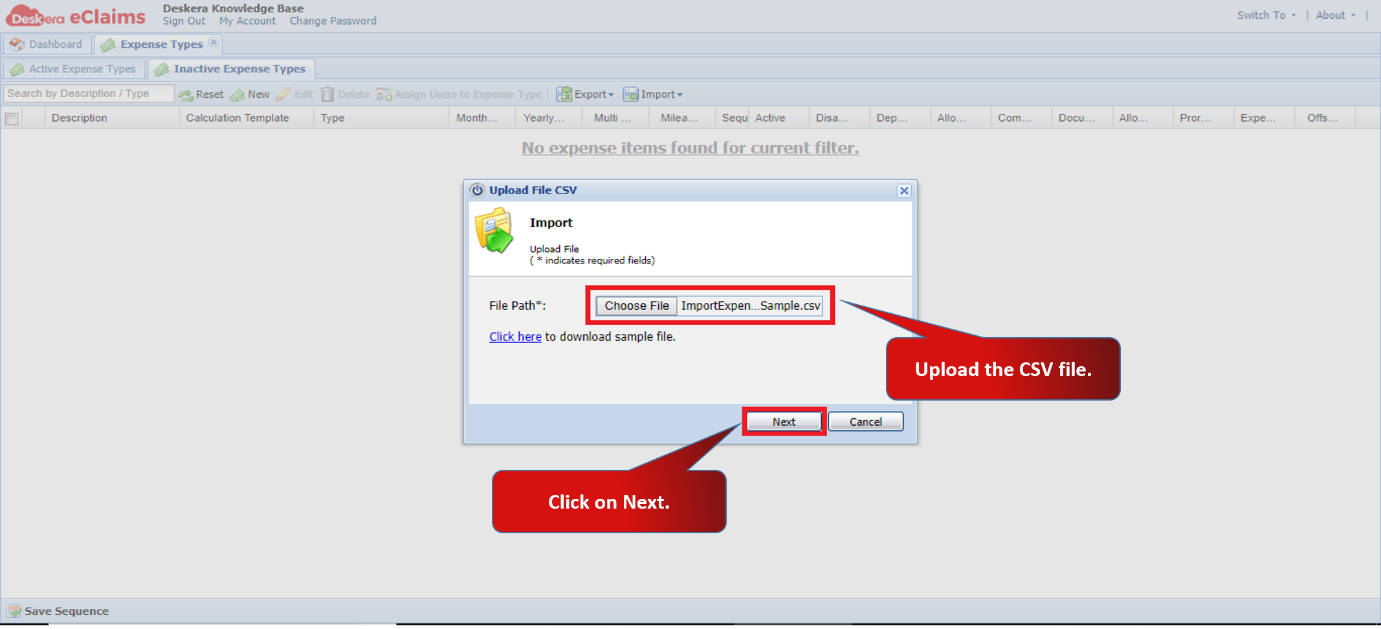 Fig 4.6.5.4.3 Import Inactive Expense Types
Step 4: Click on Auto-Map Headers to map the headers. You can map the headers manually as well. Click on Import.
The expense types will be imported successfully. It will be reflected under Inactive Expense Types tab.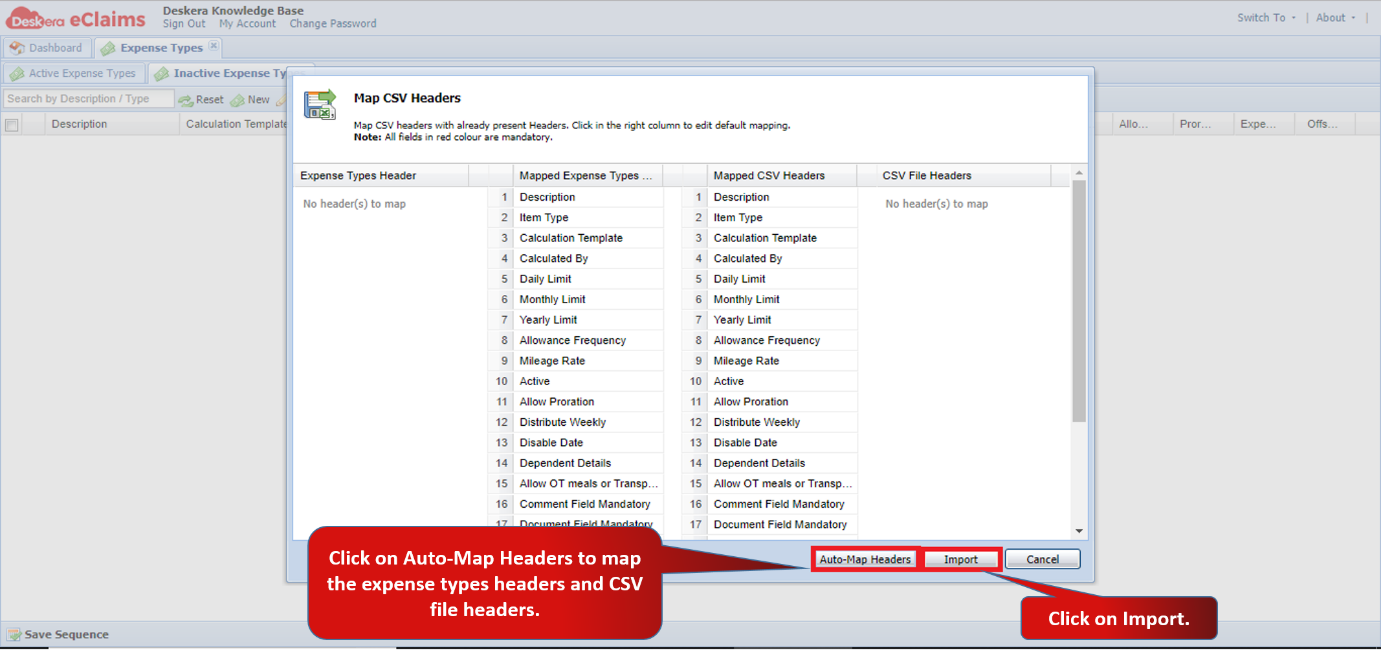 Fig 4.6.5.4.4 Import Inactive Expense Types
Import Users Expense Types Mapping
Step 1: Click on Import Users Expense Types Mapping under Inactive Expense Types.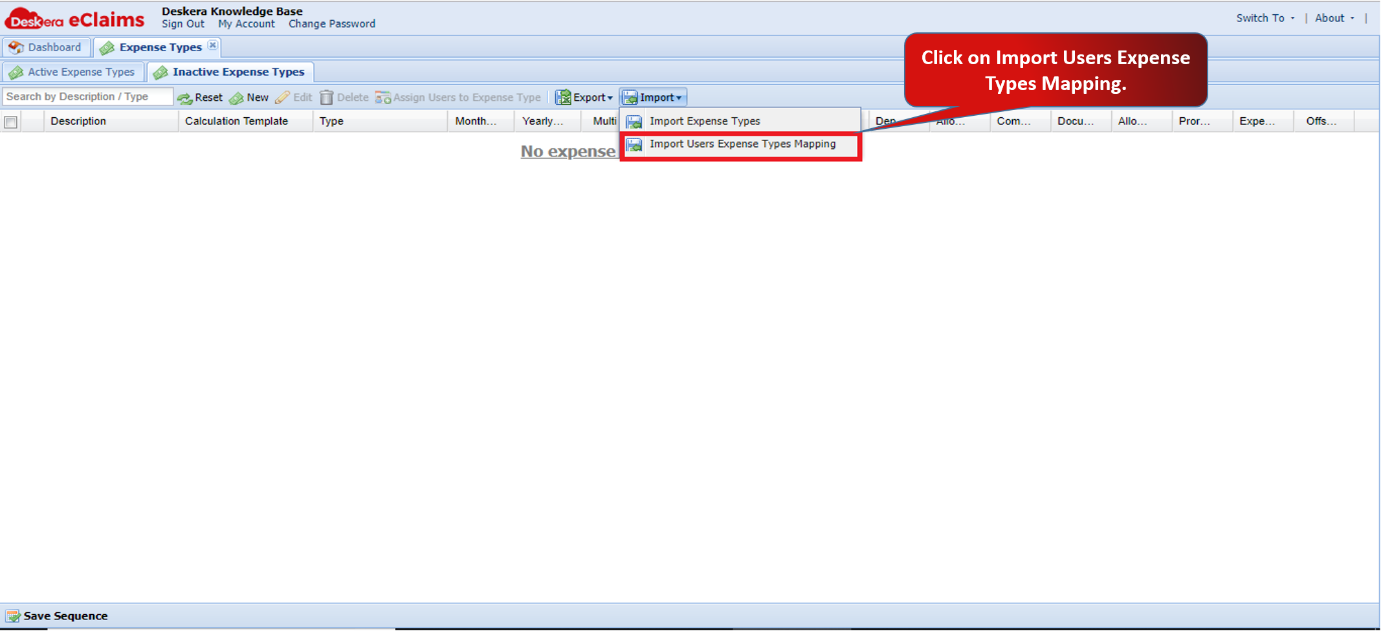 Fig 4.6.5.4.5 Inactive Expense Types
Step 2: You can download the sample file to upload the exact format. Upload the CSV file and select the date format used in the uploaded file. Click on Next.Fig 4.6.5.4.6 Import Users Expense Types Mapping
Step 3: Click on Auto-Map Headers to map the headers. You can map the headers manually as well. Click on Import.
The user expense types mapping will be imported successfully. 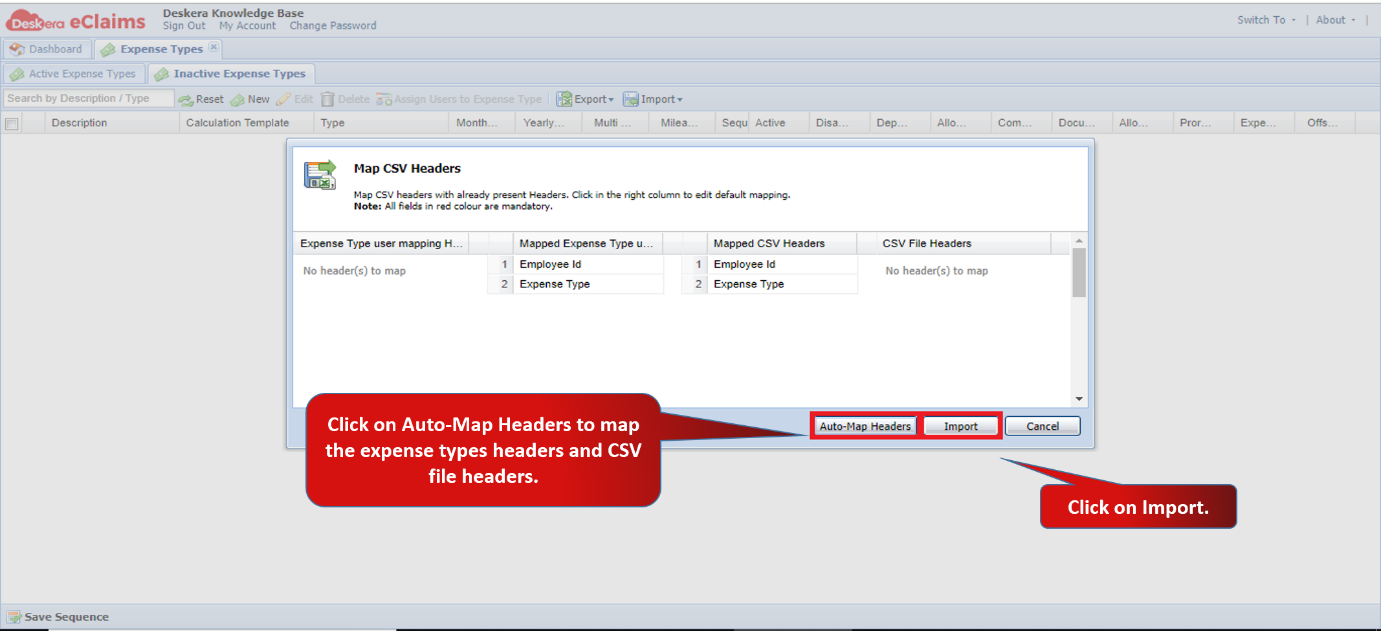 Fig 4.6.5.4.7 Import Users Expense Types Mapping
Comments
0 comments
Please sign in to leave a comment.