
New Claim Application feature enables you to add a new claim and fill in the details for Deskera eClaims to process it and approve it by the administrator.
Prerequisites:
1. You have your Deskera eClaims application URL in place.
2. You are the administrator of the eClaims application.
3. Ensure good internet connectivity.
Step 1: Go to New Claim Application under Claims widget in eClaims. 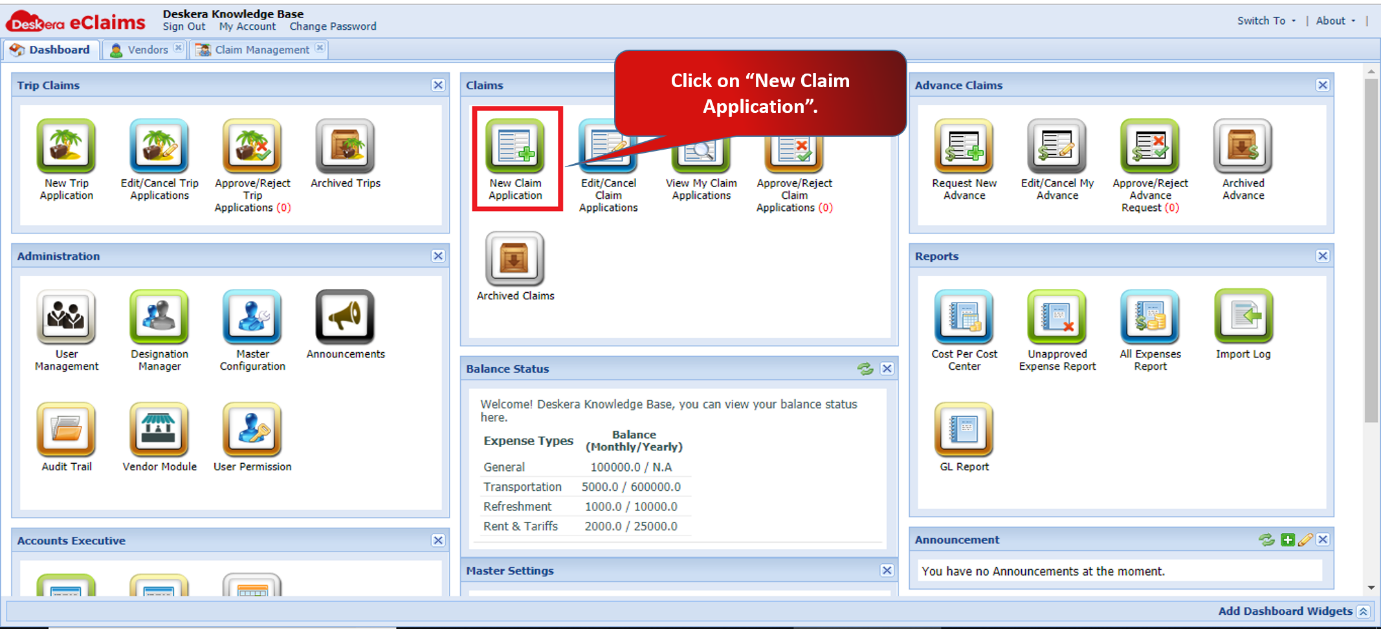
Fig 4.3.1.1 eClaims Dashboard
Step 2: Fill in the mandatory claim details and expense related details under each section.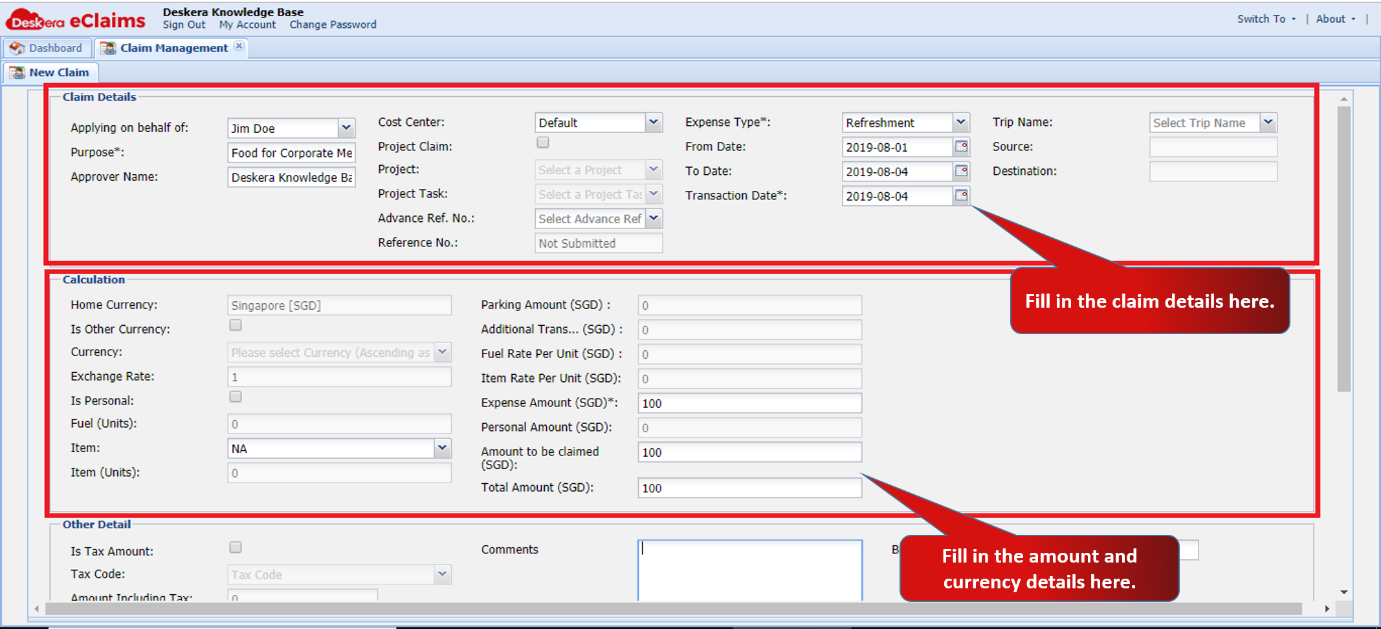
Fig 4.3.1.2 New Claim
You can also fill in the other details and attach the documents related to the claim. Once you have filled in all the required information, click on Save as Draft to add it as a Draft. 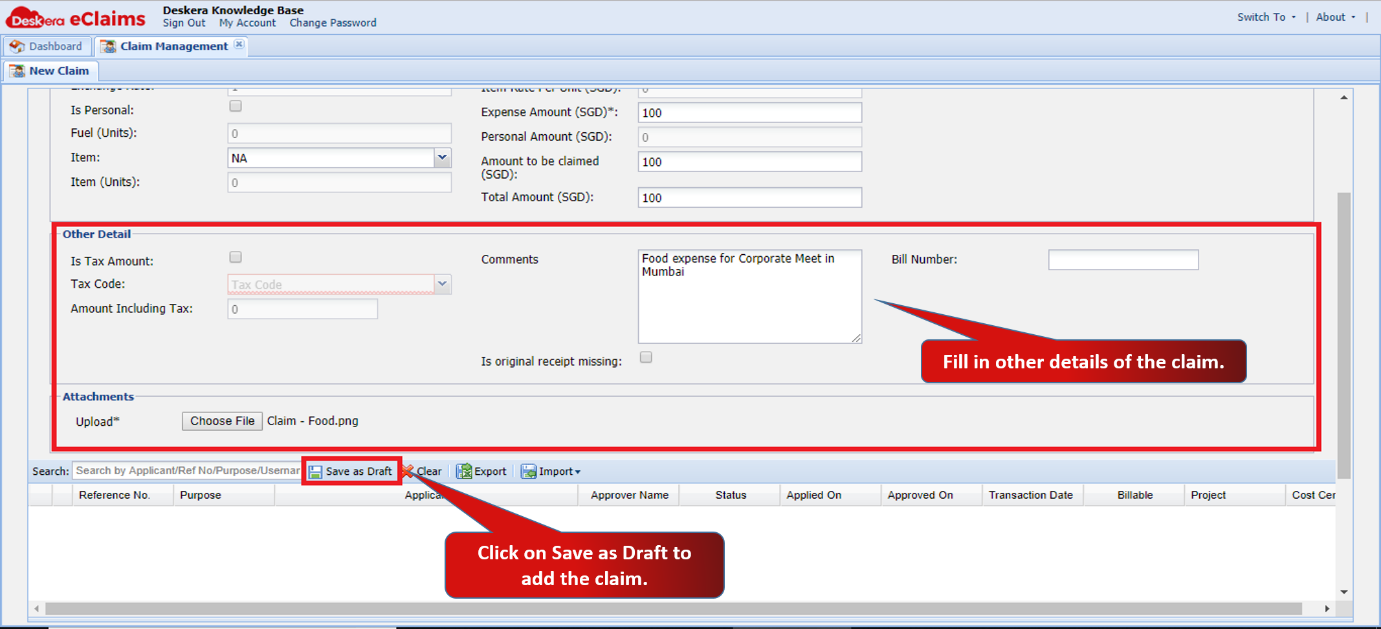
Fig 4.3.1.3 New Claim
Step 3: You can see the Draft claim below. Select the claim and click on Submit Selected Claims to submit it and send it for approval.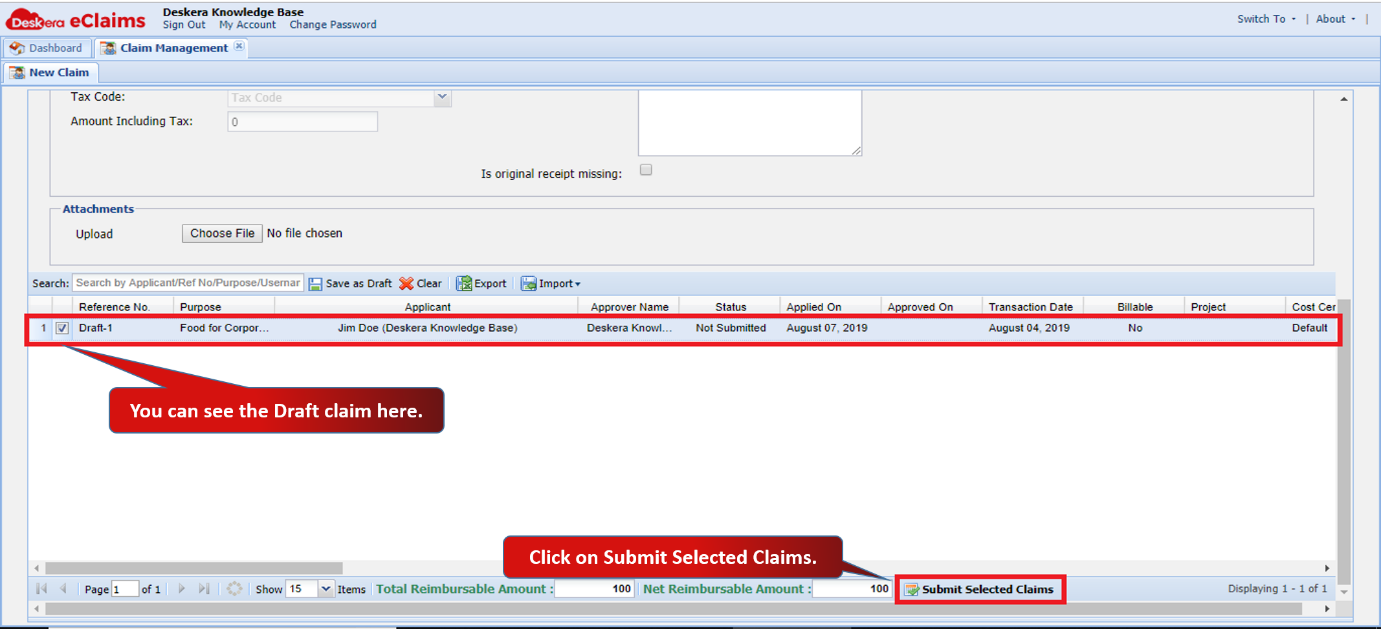
Fig 4.3.1.4 New Claim
The claim will be created and submitted successfully. 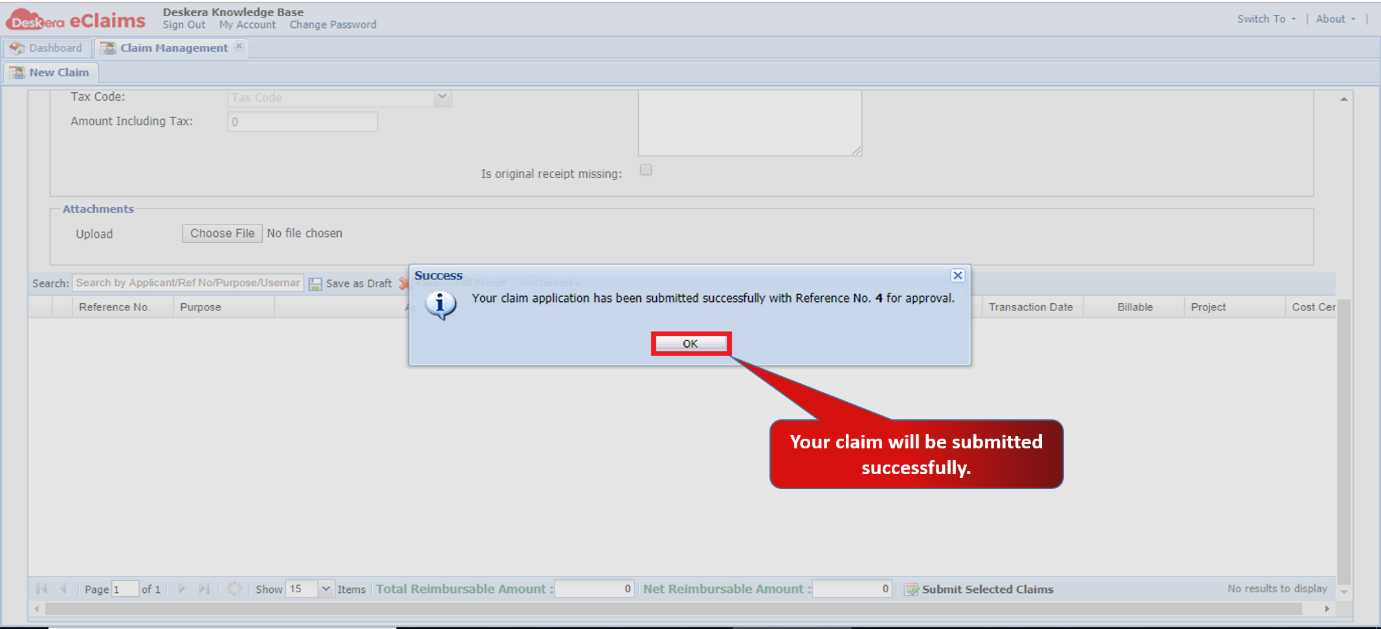
Fig 4.3.1.5 New Claim
Step 4: You can also import claim under this feature. Go to Import and click on Import From CSV. You can download a sample file to know the format of import file.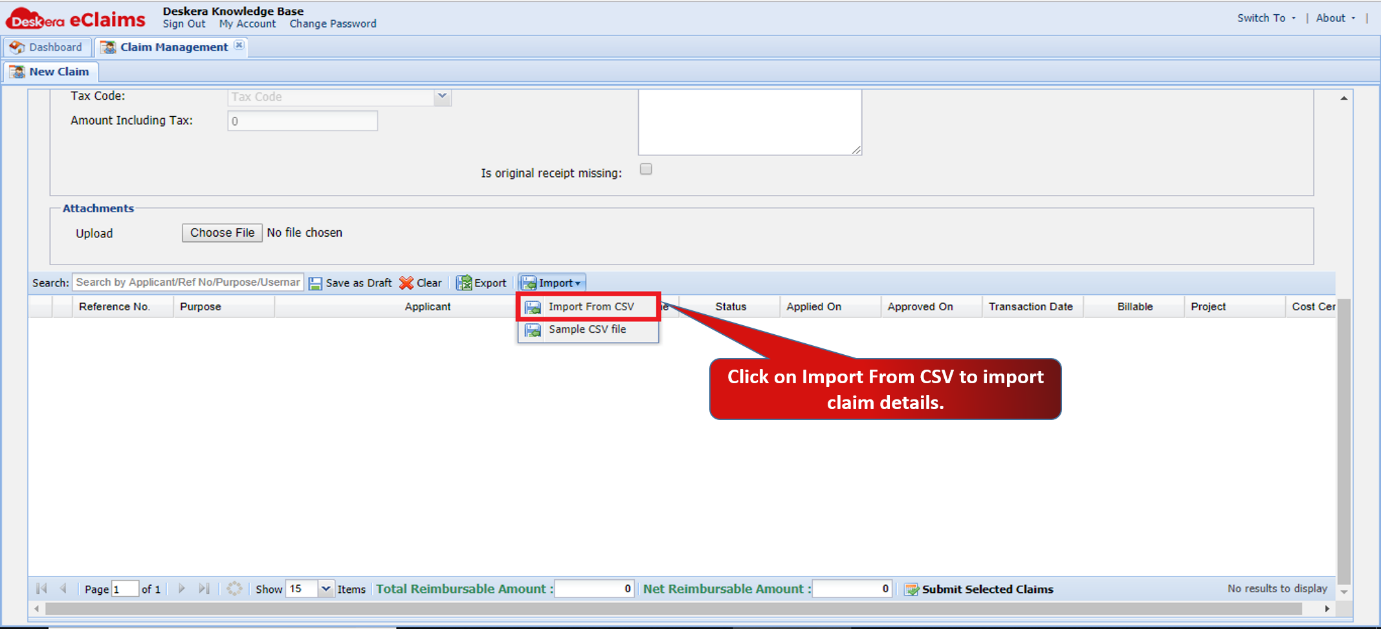
Fig 4.3.1.6 Import Claim
Step 5: Select the import file and upload it from your system. You need to select the exact same date format as mentioned in the import CSV file. 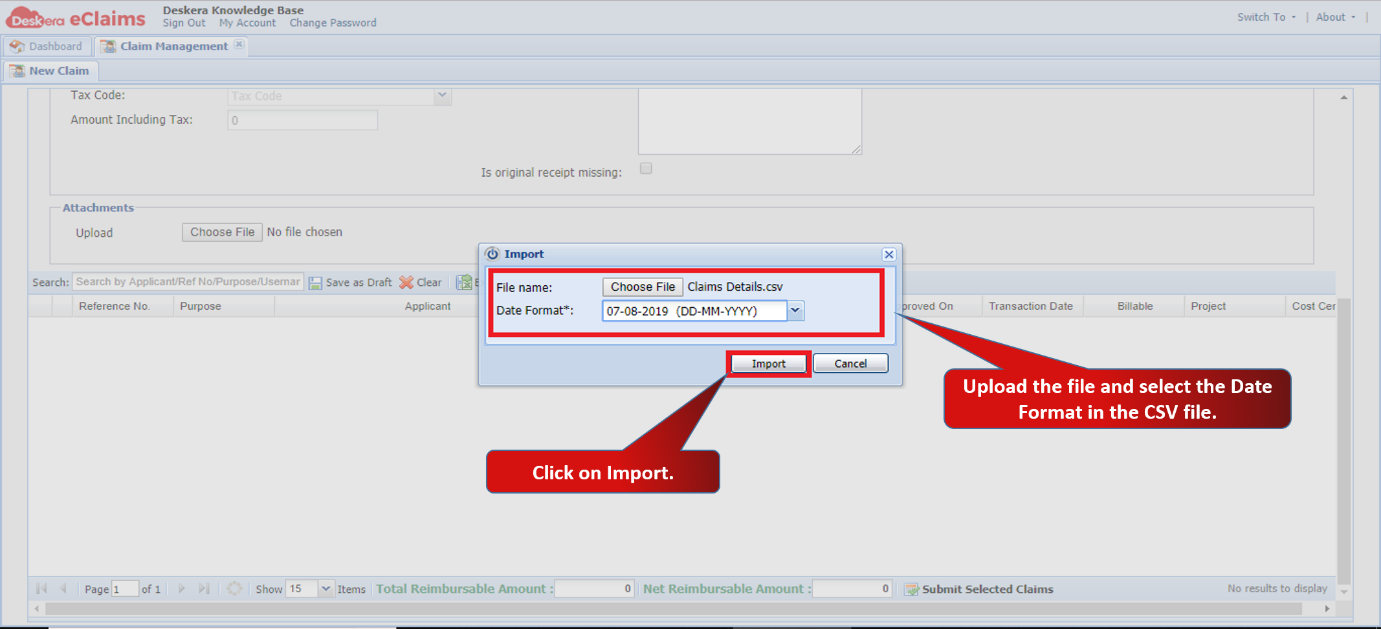
Fig 4.3.1.7 Import Claim
Step 6: Map the headers of the CSV file with Claim headers. You can click on Auto Map Headers to automatically map the headers as well. Once the headers are mapped, click on Import. The file will be imported successfully. 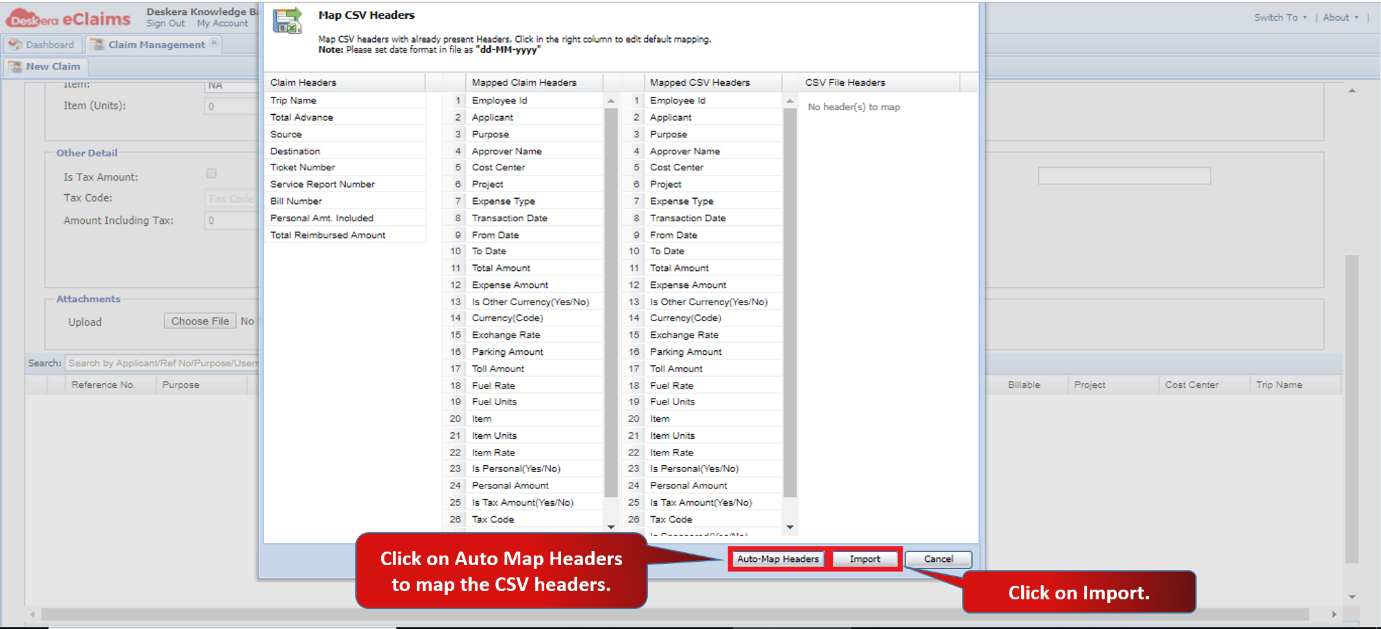
Fig 4.3.1.8 Import Claim
You can view the imported claims under View My Claims Tab. 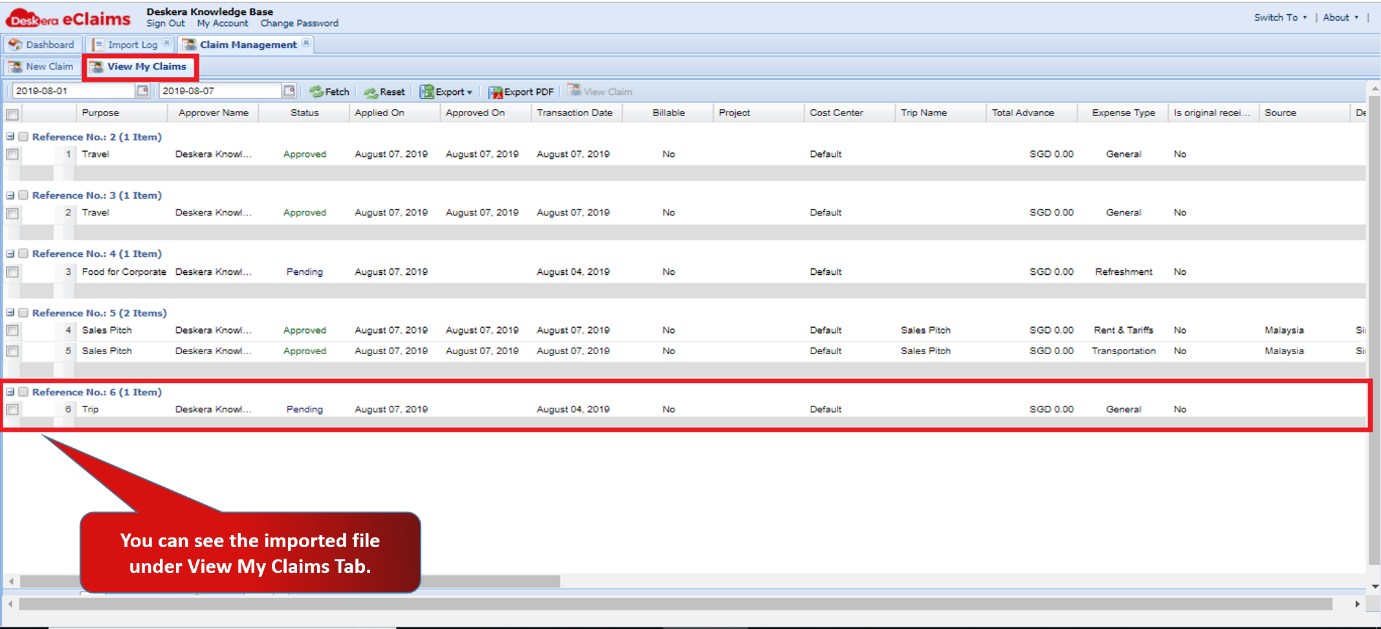
Fig 4.3.1.9 View My Claims
Comments
0 comments
Please sign in to leave a comment.