
The attendance in the Deskera eLeaves Application after submission can be approved, deleted or reverted back to submission state. The article briefs us how to approve, delete or revert attendance.
Prerequisites:
- You have your Deskera eLeaves application URL in place.
- You are the administrator of the eLeaves application.
- Ensure Stable Internet Connectivity.
Approve all
Step 1: On the e-Leaves Dashboard, Click on Attendance Management under the Attendance Manager Widget.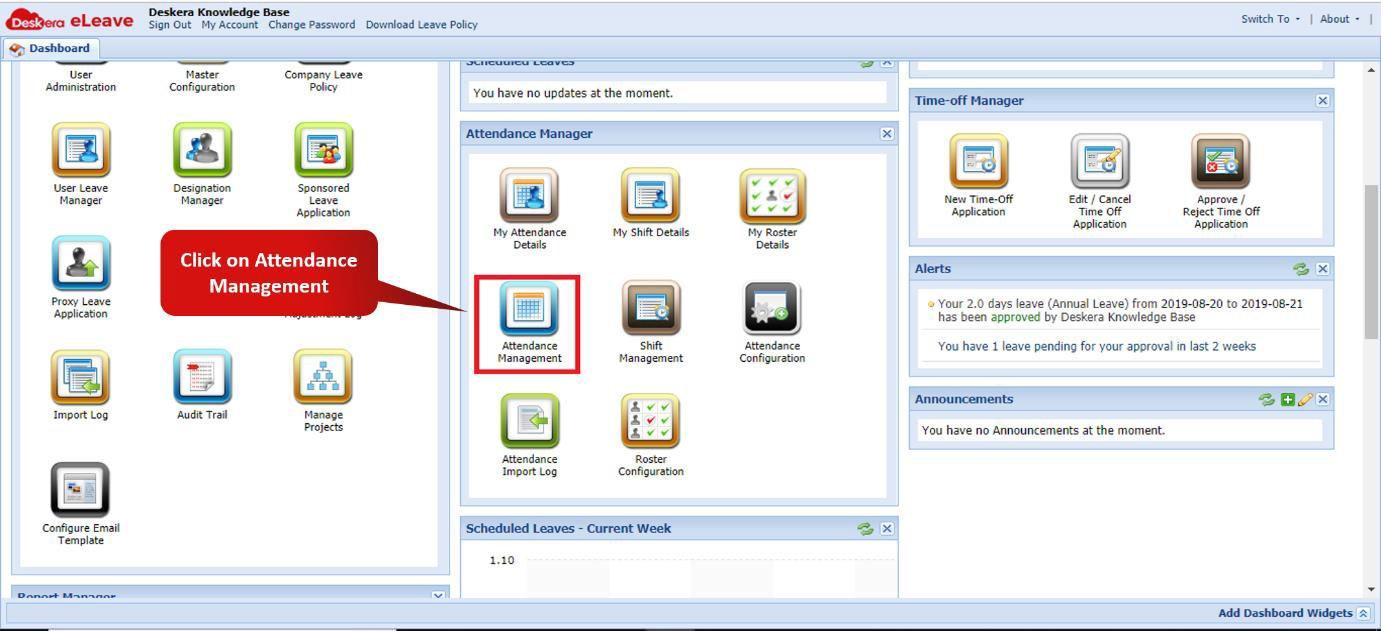 Fig. 3.3.3.6.1 e-Leaves Dashboard
Step 2: Select the user whose attendance record has to be approved and click on Approve All to approve all records of the selected user.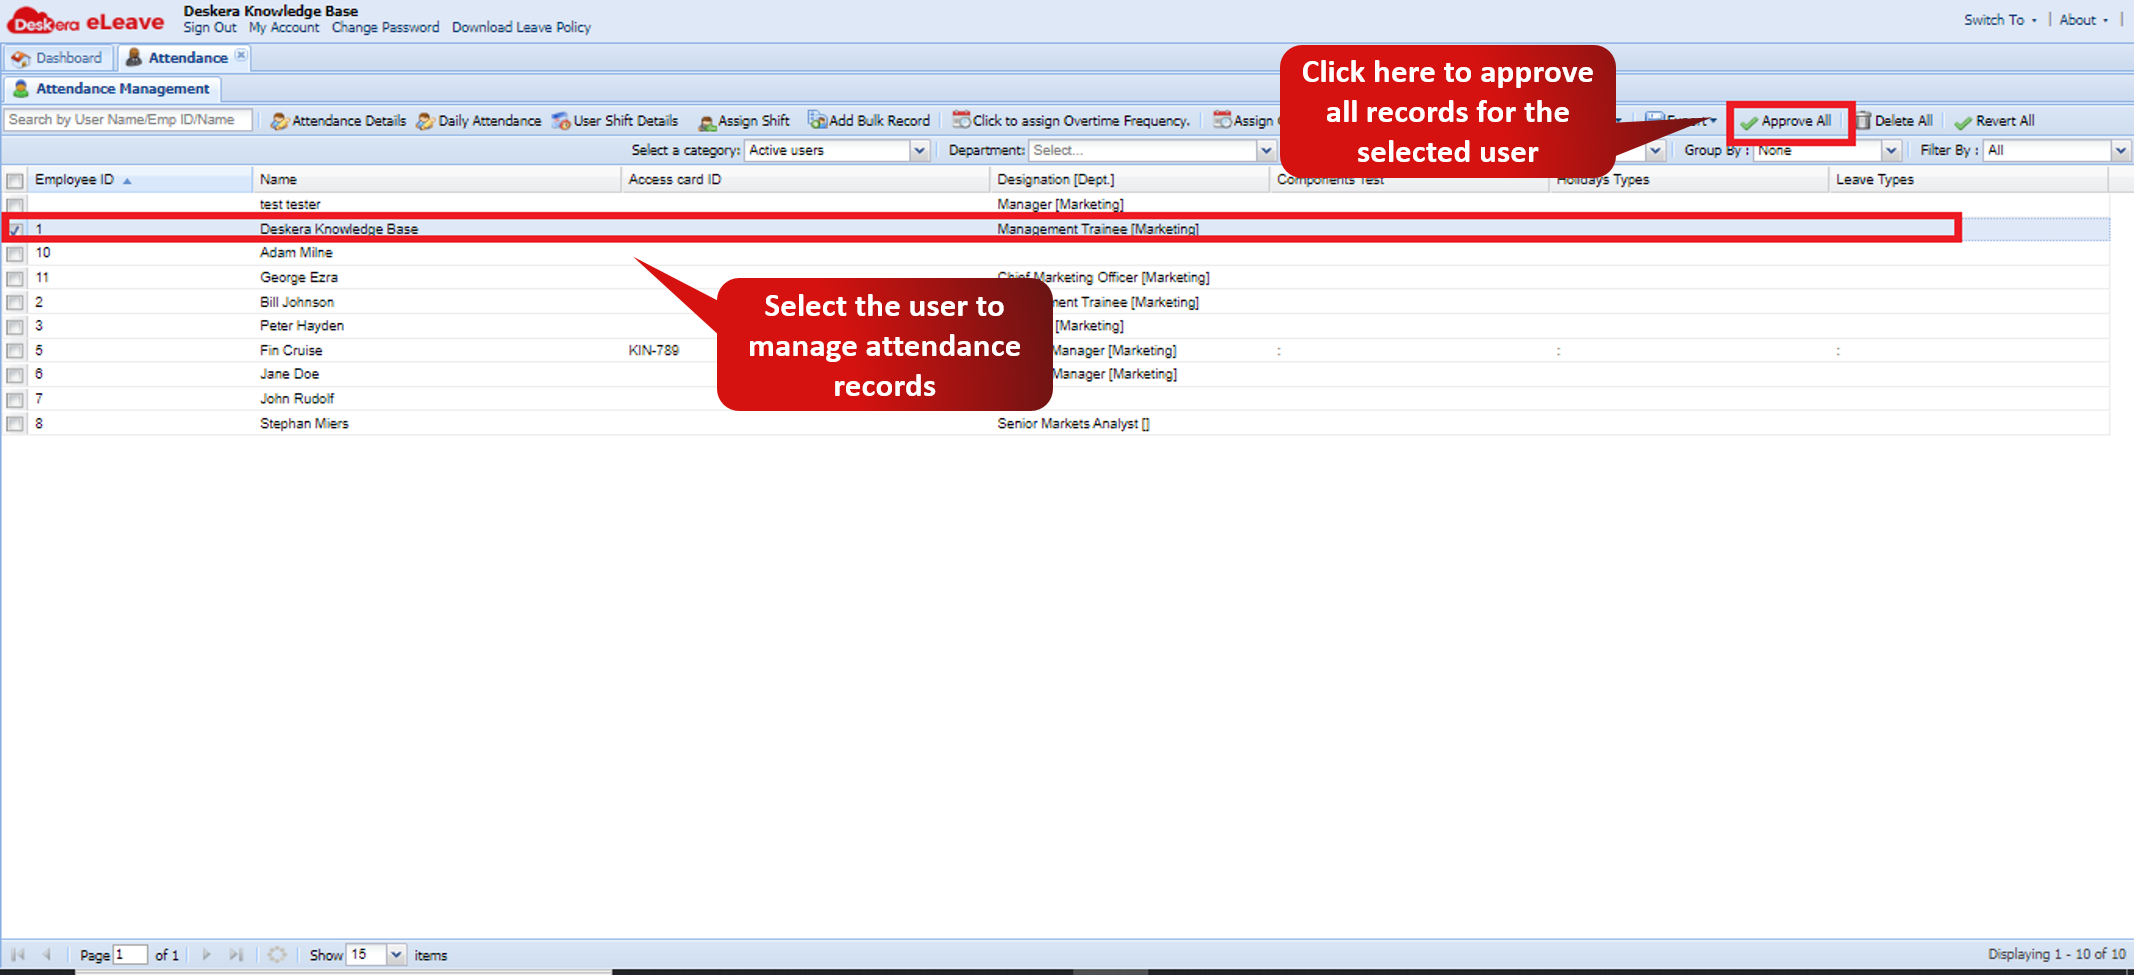 Fig. 3.3.3.6.2 Attendance Management Window
Step 3: Click on yes to confirm approval of all attendance records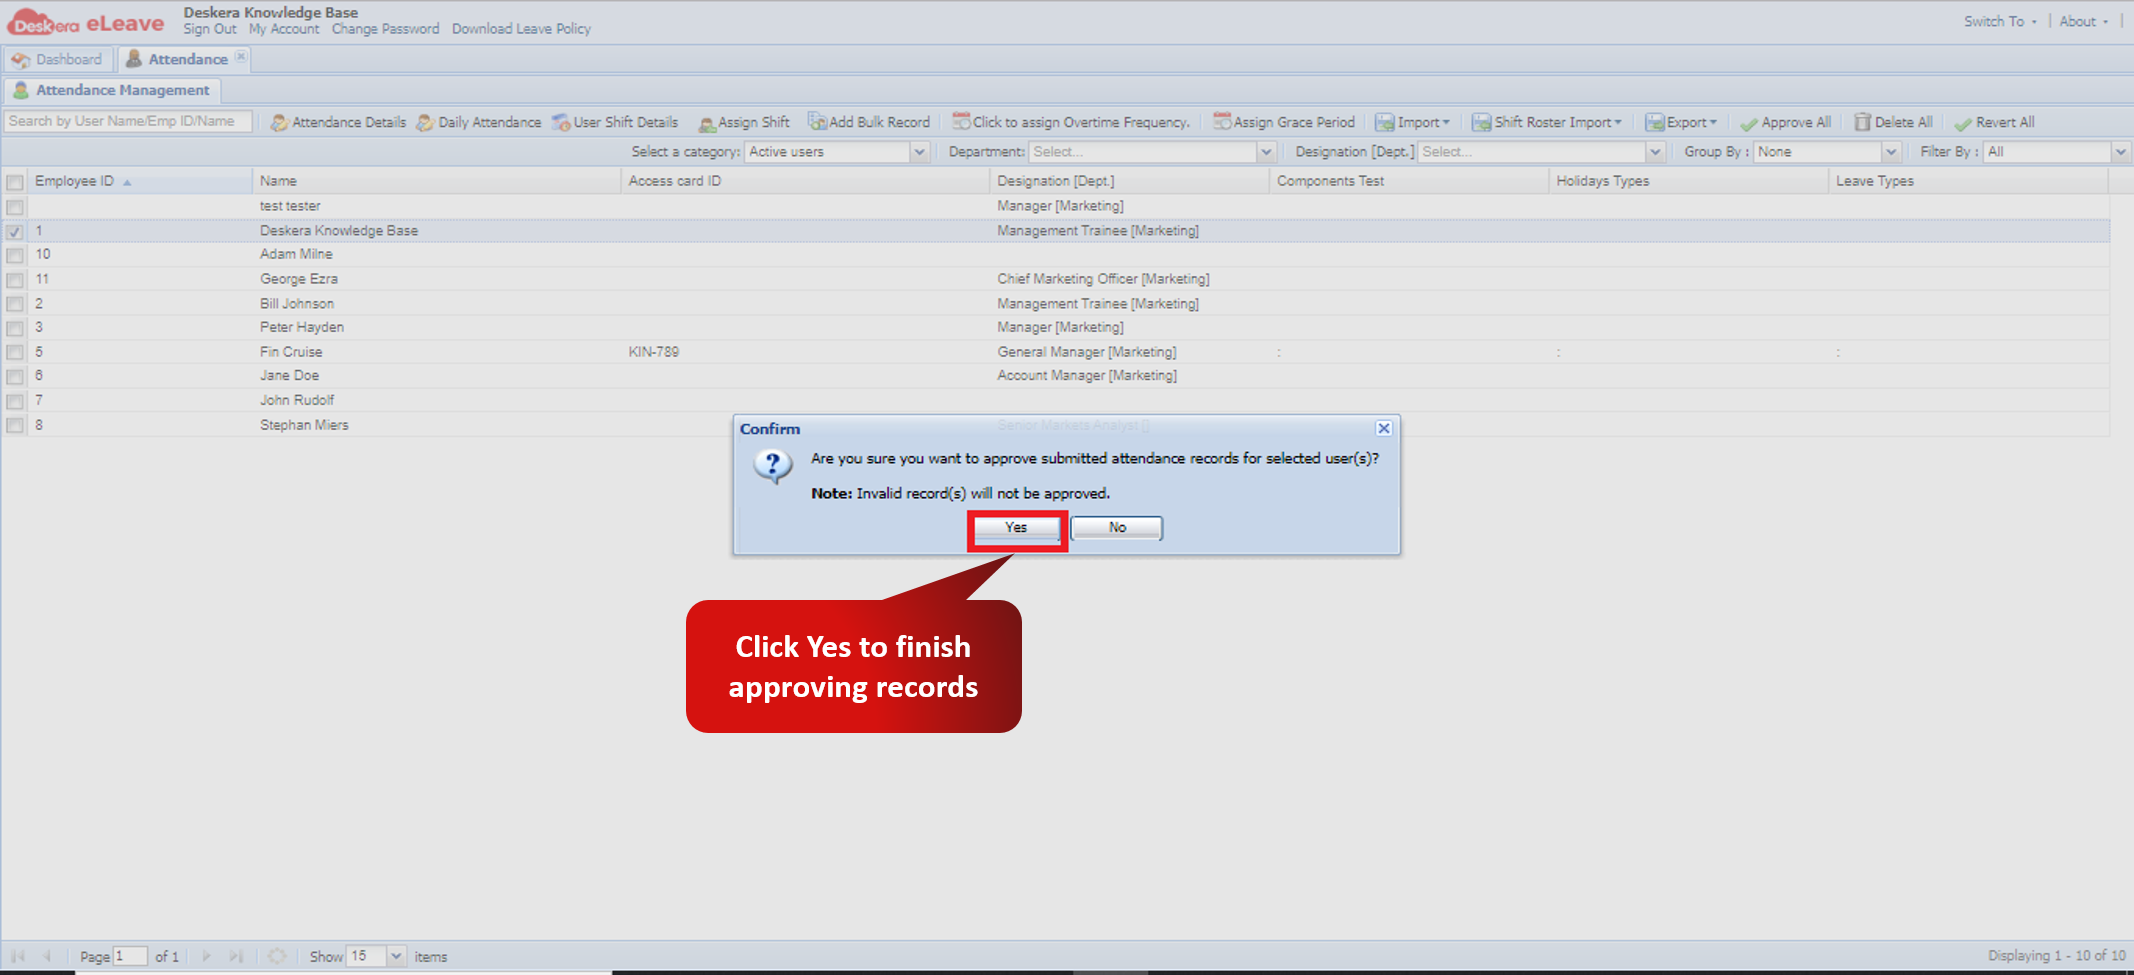 Fig. 3.3.3.6.3 Approve Confirmation
Delete all
Step 1: On the e-Leaves Dashboard, Click on Attendance Management under the Attendance Manager Widget.Fig. 3.3.3.6.4 e-Leaves Dashboard
Step 2: Select the user whose attendance record has to be deleted and click on Delete All to delete all records of the selected user.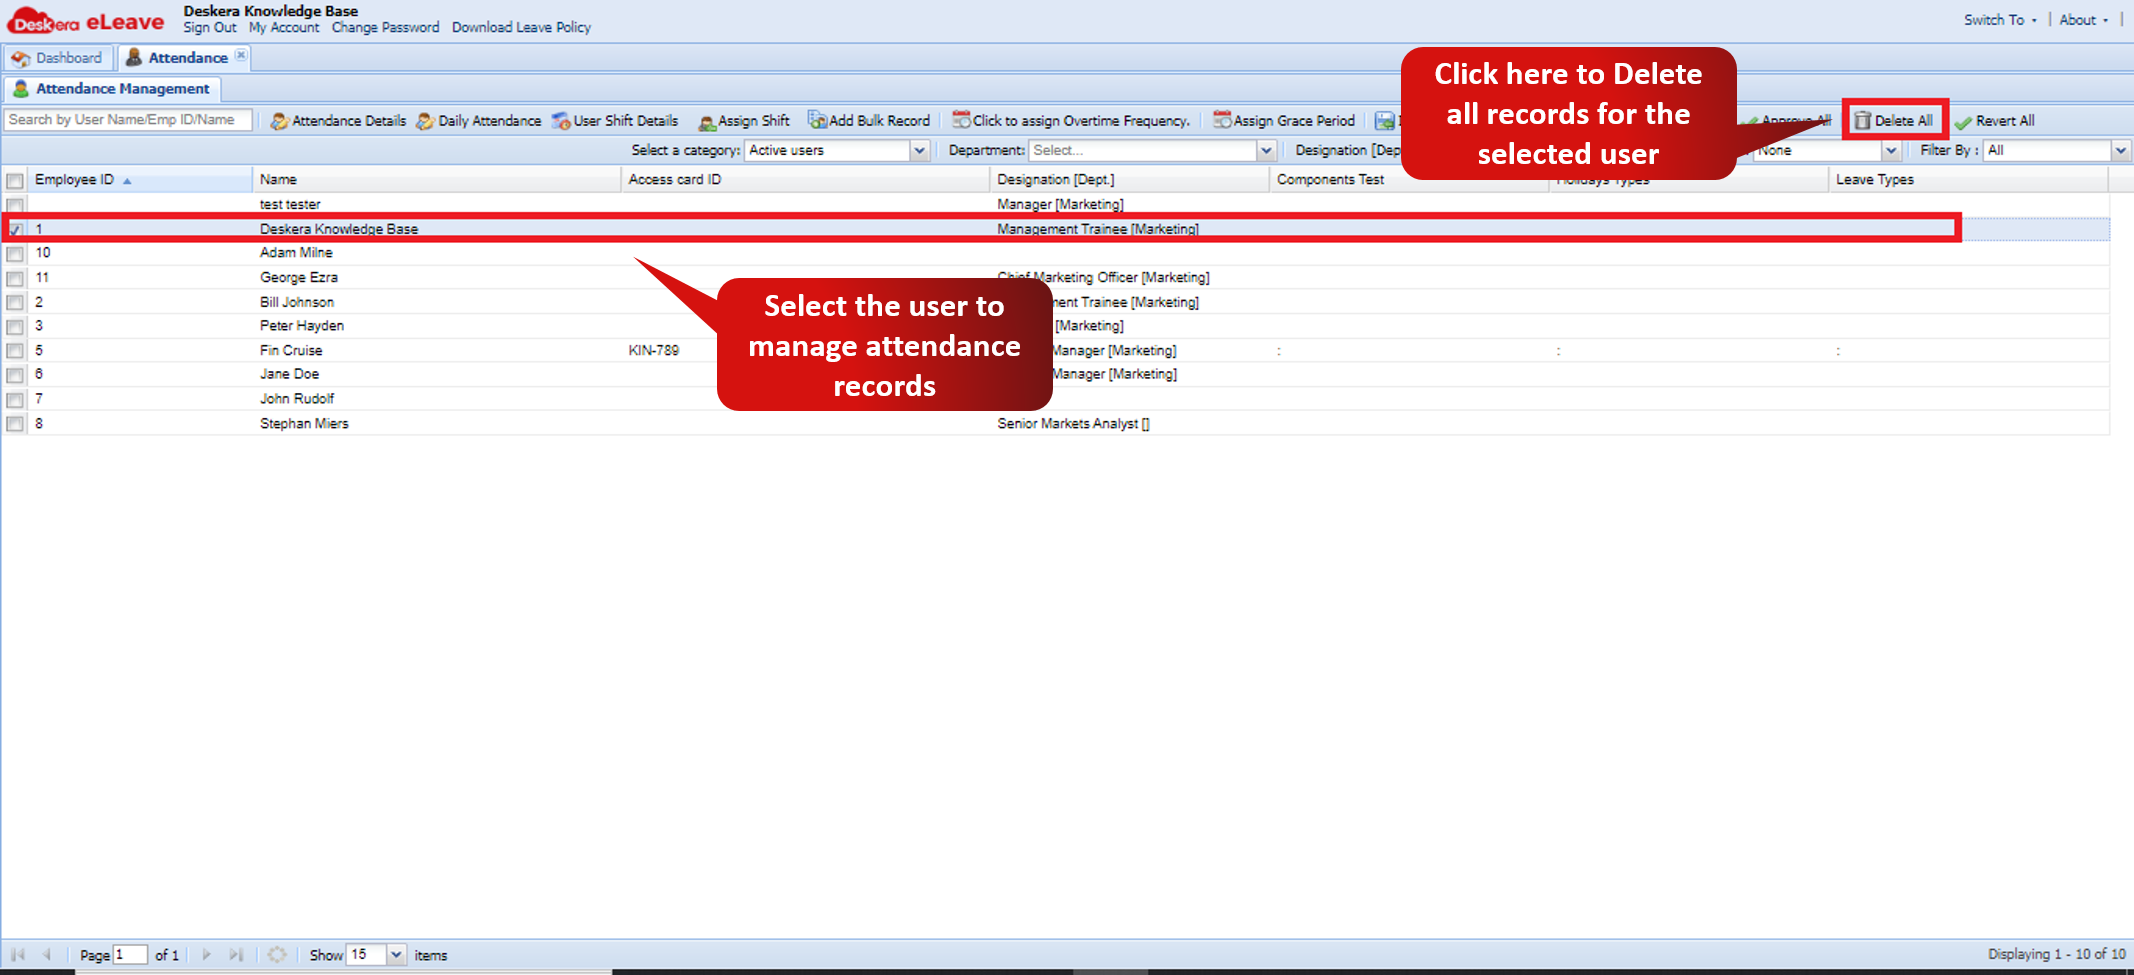 Fig. 3.3.3.6.5 Attendance Management Window
Step 3: Click on yes to confirm deletion of all attendance records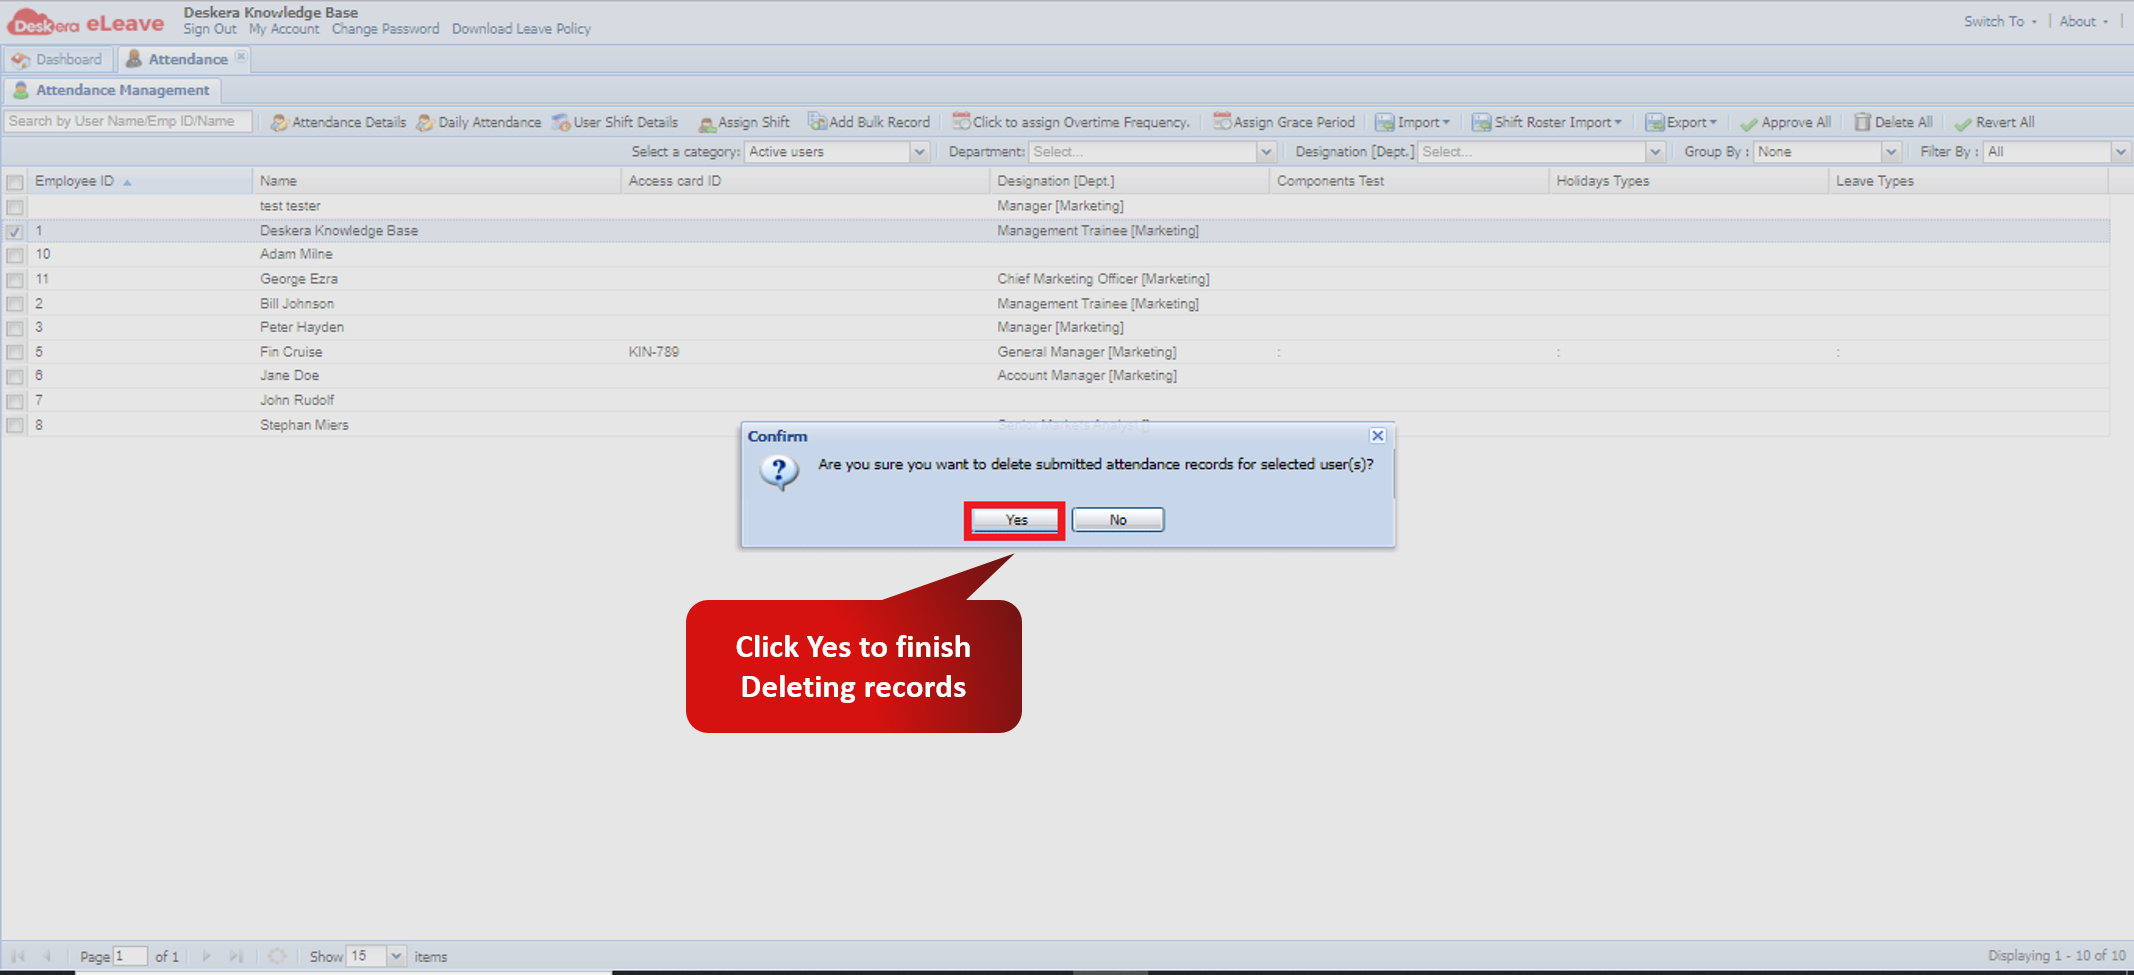 Fig. 3.3.3.6.6 Delete Confirmation
Revert all
Step 1: On the e-Leaves Dashboard, Click on Attendance Management under the Attendance Manager Widget.Fig. 3.3.3.6.7 e-Leaves Dashboard
Step 2: Select the user whose attendance record has to be reverted and click on revert all to Revert All records of the selected user.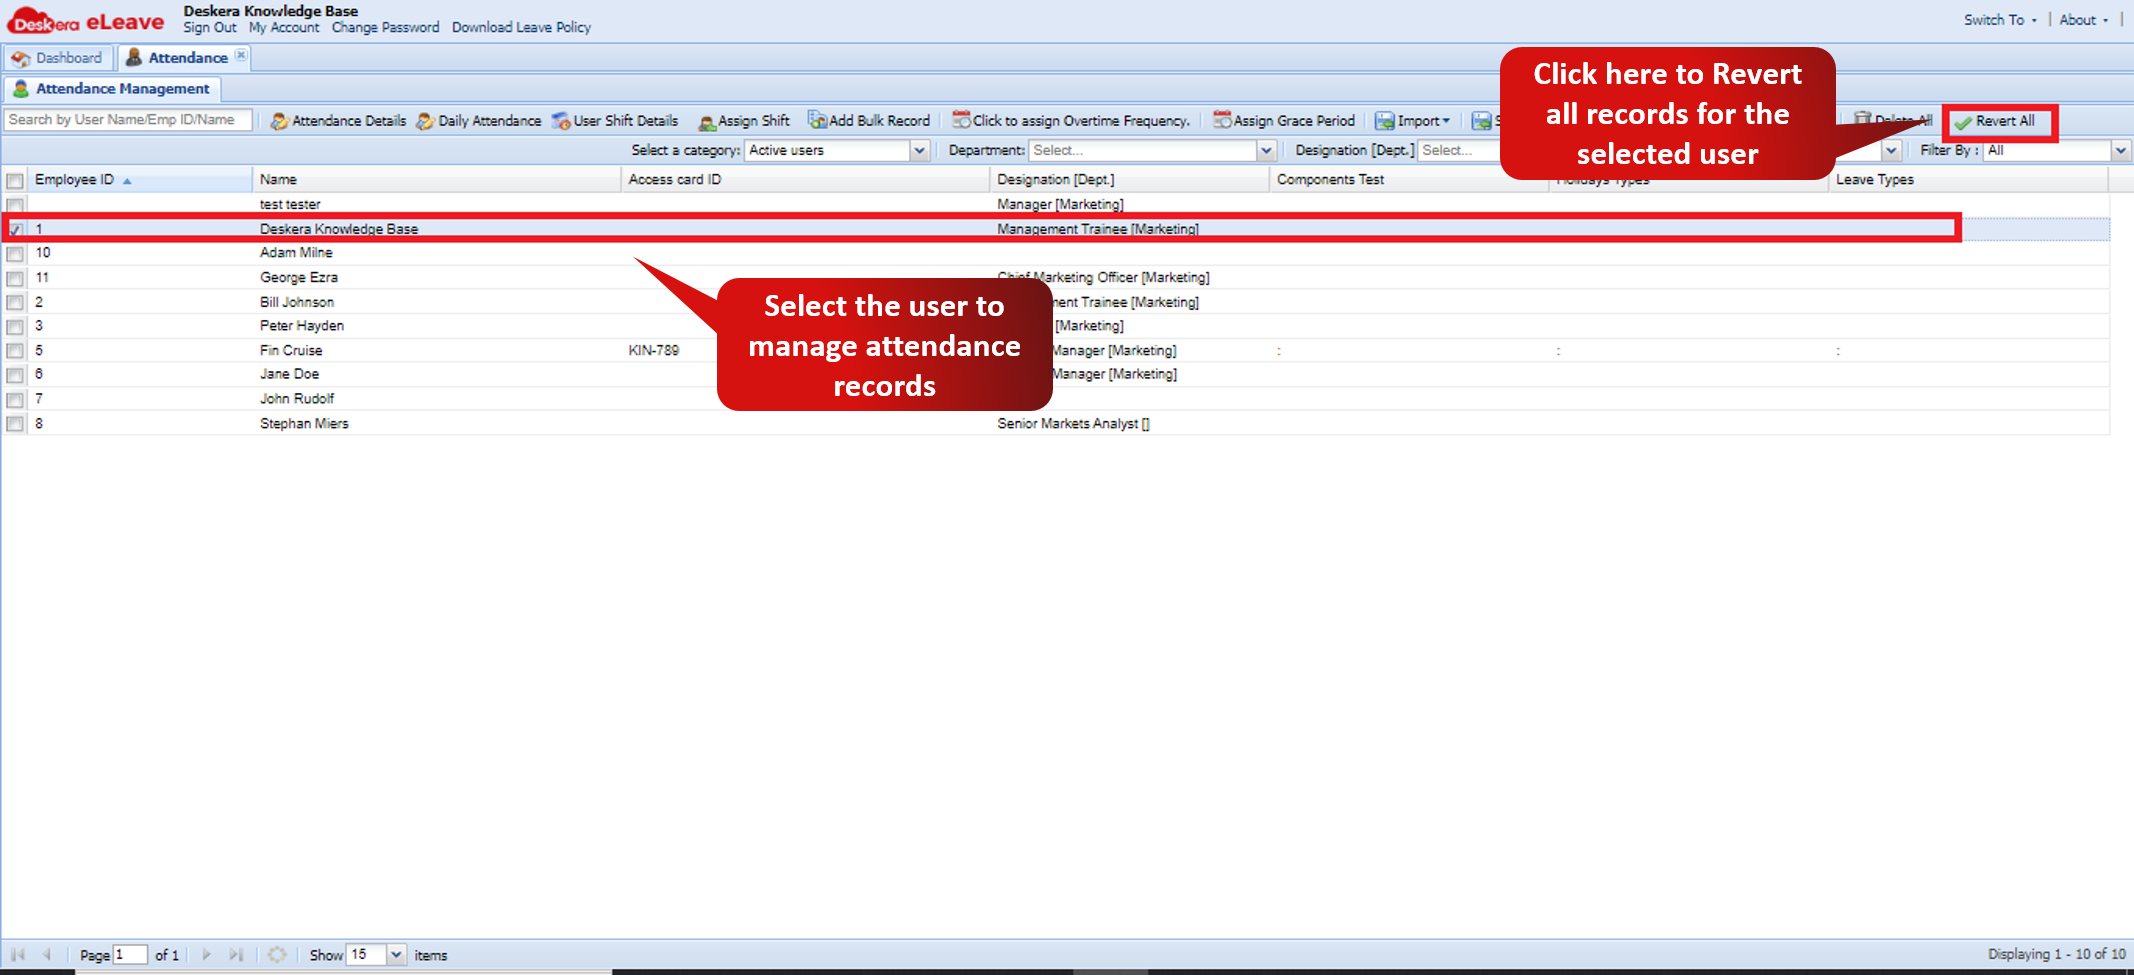 Fig. 3.3.3.6.8 Attendance Management Window
Step 3: Click on yes to confirm reverting of all attendance records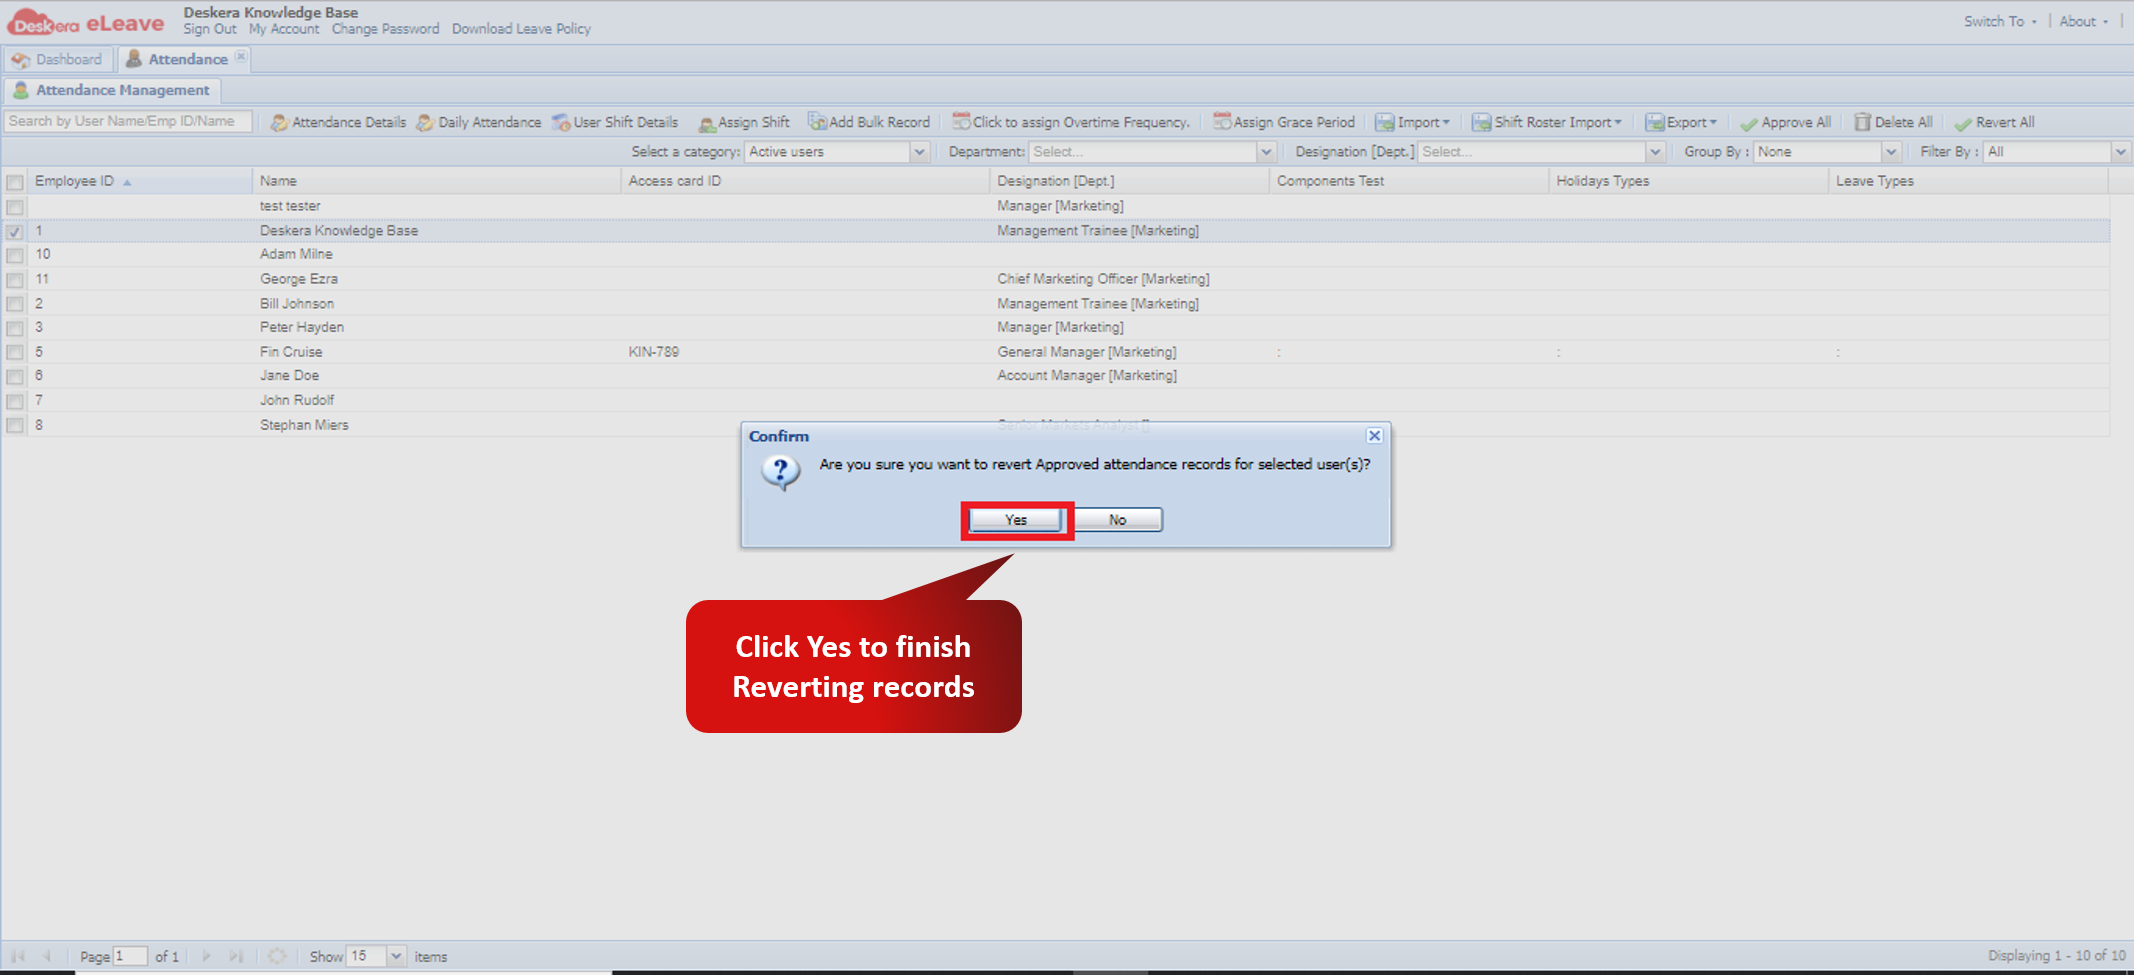 Fig. 3.3.3.6.9 Revert Confirmation
Comments
0 comments
Please sign in to leave a comment.