
Roster Configuration feature enables you configure multiple shifts of employee’s and keep a track of it. You can manage employee’s various shifts with roster management.
Prerequisites:
1. You have your Deskera eLeave application URL in place.
2. You are the administrator of the eLeave application.
3. Ensure good internet connectivity.
4. Make sure that Roster Configuration is activated in master configuration.
Save Roster
Step 1: Go to Roster Configuration under Attendance Manager widget in eLeave.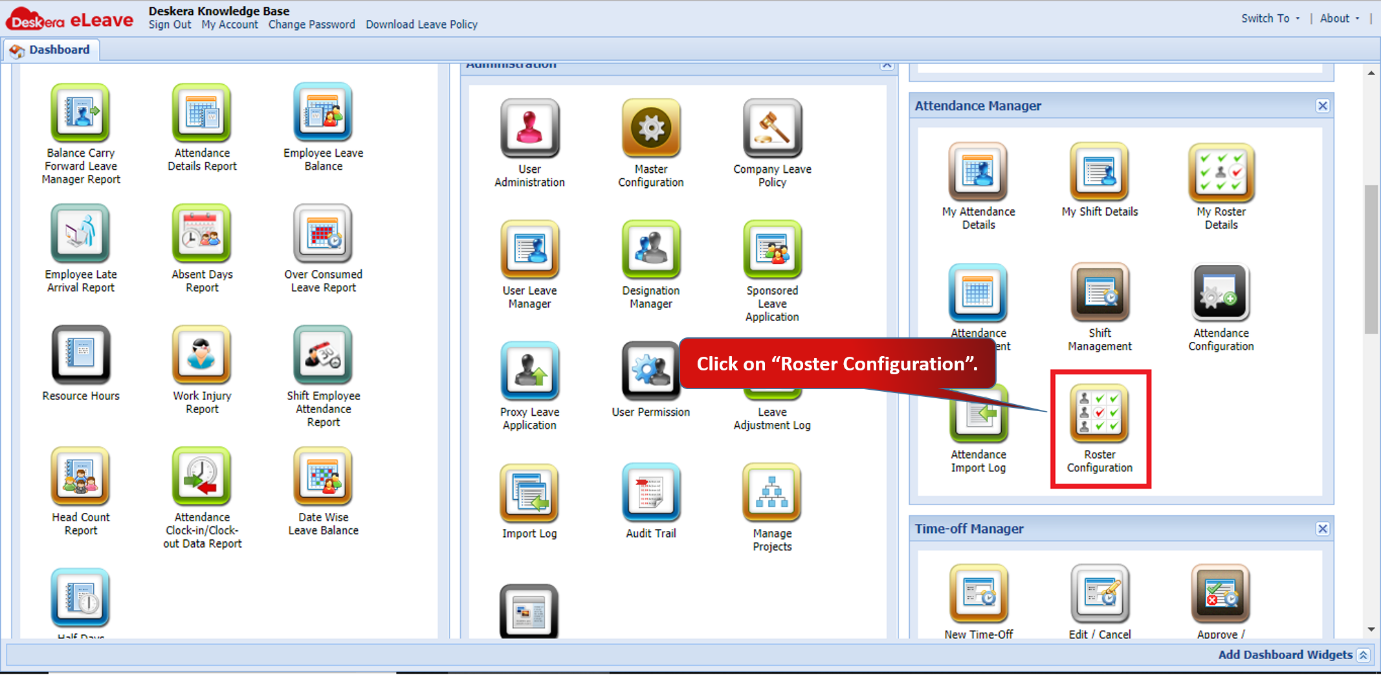 Fig 3.3.6.1 eLeave Dashboard
Step 2: Fill in the In/Out timings of an employee for multiple dates as required. Click on Save Roster.
Roster Attendance Details will be submitted successfully.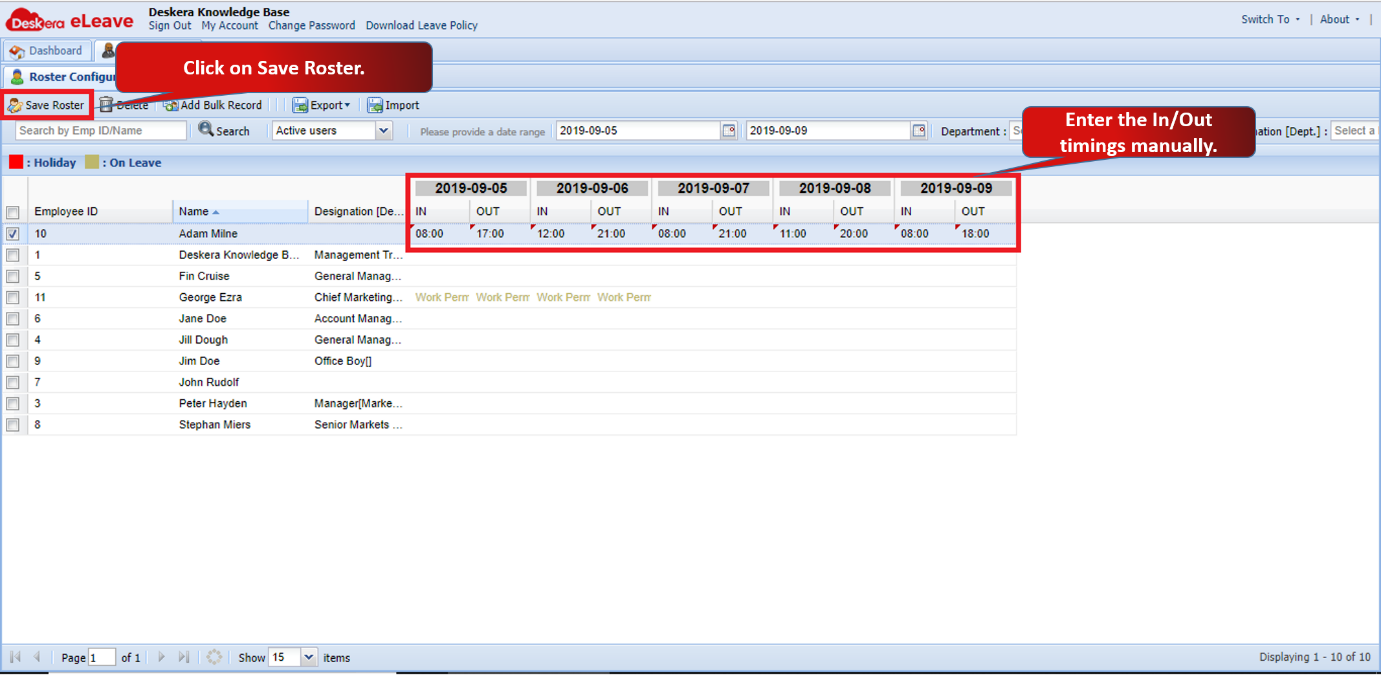 Fig 3.3.6.2 Roster Configuration
 Fig 3.3.6.3 Roster Configuration
Note:
- If you want to add an off for an employee, enter OFF.
- If you want to add a night off for an employee, enter OFFN.
- You can see the leaves of an employee highlighted in yellow in the roster.
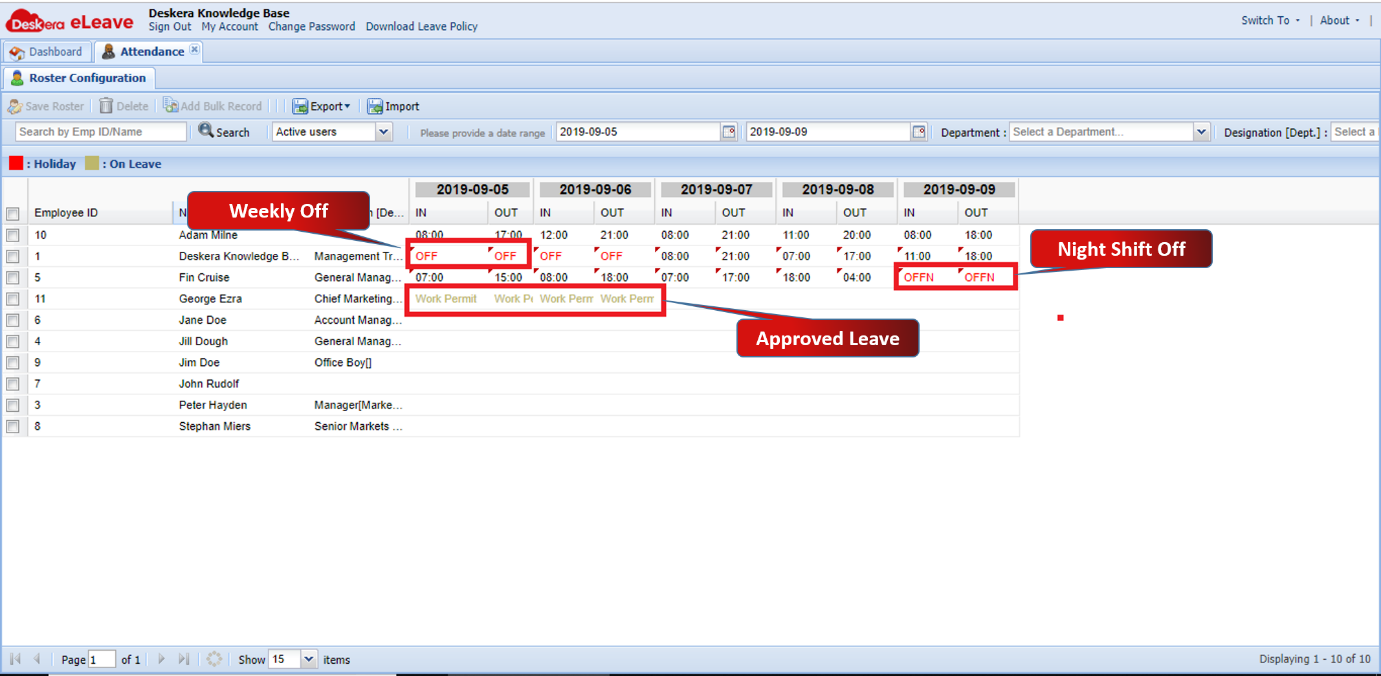 Fig 3.3.6.4 Roster Configuration
Delete Roster
Step 1: Select the employee to delete the roster details. Click on Delete.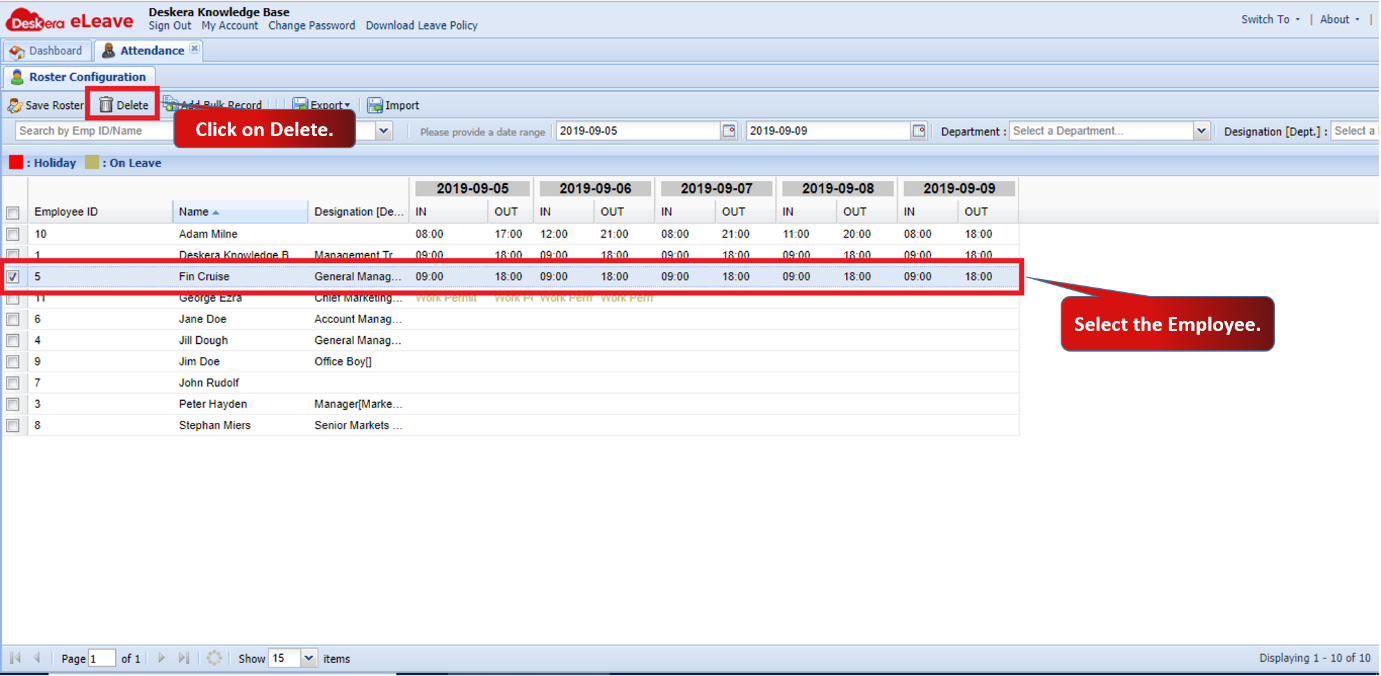 Fig 3.3.6.5 Delete Roster
Step 2: Click on Yes to confirm. Selected records will be deleted. 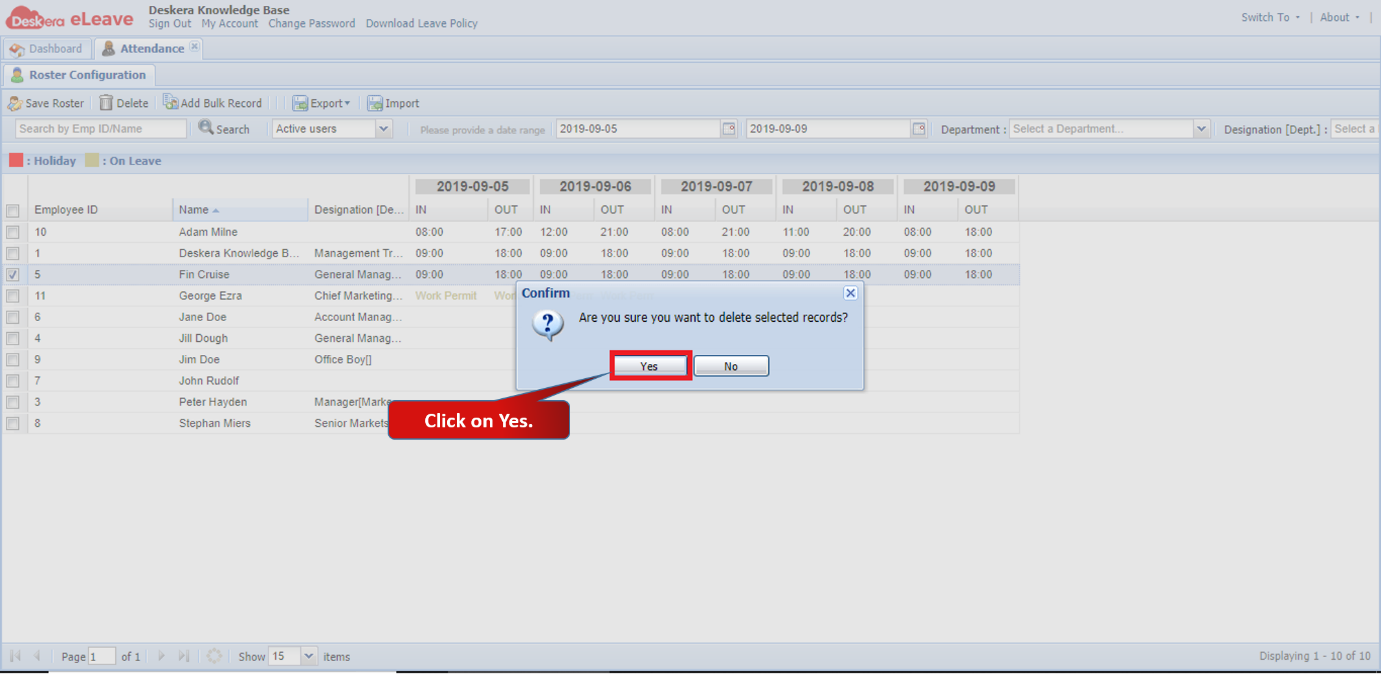 Fig 3.3.6.6 Delete Roster
Add Bulk Record
Step 1: Select the employee’s to add bulk record. Click on Add Bulk Record. 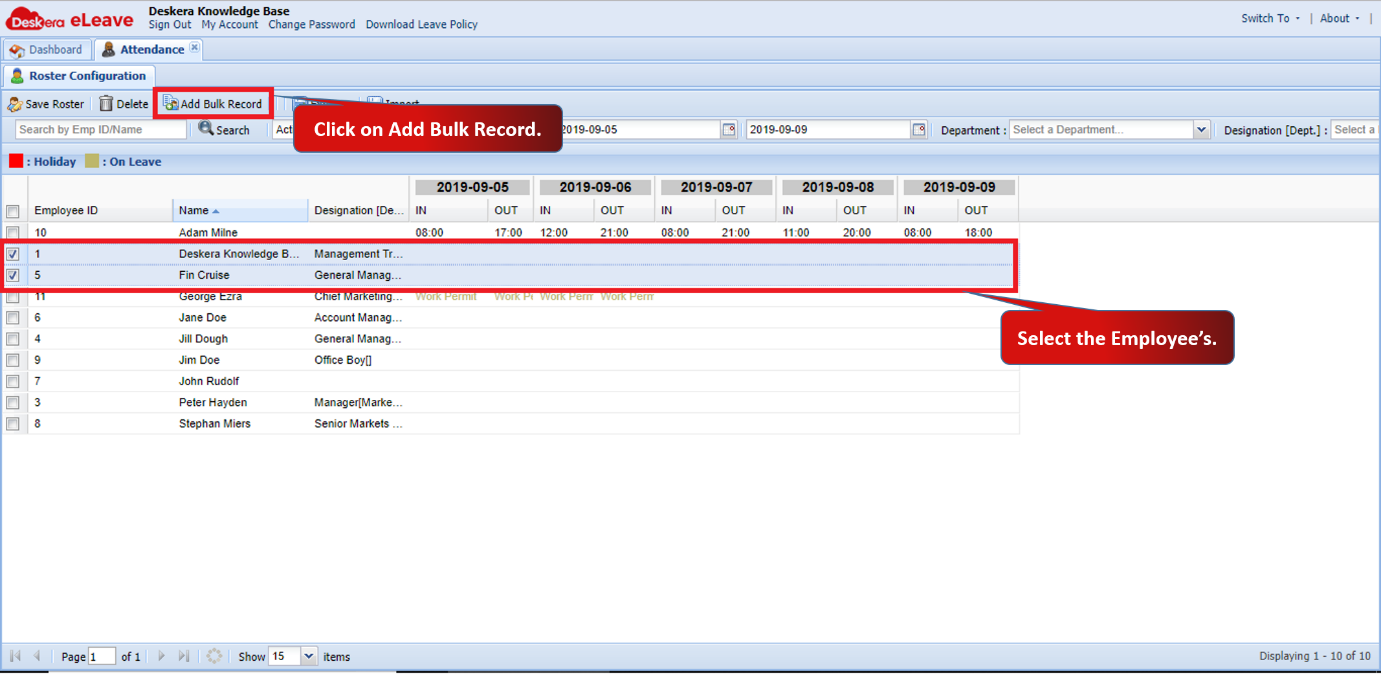 Fig 3.3.6.7 Add Bulk Record
Step 2: Fill in the details and click on Save.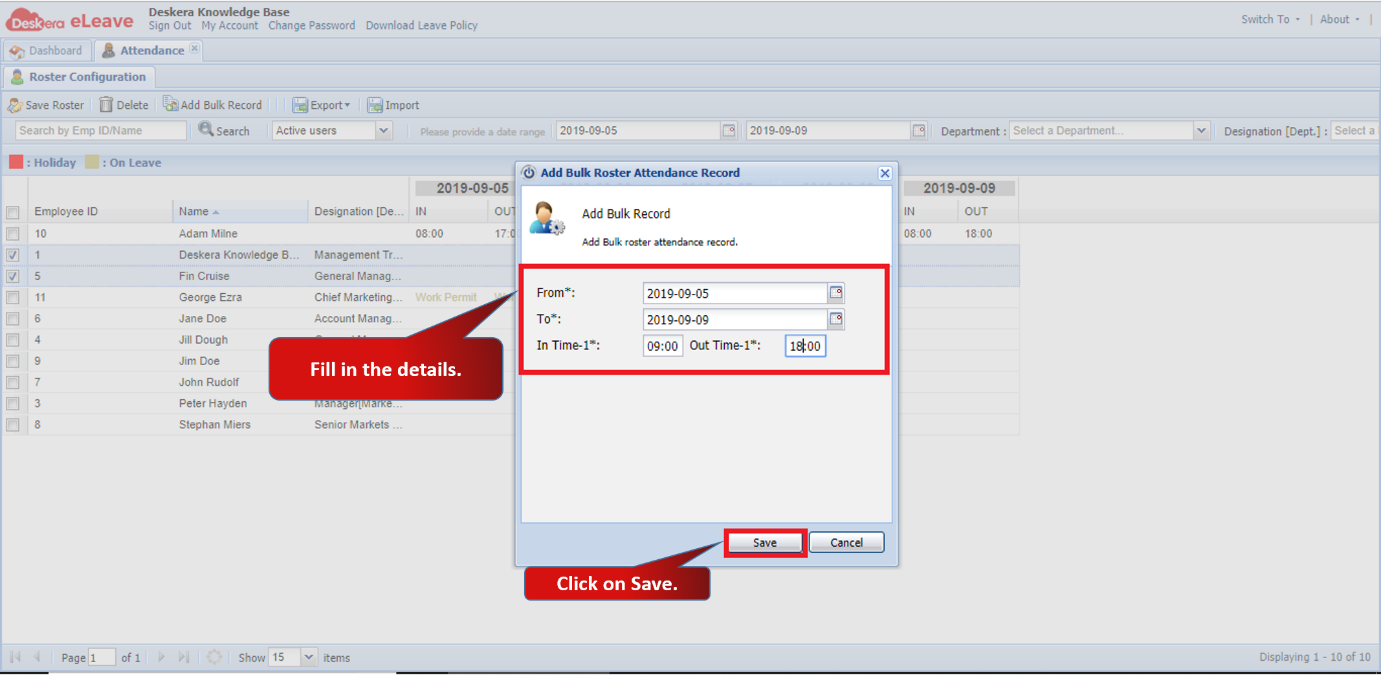 Fig 3.3.6.8 Add Bulk Record
Records will be updated for the selected employee’s.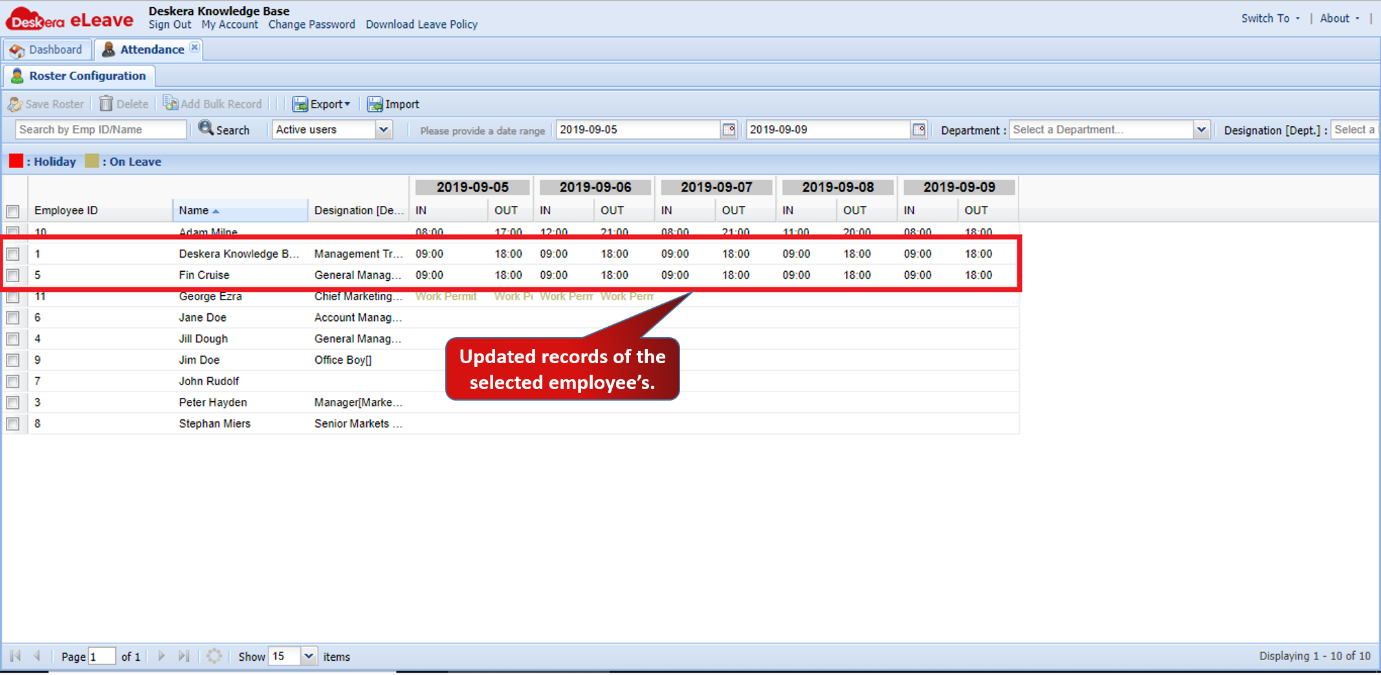 Fig 3.3.6.9 Add Bulk Record
Import Bulk Record
Step 1: Click on Import.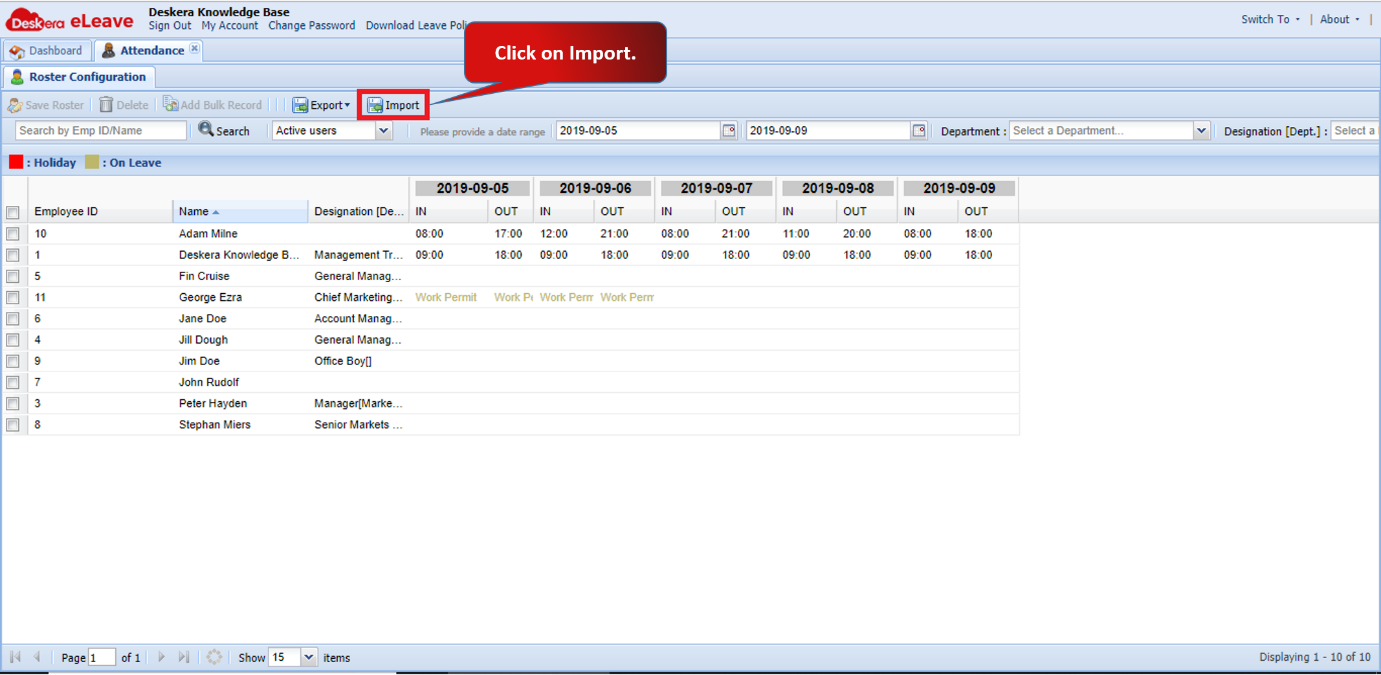 Fig 3.3.6.10 Import Roster
Step 2: Upload the CSV file to import. You can download the sample file for reference.
Select the Date format and Time format according to your import file and click on Next.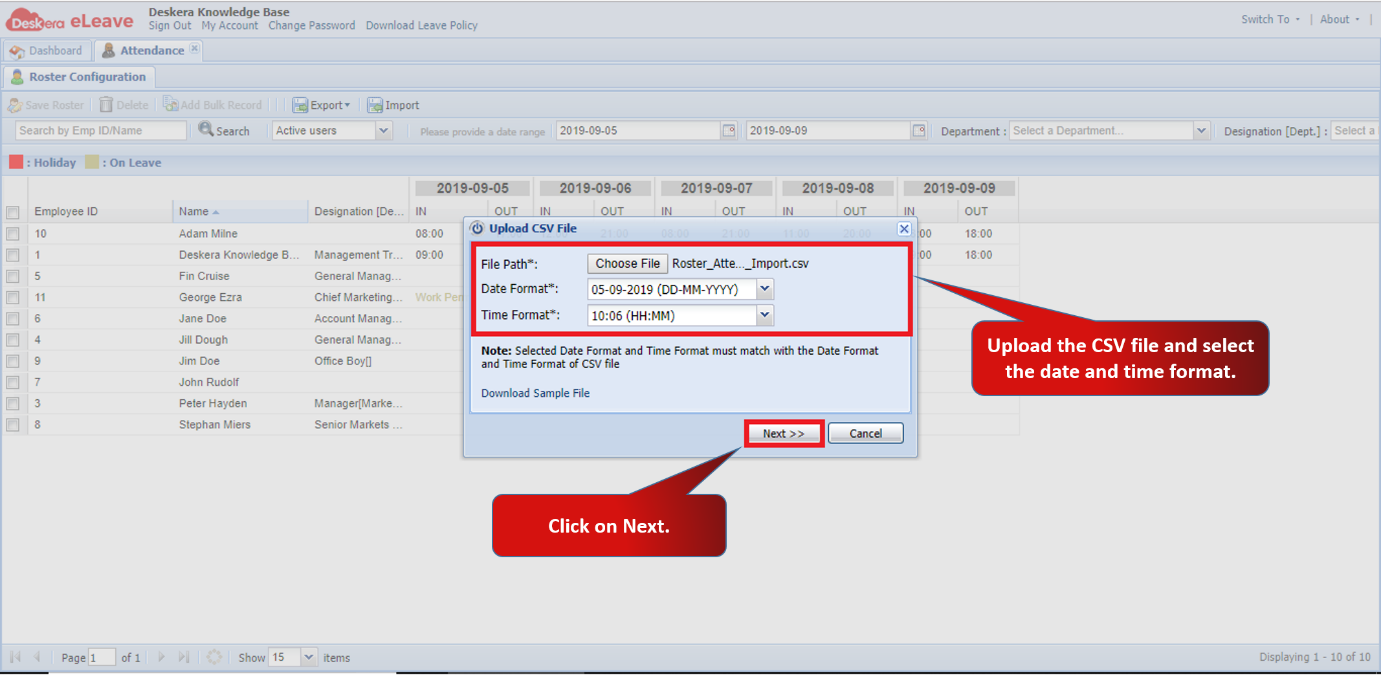 Fig 3.3.6.11 Import Roster
Step 3: Click on Auto Map to map the headers of CSV file headers with Roster headers. You can manually map the headers as well. Click on Import. Roster details will be imported successfully. 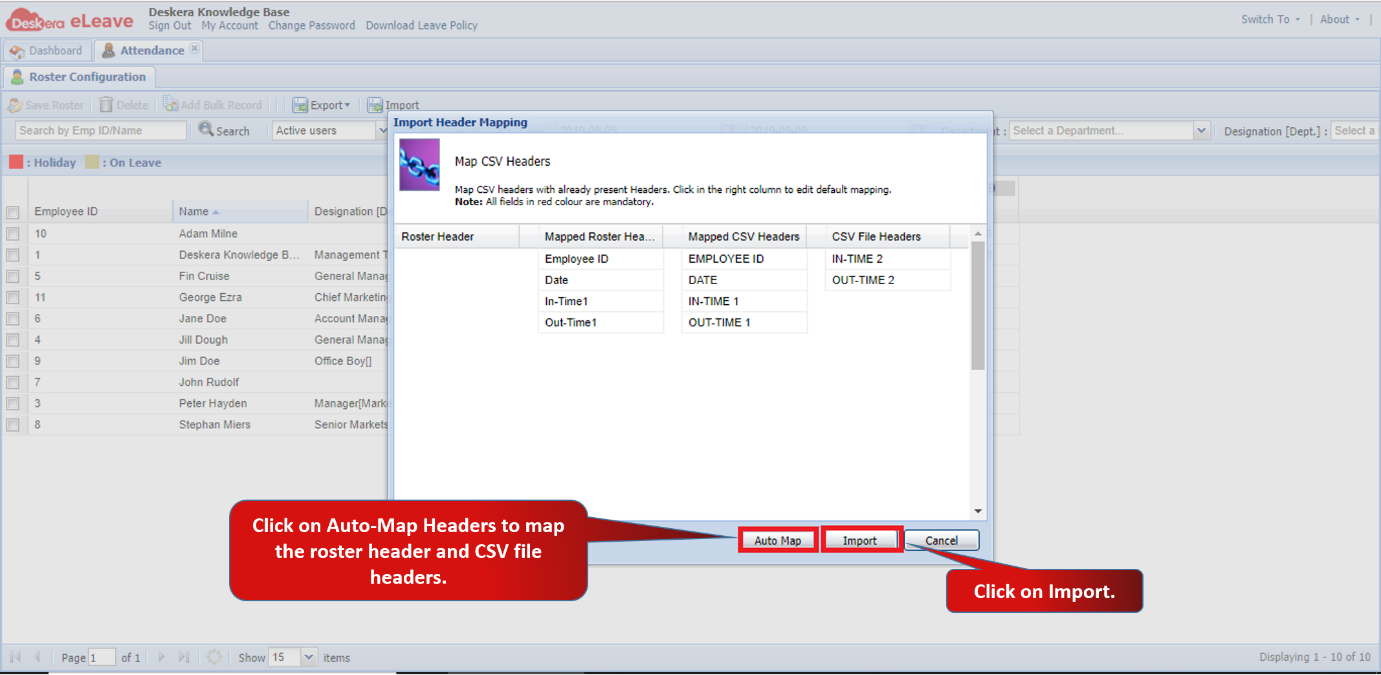 Fig 3.3.6.12 Import Roster
Comments
0 comments
Please sign in to leave a comment.