
This article describes the process flow of applying for a new trip-related claim right from the application stage to the approval stage.
Prerequisites:
- You have your Deskera HRMS application URL in place
- You are the user/administrator of the HRMS application
- Ensure a good internet connectivity
Trip Application
Step 1: Click on New Trip Application under Trip Claims on the Deskera eClaims Dashboard.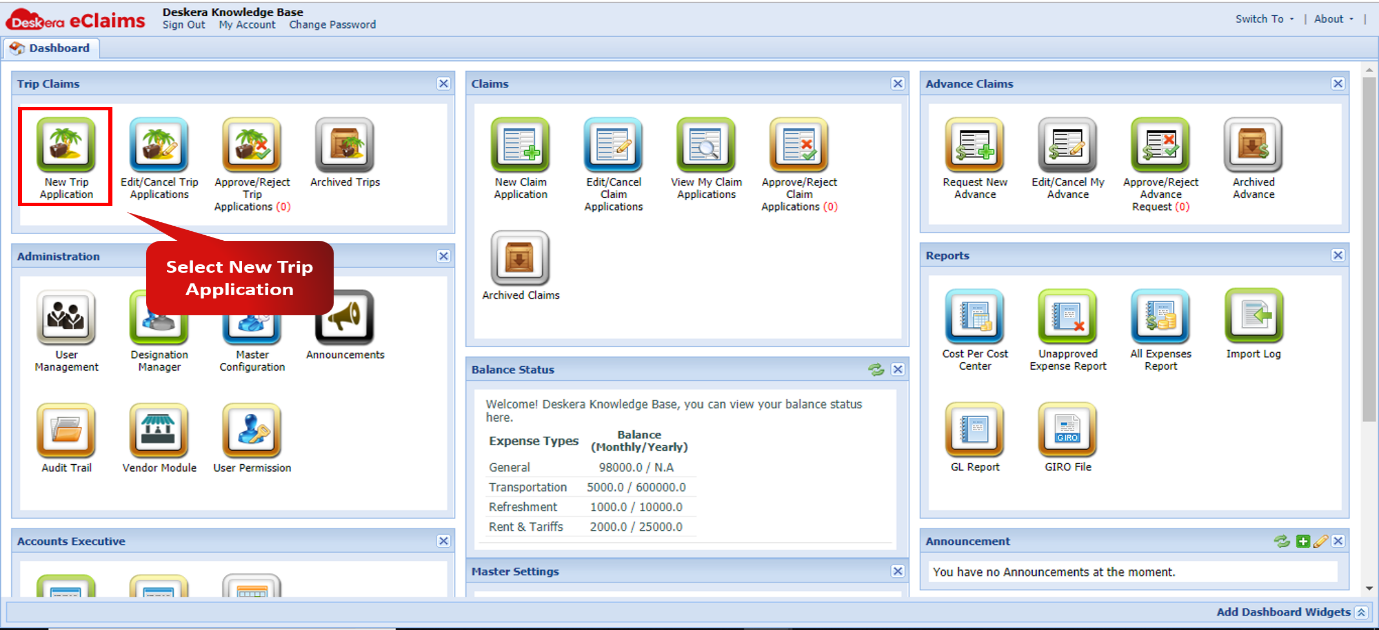 Fig 4.1.1 New Trip Application
Step 2: Enter details like Trip Name, Source, and Destination. Also add the different types of expenses that are incurred on the trip such as Rent & Tariff, Transportation etc. and enter corresponding details such as the budget against each of these expense types. Click on Submit to send the application for approval. 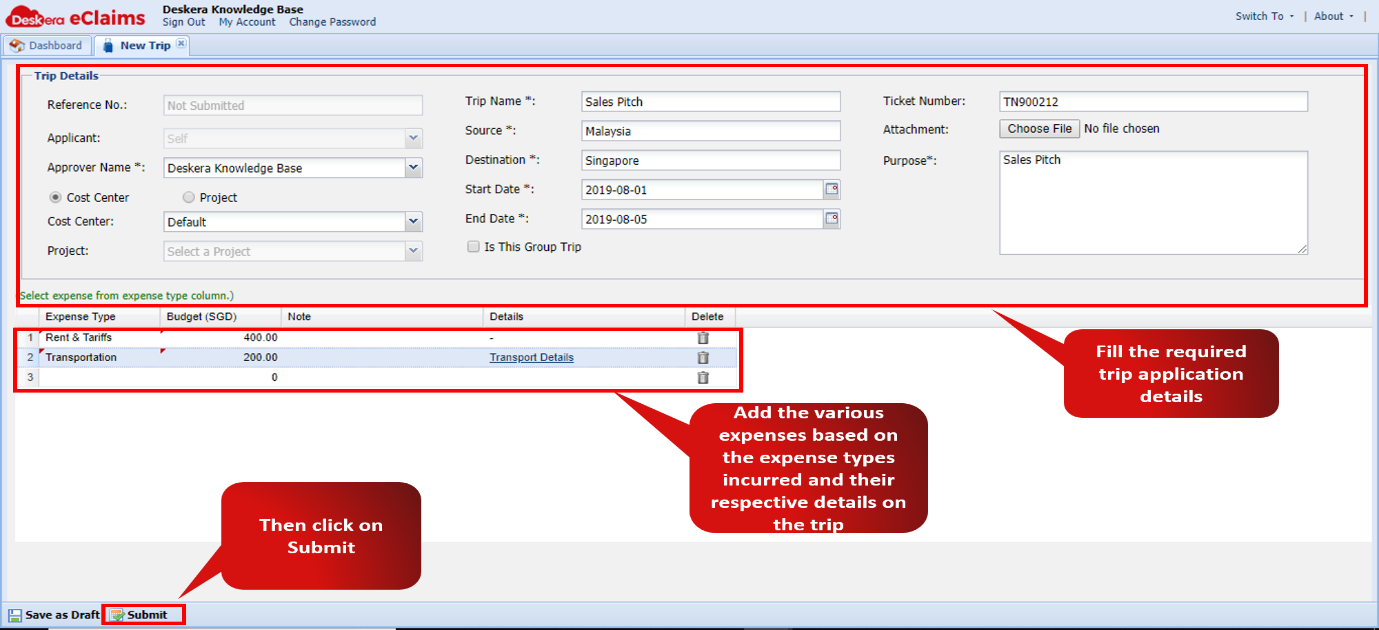 Fig 4.1.2 New Trip Application
Step 3: The approver now has to review and approve the trip application. On the approver’s eClaims Dashboard, navigate to Approve/Reject Trip Applications sub-module in the Trip Claims module from the eClaims Dashboard. 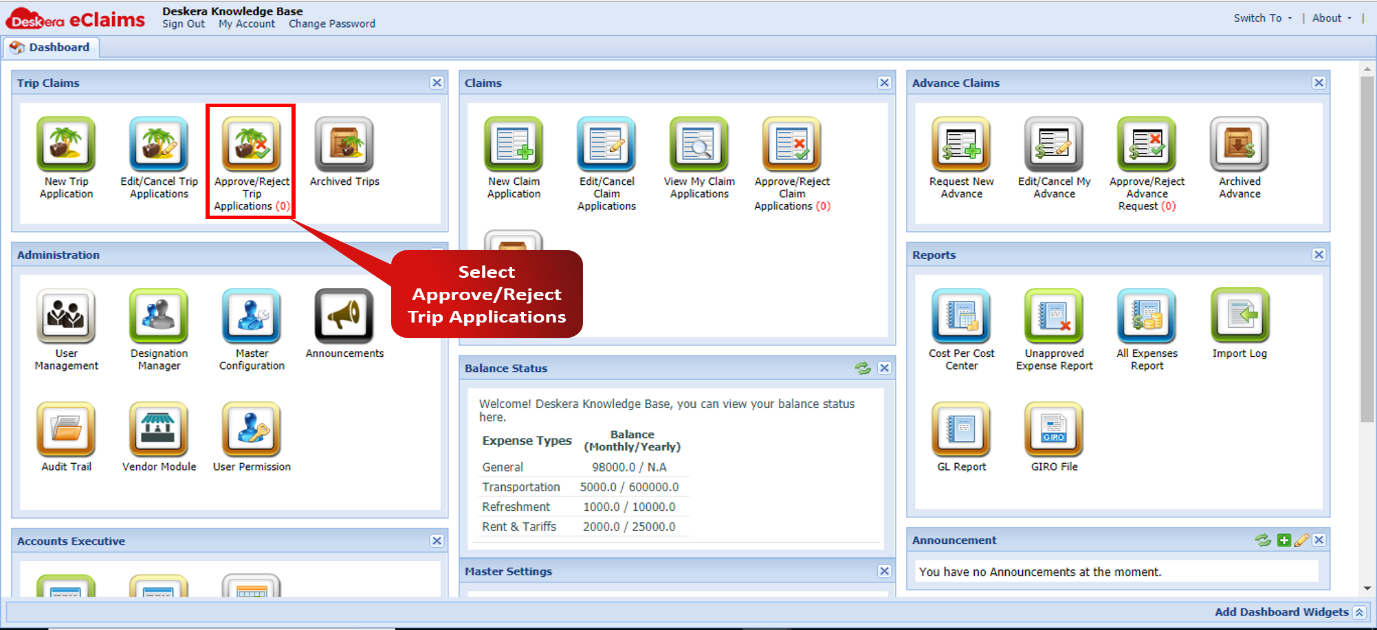 Fig 4.1.3 Approve/Reject Trip Application
Step 4: Select the claim application under consideration and to review its details select View Details. 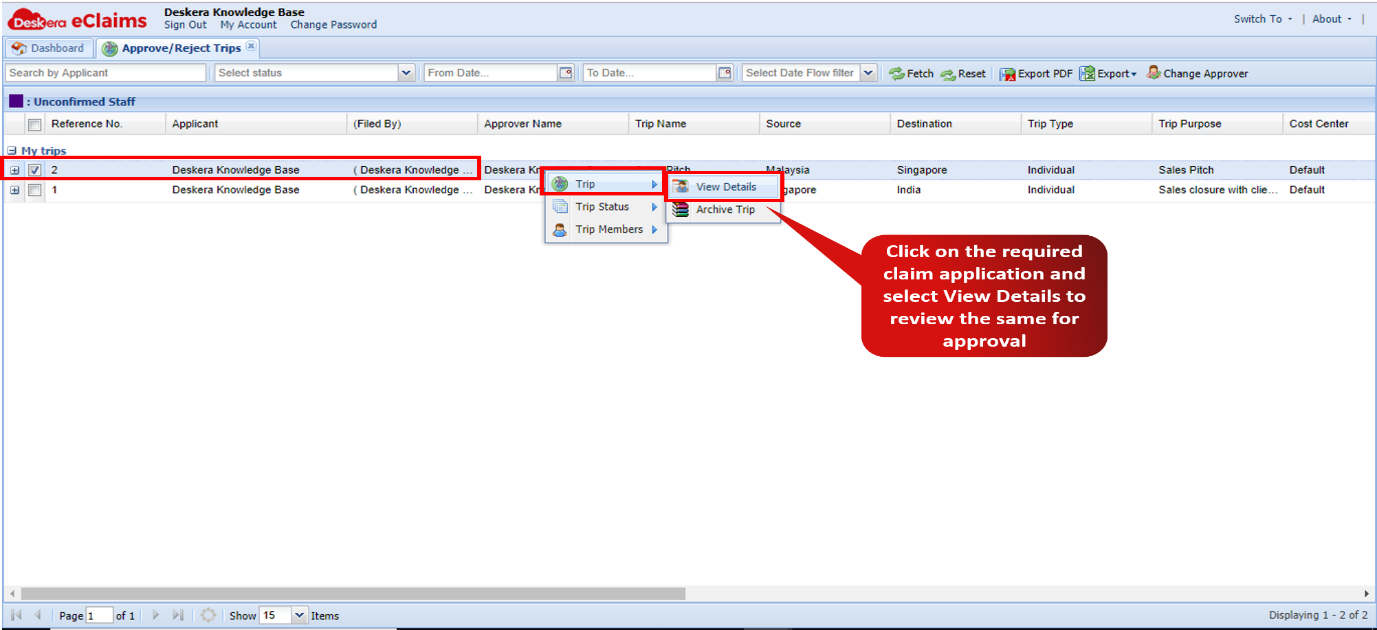 Fig 4.1.4 View Details
Step 5: After appropriately reviewing the details of the trip application, select Approve icon. 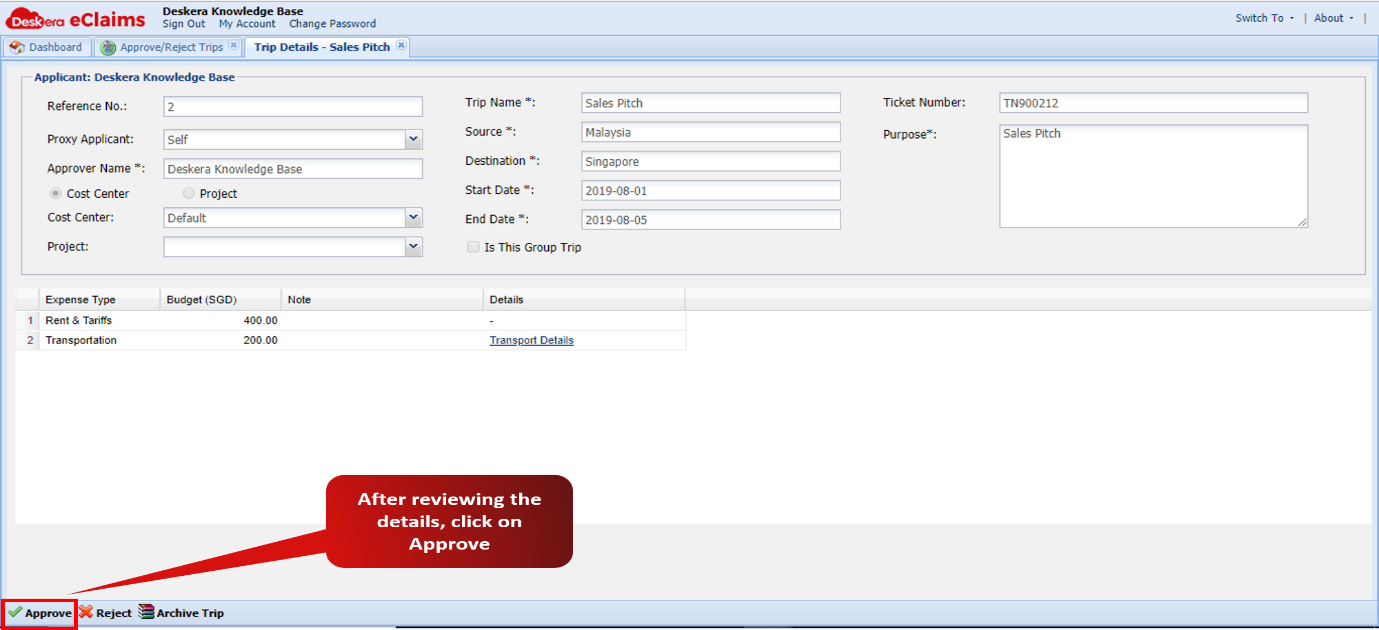 Fig 4.1.5 Approve/Reject Trip Application
Step 6: Add an approval remark and click on OK to complete the approval process. 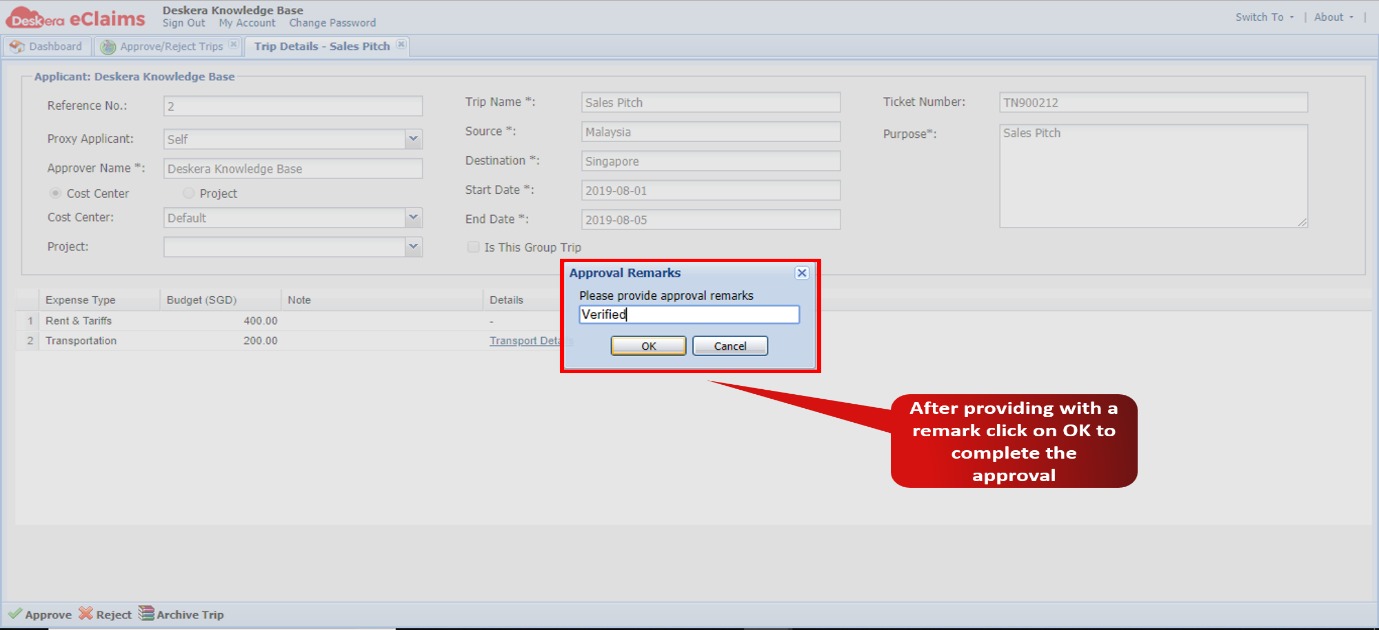 Fig 4.1.6 Approve/Reject Trip Application
Trip Claim Application
Step 7: On the HRMS Dashboard select New Application under the Claims module. 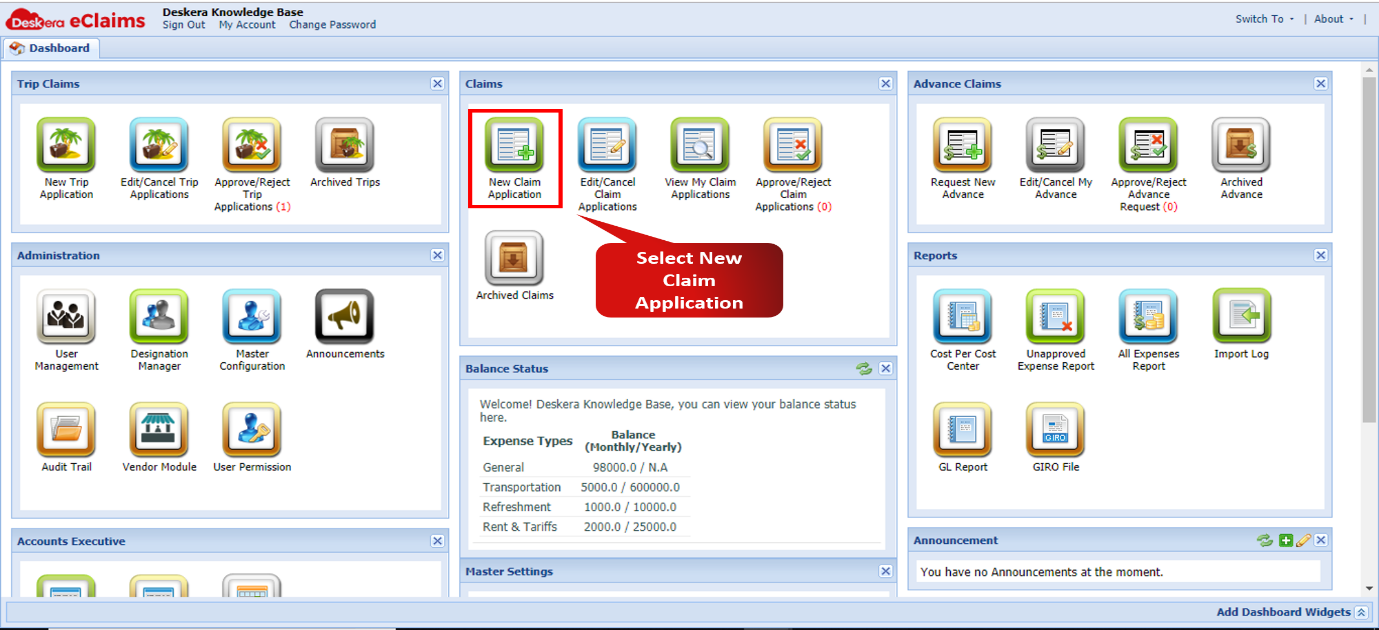 Fig 4.1.7 New Claim Application
Step 8: Enter the details under the Claim Details section as illustrated below: 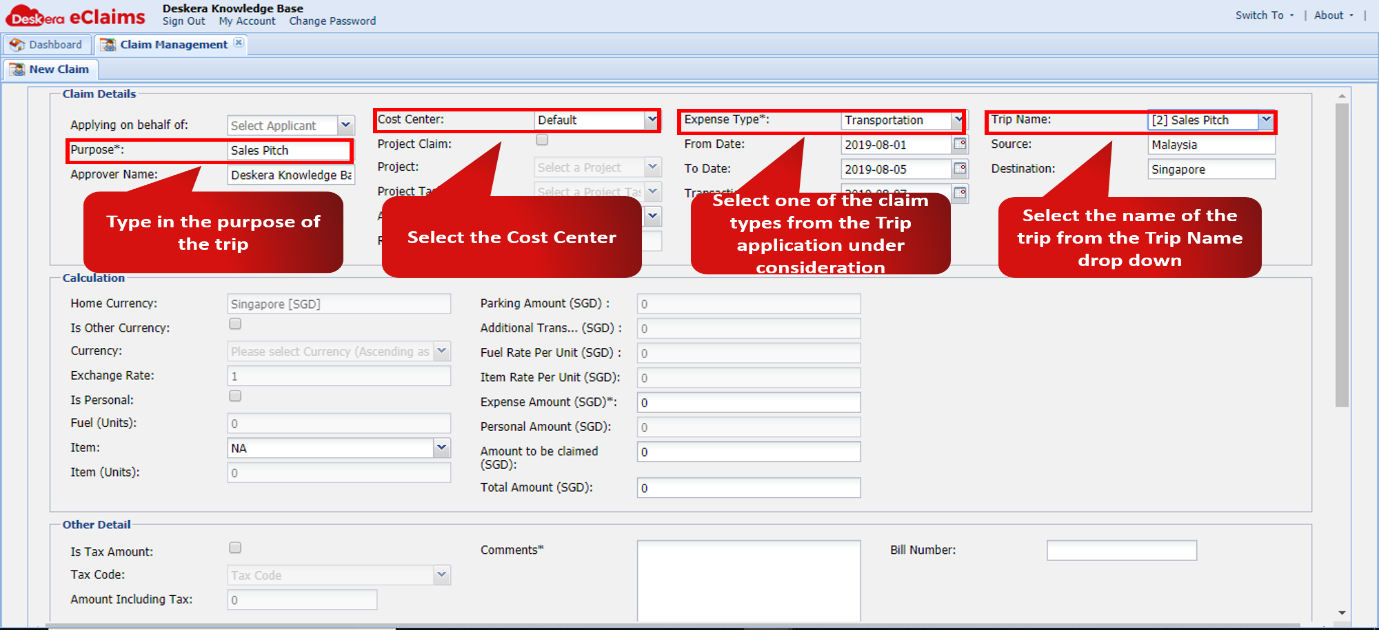 Fig 4.1.8 New Claim Application
Step 9: Enter the Expense Amount under the Calculation section. 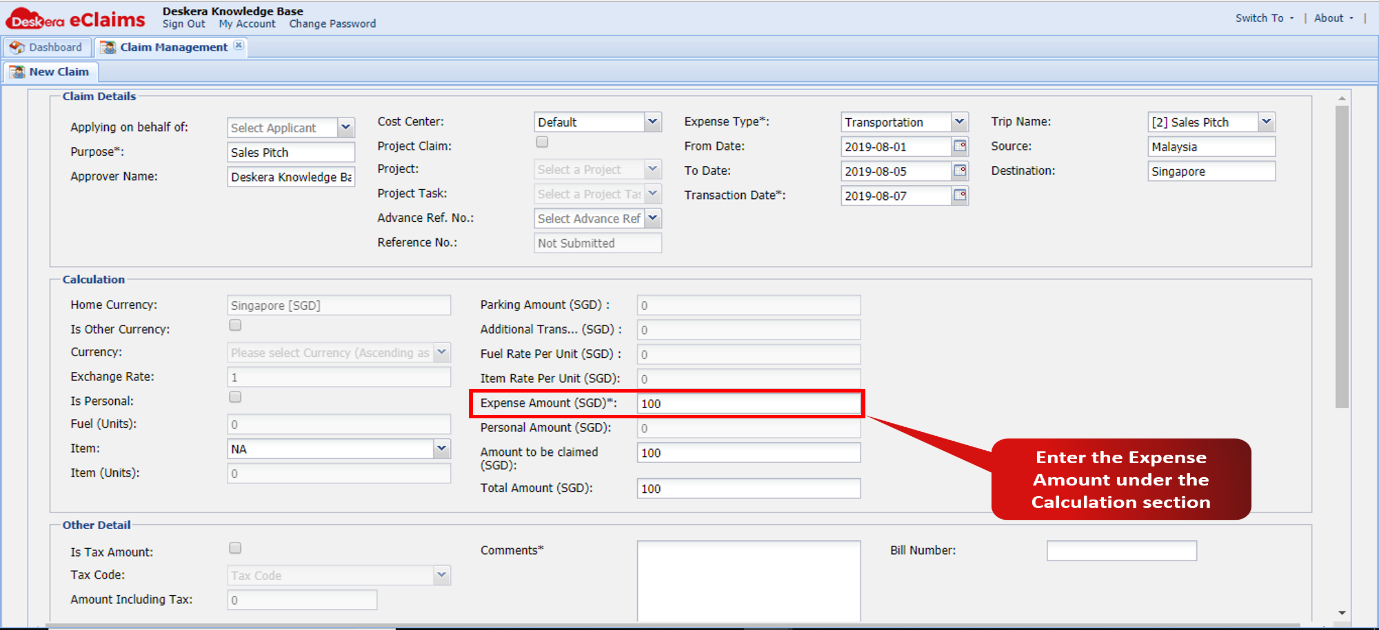 Fig 4.1.9 New Claim Application
Step 10: Enter all the other required details appropriately under Other Detail and Attachments sections and click on Save as Draft.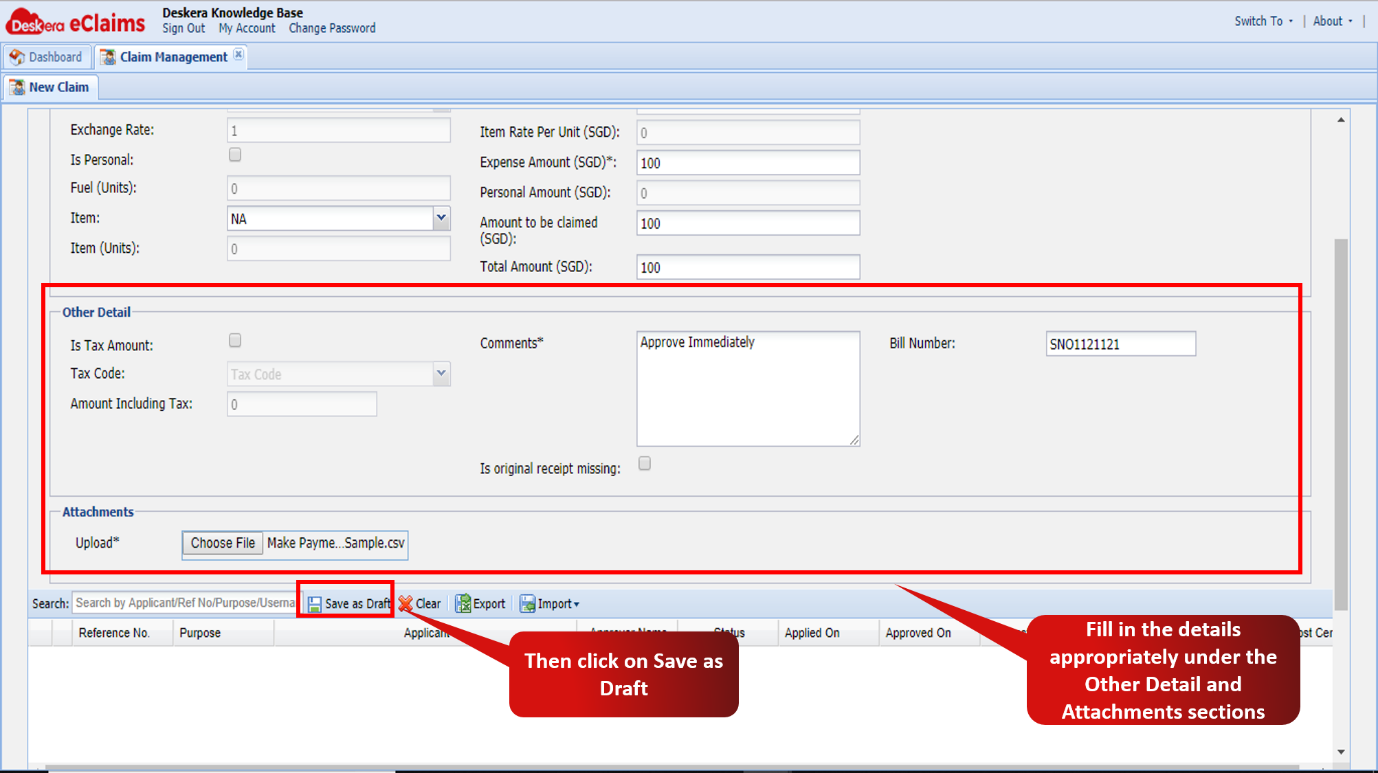 Fig 4.1.10 New Claim Application
Step 11: The draft will now be reflected as is shown below. You can add other expense types and claims in this application using the same process to add multiple drafts to this claim. 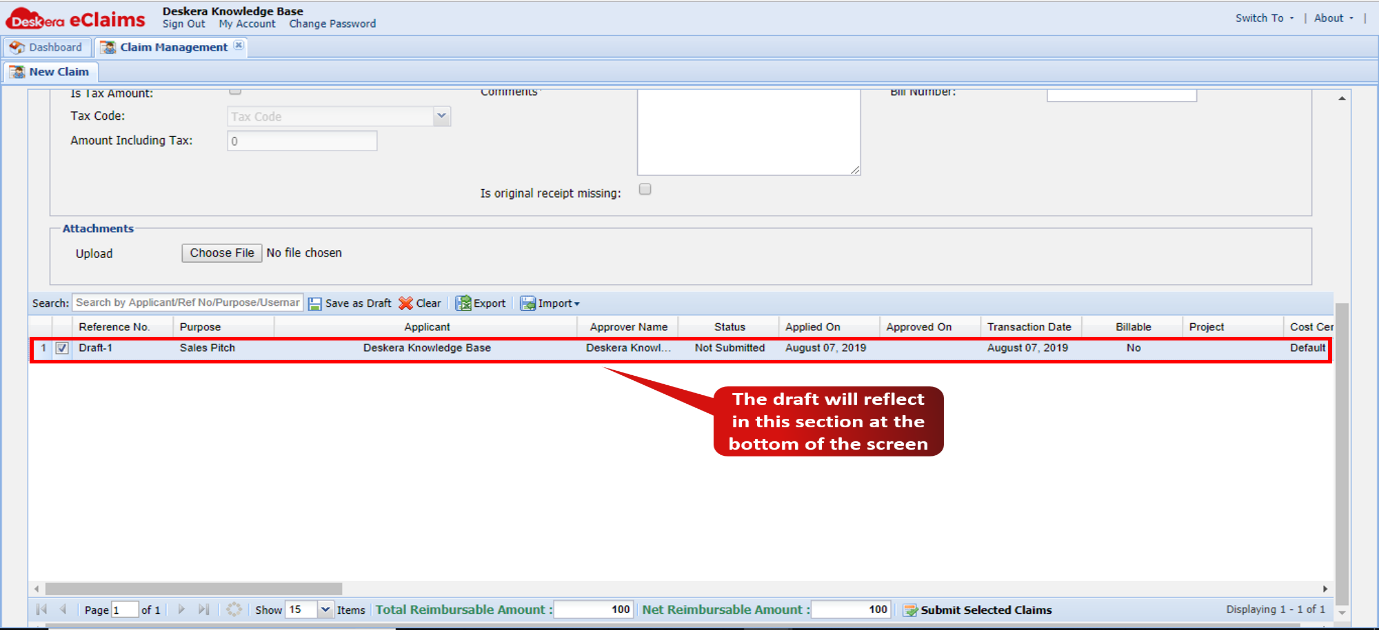 Fig 4.1.11 New Claim Application
Step 12: After adding all the draft claims, select Submit Selected Claims to proceed. 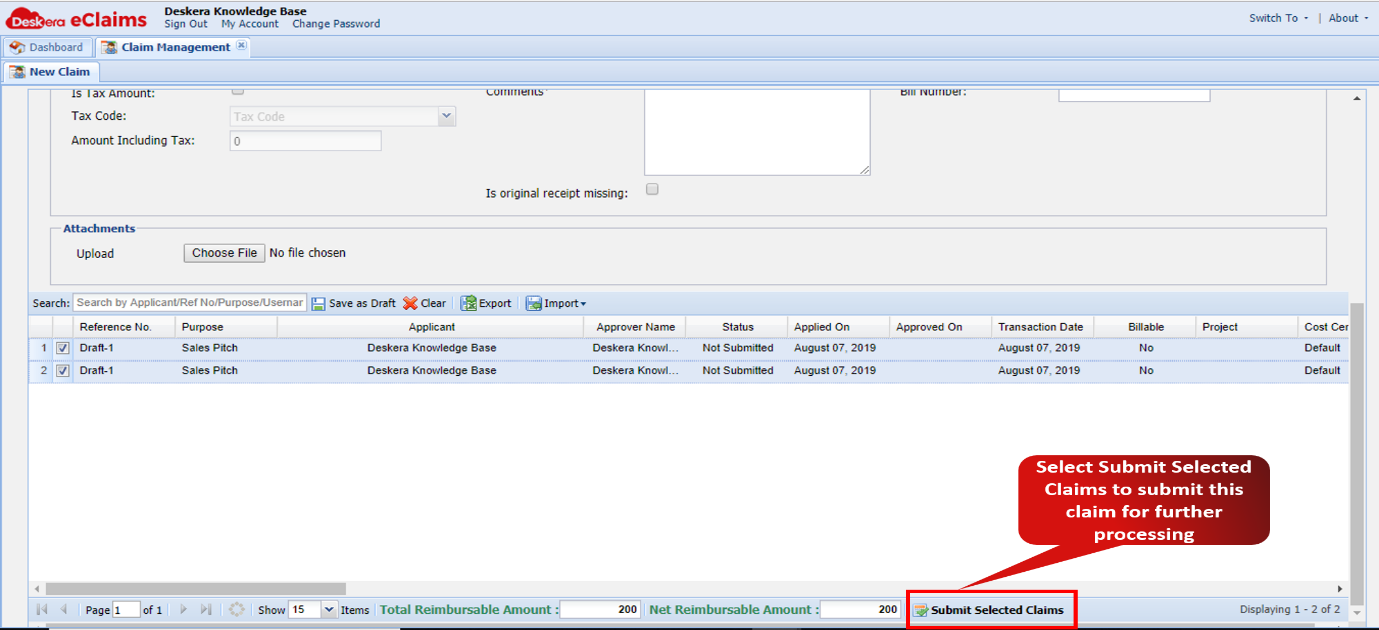 Fig 4.1.12 New Claim Application
Trip Claim Approval
Step 13: This claim will now go for approval to the designated approver. If the user is the administrator of the application then he/she can approve the claim on their own. Select Approve/Reject Claim Applications under Claims on the eClaims Dashboard. 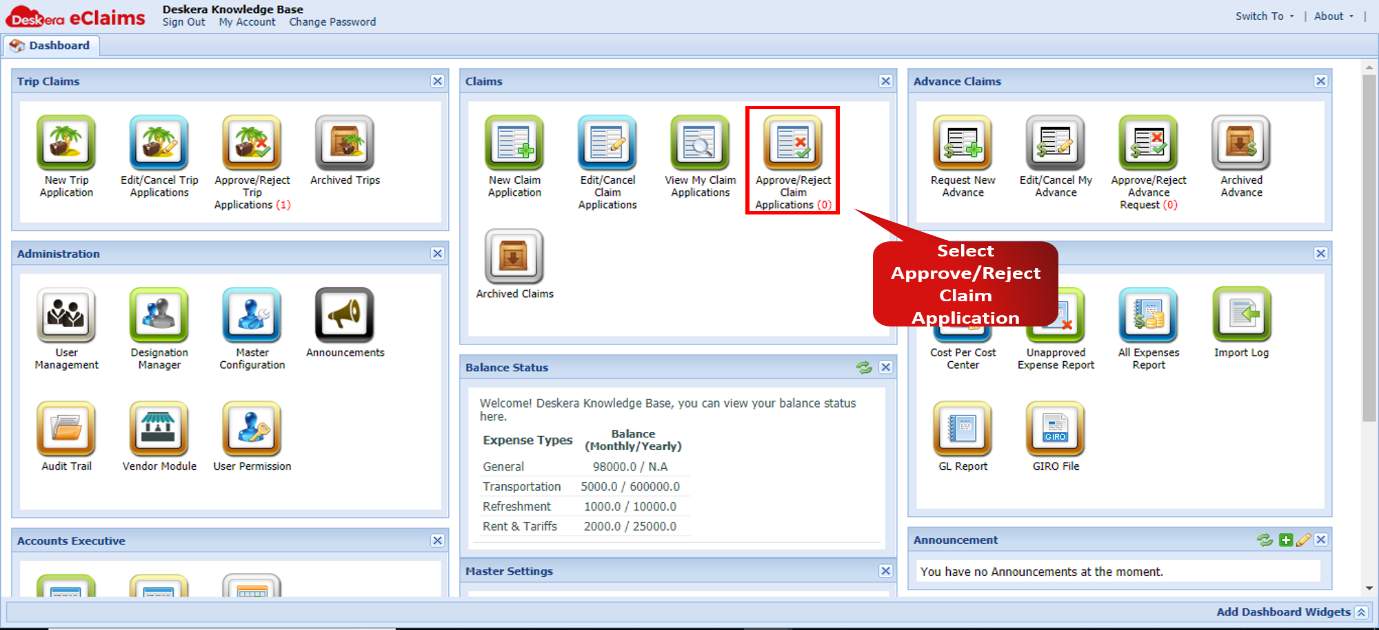 Fig 4.1.13 Claim Approval
Step 14: Select the Claims to be approved and then click on Approve Selected Claims. 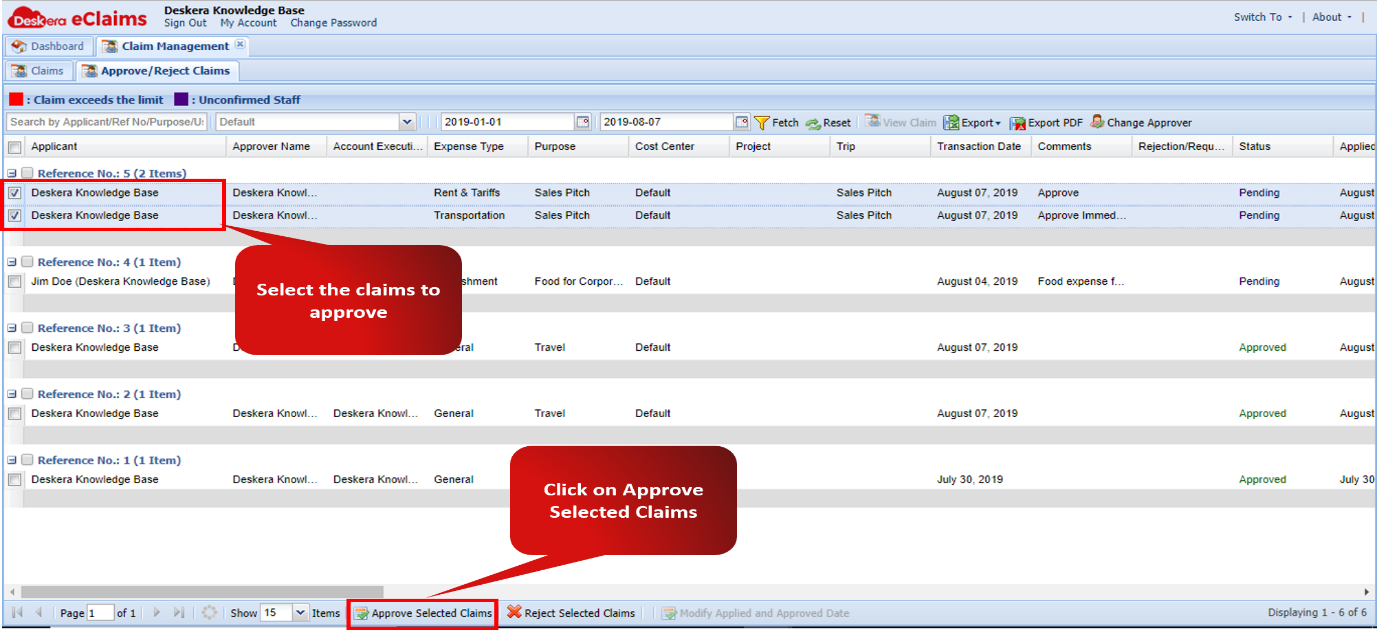 Fig 4.1.14 Claim Approval
Step 15: On the next screen, click on OK to proceed.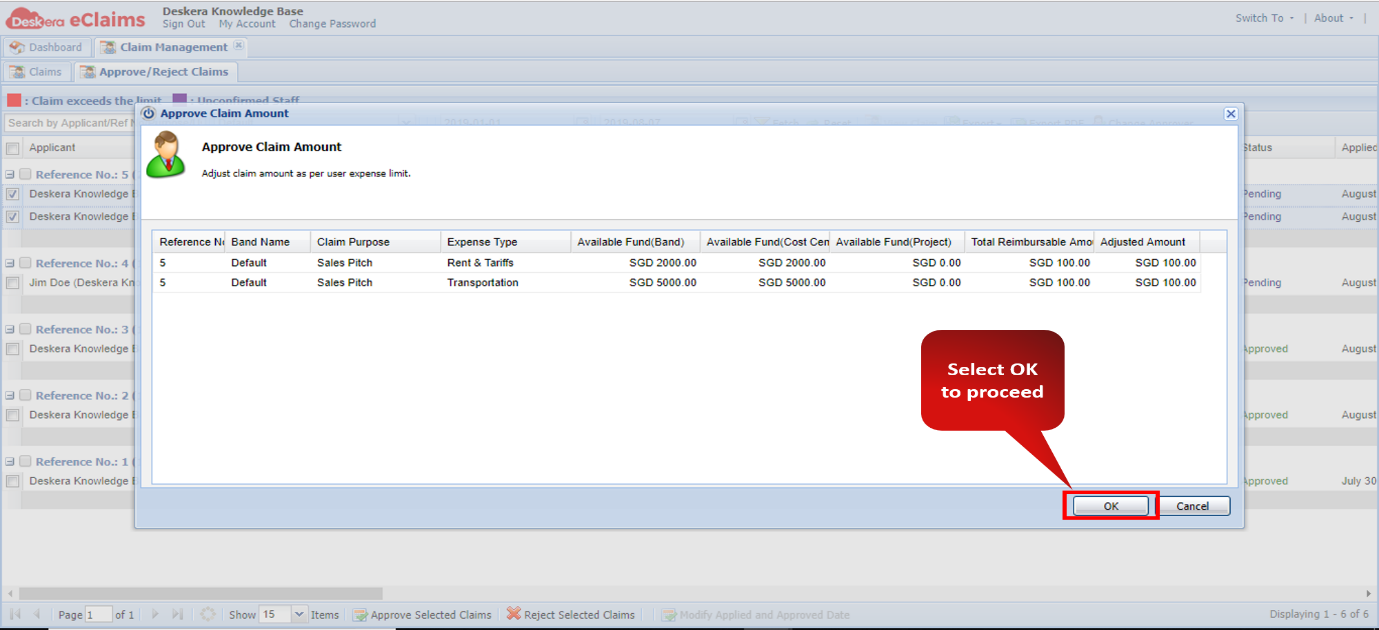 Fig 4.1.15 Approve Claim Amount
Step 16: Select the Accounts Executive to whom you wish to forward this claim for approval from the accounts department and click on OK.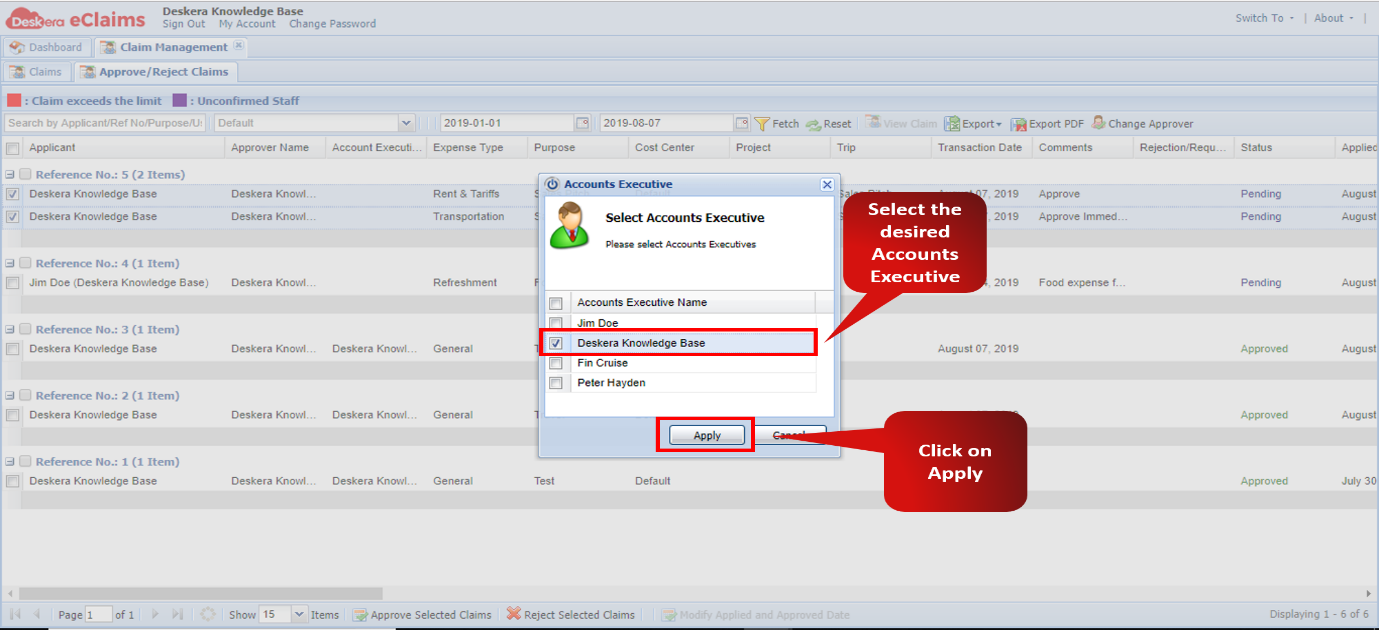 Fig 4.1.16 Accounts Executive
Step 17: Through the login of the Accounts Executive selected in the previous step, click on View Expense Approval Request under Accounts Executive module on the eClaims Dashboard.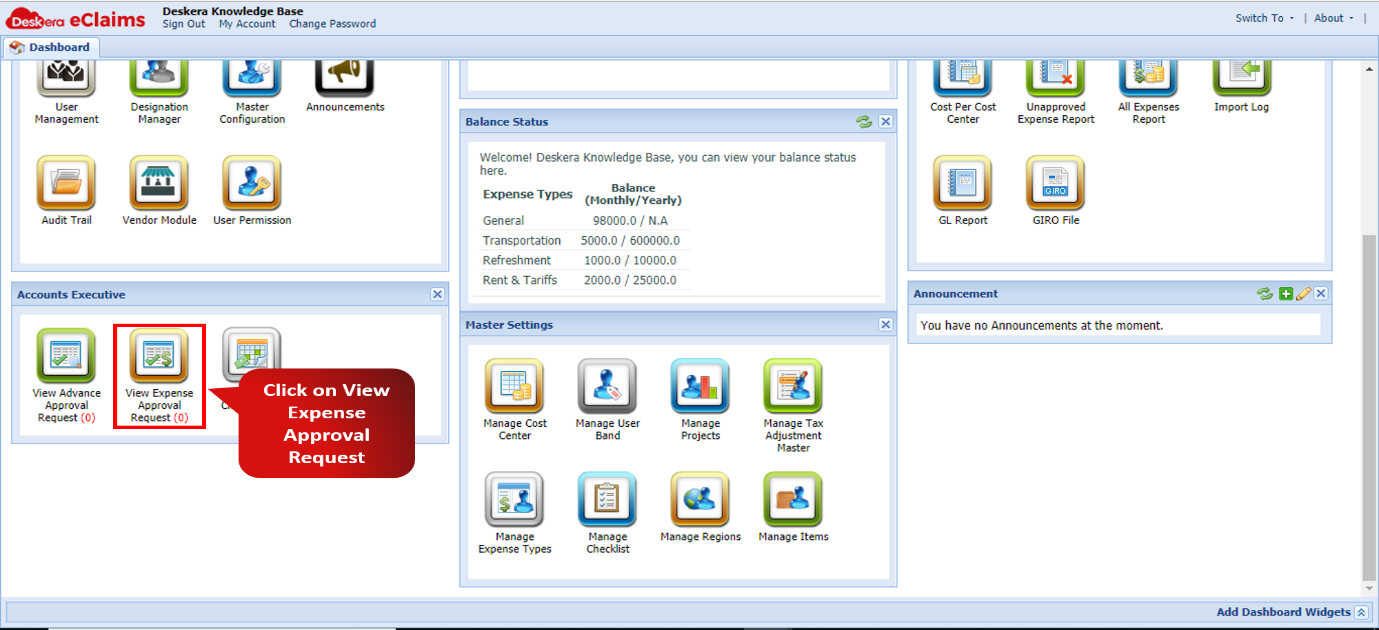 Fig 4.1.17 Accounts Executive
Step 18: Select the Claim that is to be approved, then click on Approve Selected Claims. The Claims are now approved. 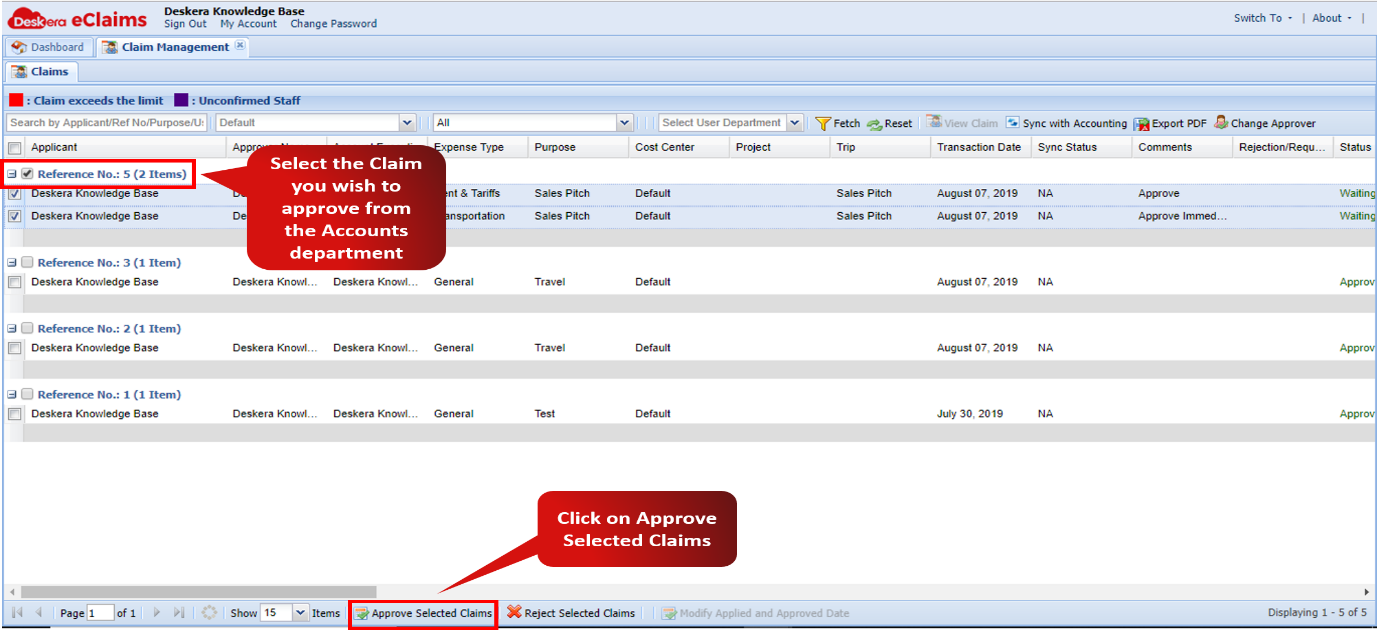 Fig 4.1.18 Accounts Executive
Step 19: To sync these claims with Deskera Accounting application. Select these approved claims and click on Sync with Accounting to complete the sync. 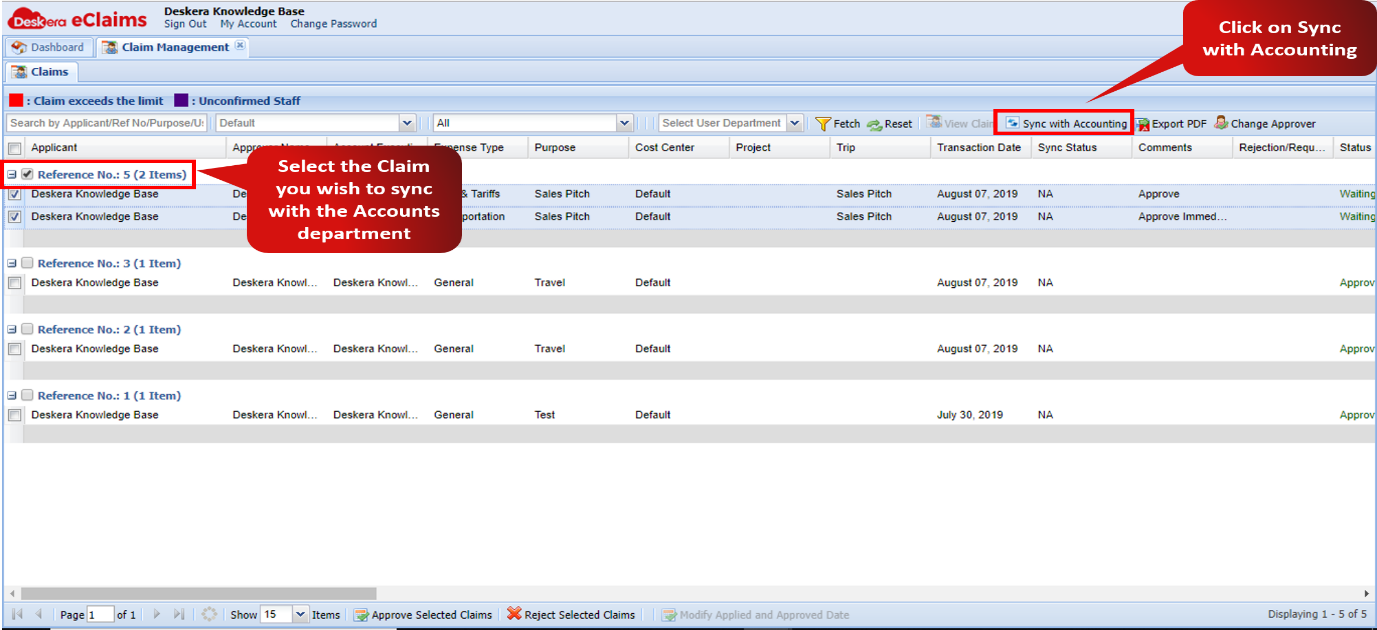 Fig 4.1.19 Accounts Executive
Comments
0 comments
Please sign in to leave a comment.