
The Recruitment Management module comprises of all the features required to successfully carry out a recruitment process. The sequence followed is that of adding the jobs for which there is a requirement, assigning those jobs to recruiting agencies, selecting and rejecting applicants and finally onboarding the selected applicants into the company.
Prerequisites:
- You have your Deskera HRMS application URL in place
- You are the administrator of the HRMS application
- Ensure a good internet connectivity
Step 1: Go to Add Jobs under Recruitment Management widget in HRMS.
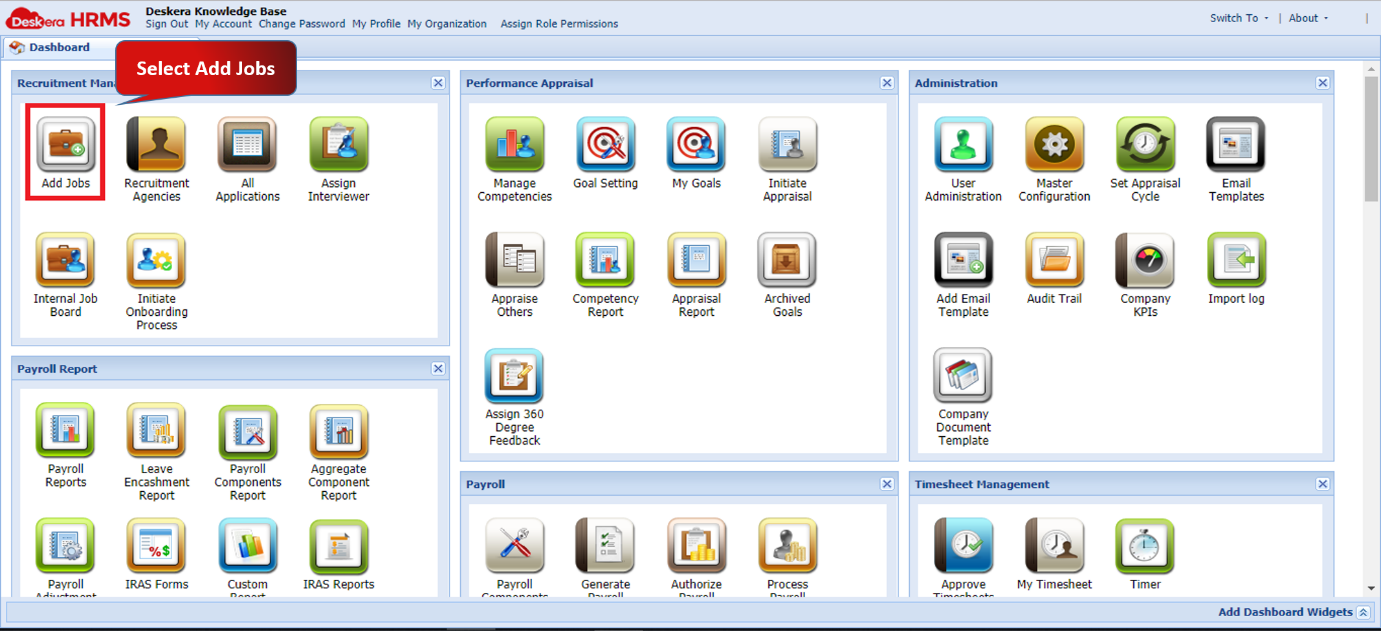
Fig 2.3.1 HRMS Dashboard
Step 2: Under Job Management tab, click on Add Job present on the top left corner of the screen.
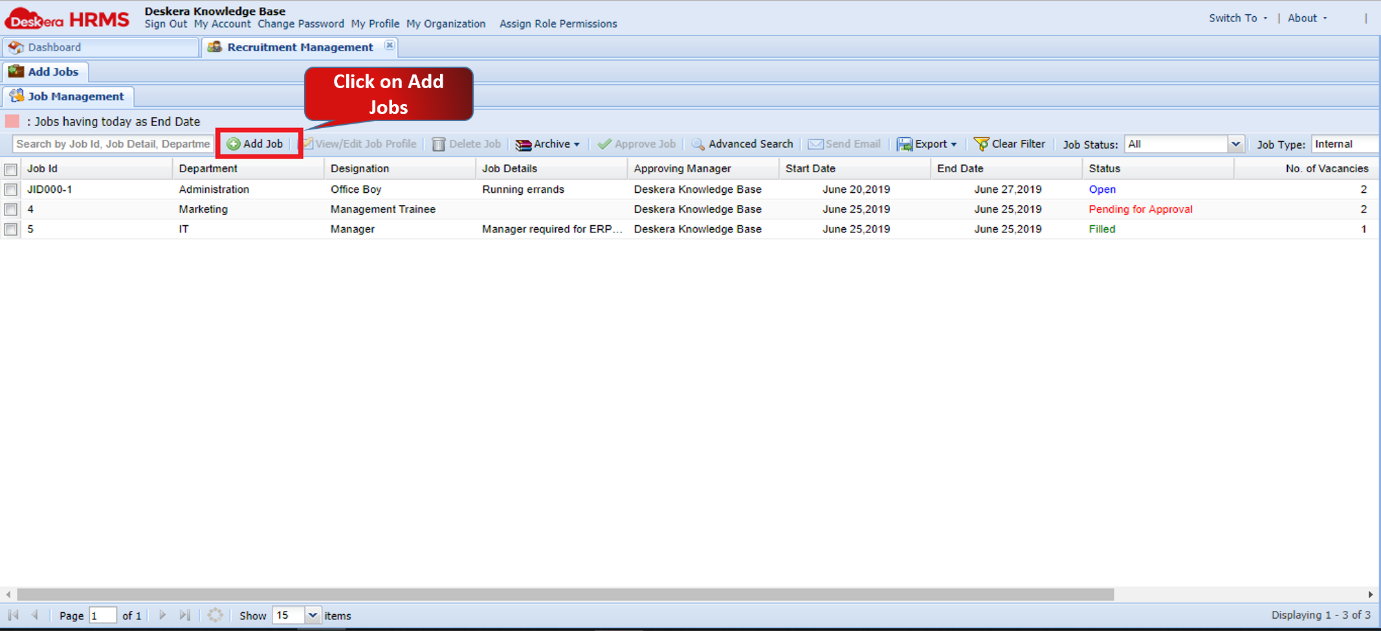 Fig 2.3.2 Job Management
Step 3: Fill in the mandatory details like Position Name, No. of Vacancies, Department, Approving Manager, Start Date, End Date and Job Type and click on Submit. A new job vacancy will open up for applicants.
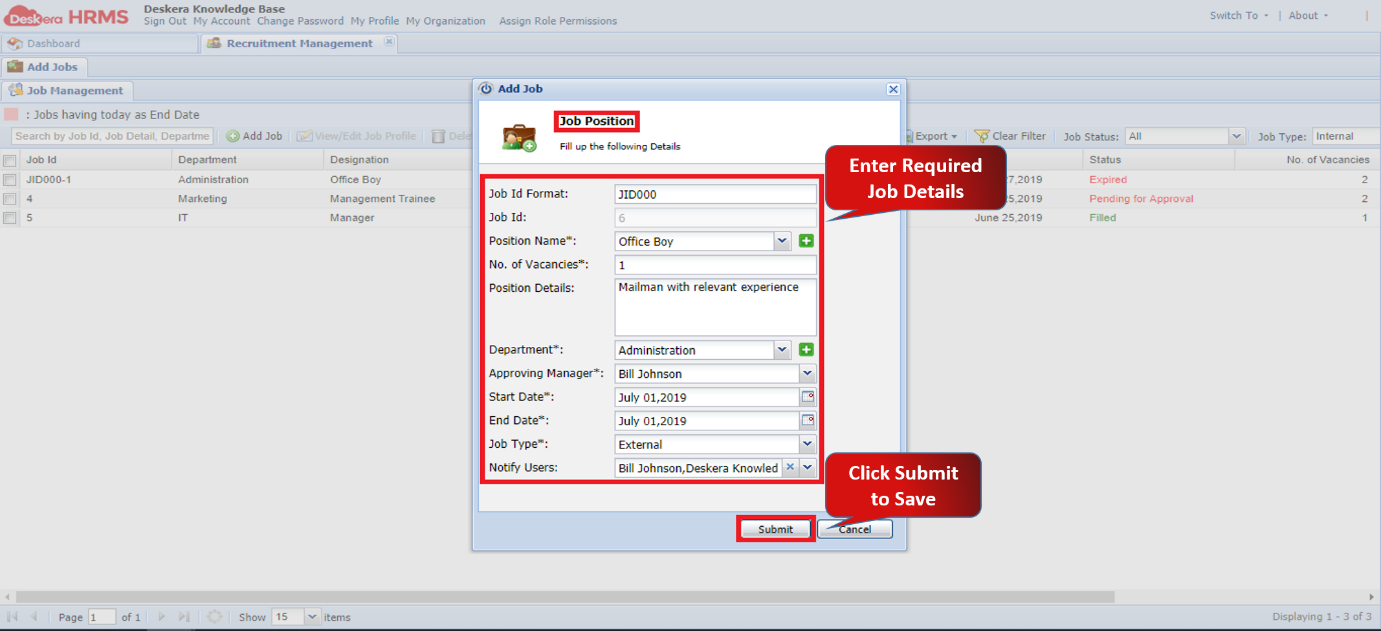
Fig 2.3.3 Add Job
After successfully adding a job, it needs to be approved by the administrator.
Step 4: Under the Job Management window navigate to the Job you want to approve and select it. Its status will be “Pending for Approval”.🡪 Select Approve Job
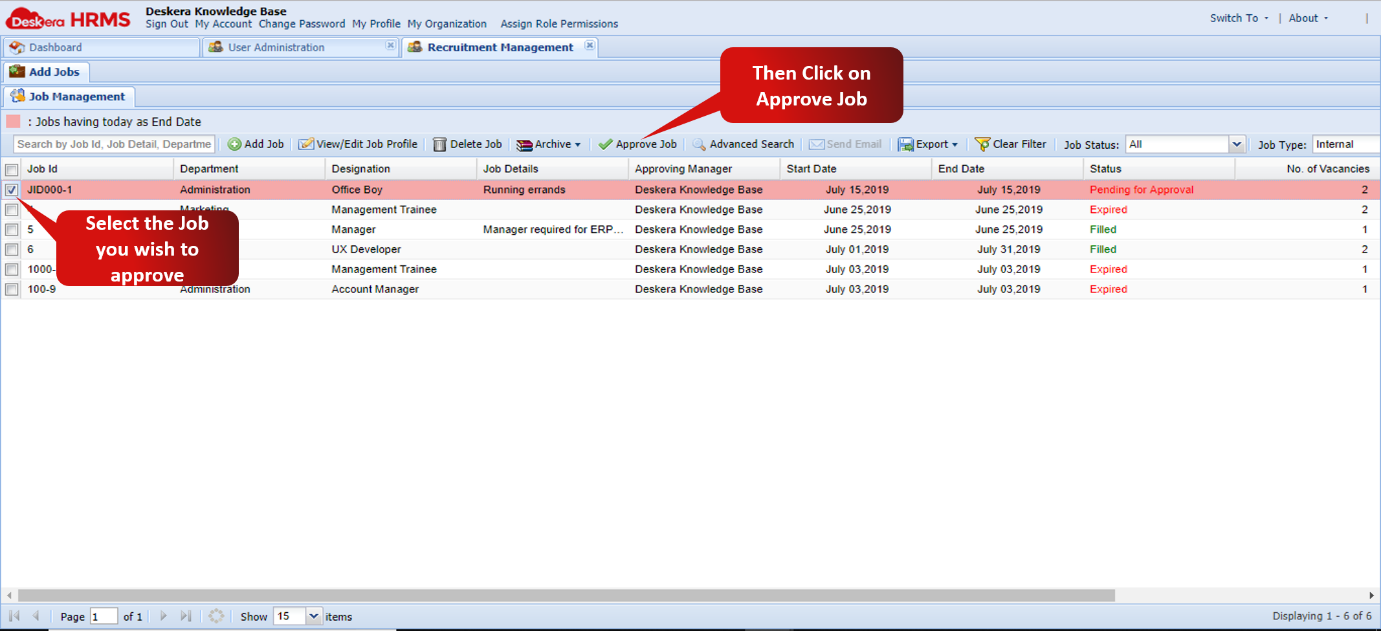
Figure 2.3.4 Approve Job
The job is now approved and its status will change to “Open”.
Note: Ensure that Job Approval Flow has been enabled in the Recruitment Management Configuration under Module Configuration.
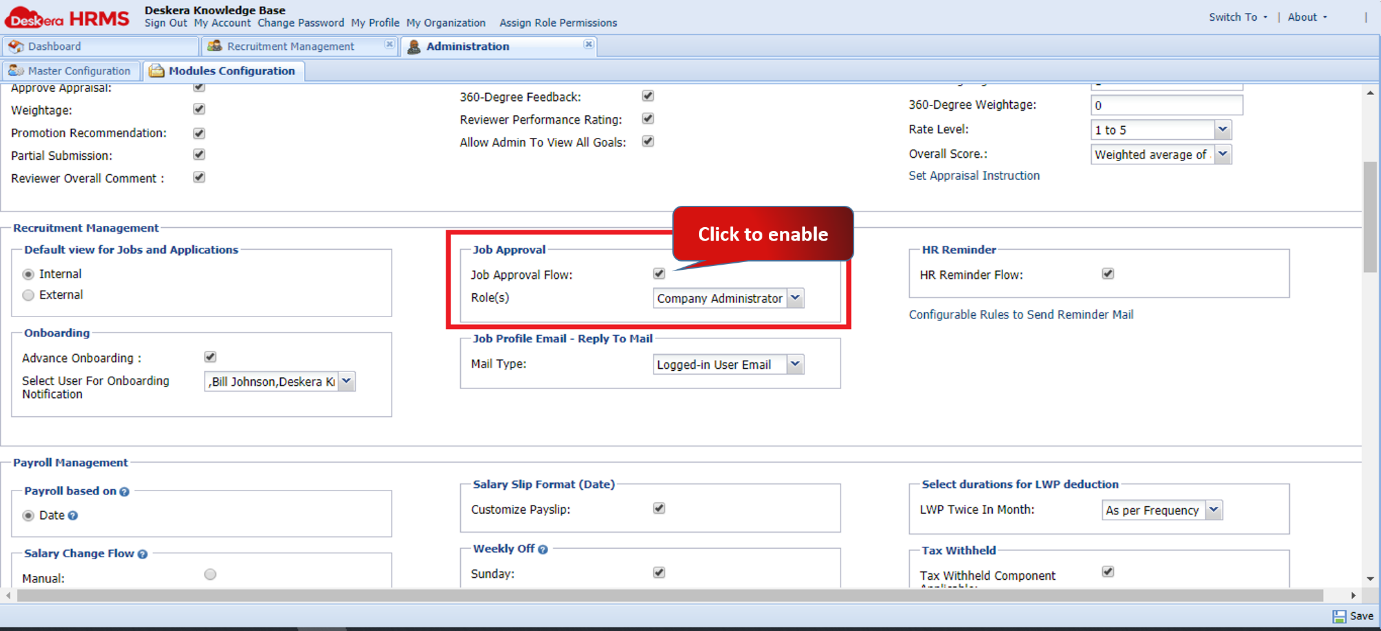
Figure 2.3.5 Job Approval Flow
Since the Job has now been approved by the administrator, it is now possible for applicants to apply for the job.
Step 5: For the approved job, the user can send emails to prospective candidates that contains the link to apply for this job. Selecting the job on the Add Jobs page and then clicking on Send Email opens the window as shown in the following screenshot. Fill in the Email IDs of the prospective candidates and enter the Email ID on which you wish to receive the reply from the prospective candidates. Then click on Send Email.
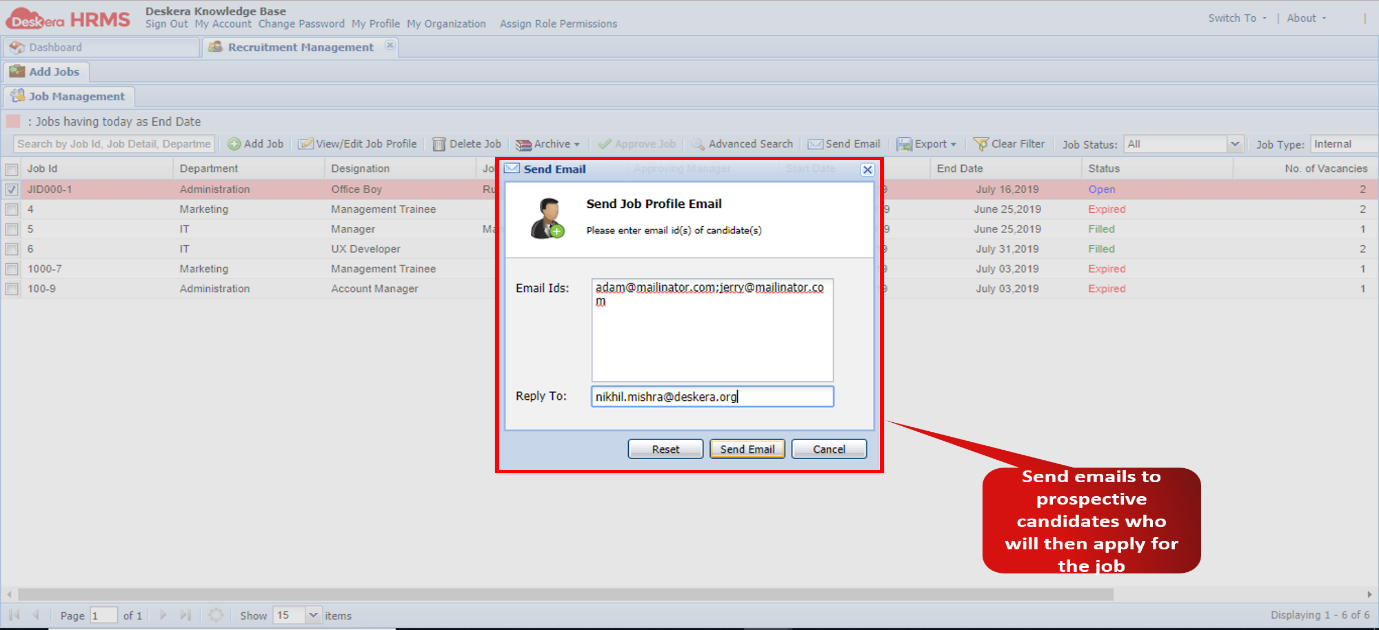
Figure 2.3.6 Send Job Profile Email
Step 6: The prospective candidates will receive a link that will redirect them on the page wherein they can apply for this job opening. The following screenshot illustrates the same. The prospective candidates have to click on Apply Online to proceed with the application.
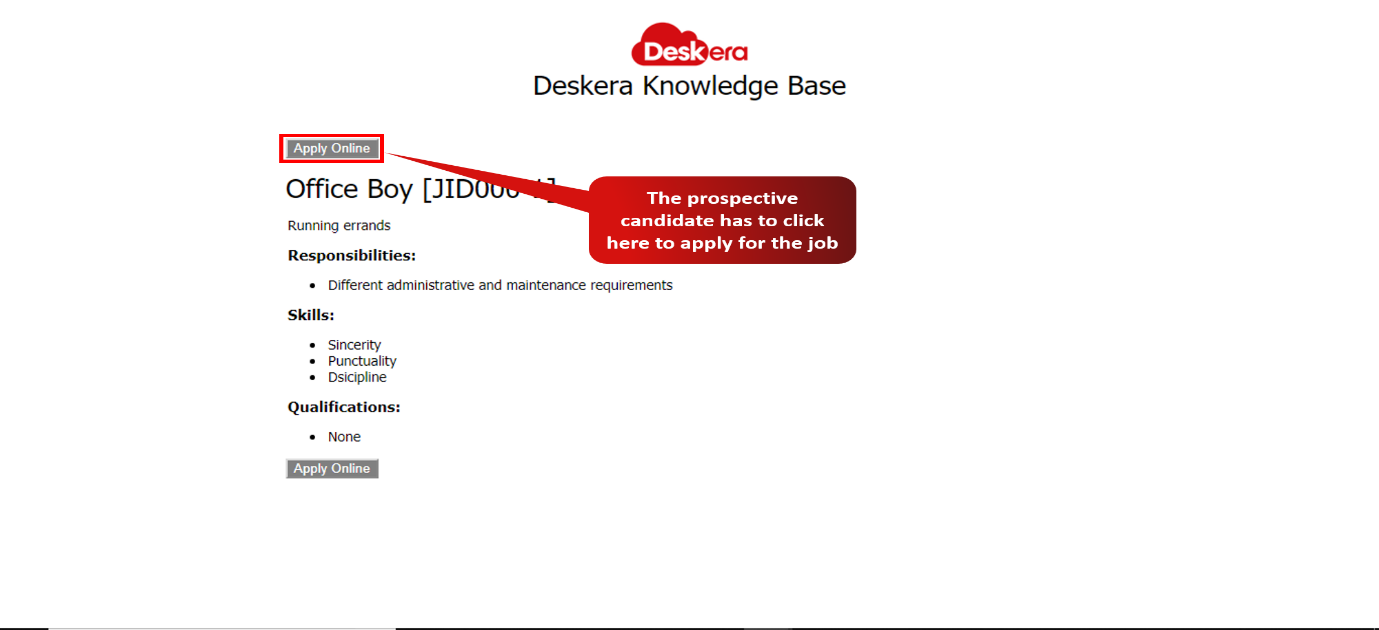
Figure 2.3.7 Apply Online
Step 7: The Job Application Form consists of fields required to be filled in by the candidate such as Name, Contact Details, Address, Resume etc.
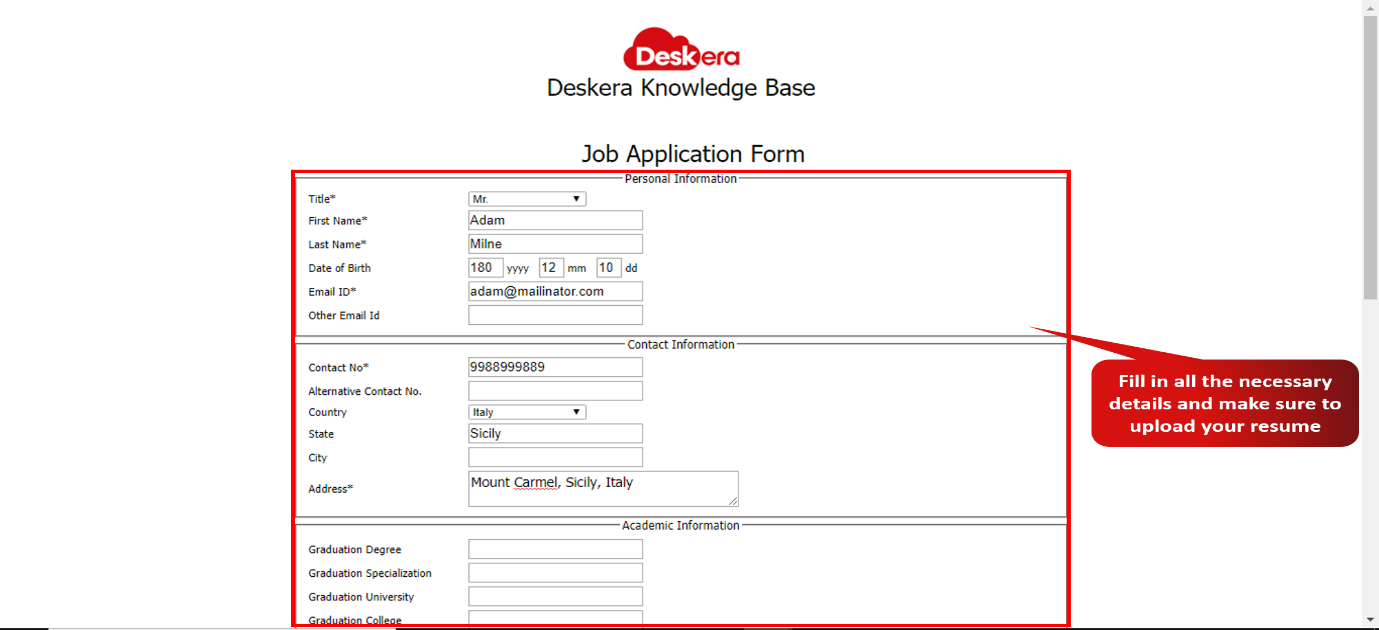
Figure 2.3.8 Job Application Form
Step 8: The candidate, after having submitted the Job Application Form, will appear under the External Applicants List found under All Applications sub-module on the Dashboard.
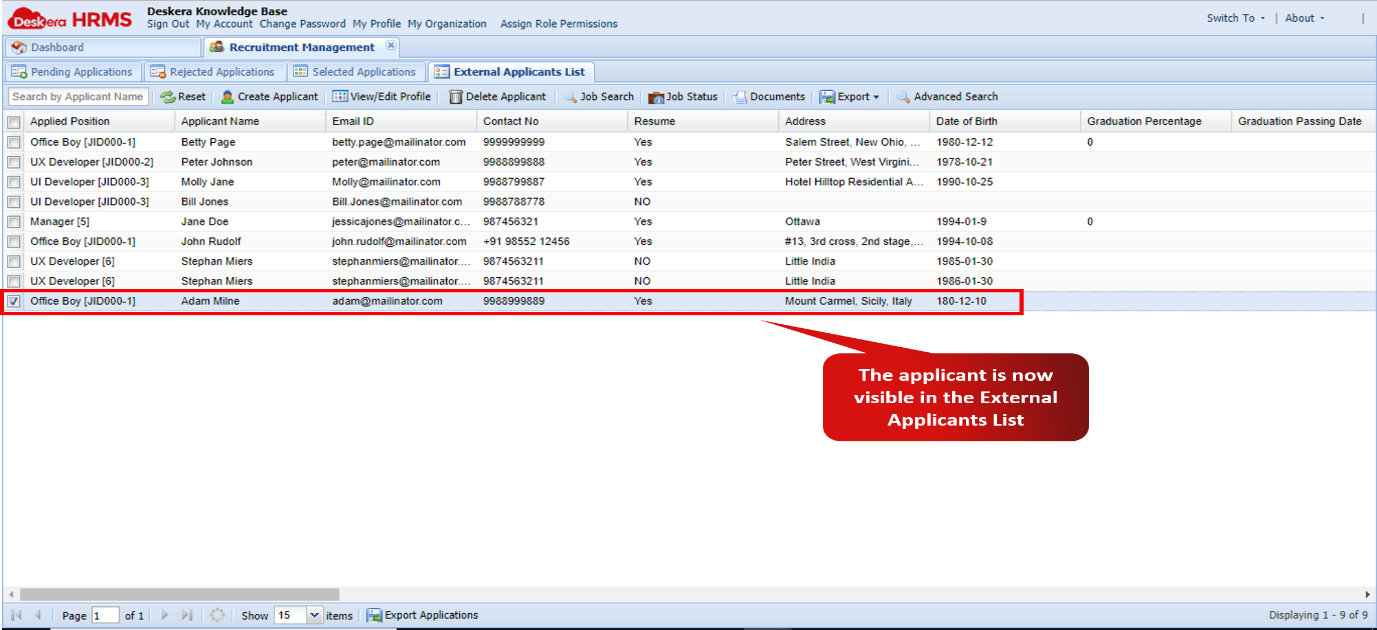
Figure 2.3.9 External Applicants List
Step 9: Alternately, the user can directly add an applicant to the list by choosing Create Applicant button on the External Applicants List tab
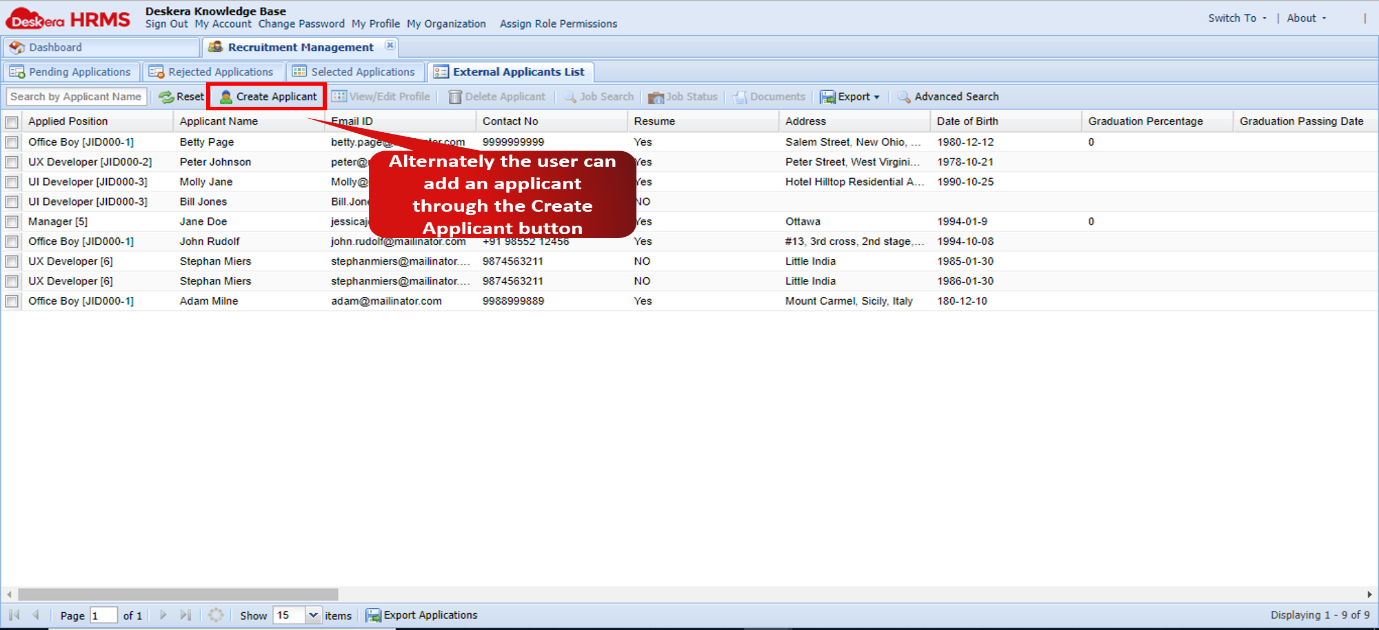
Figure 2.3.10 Create Applicant
Step 10: The user has to select the Job Position for which they are adding the applicant to the list, Name of the candidate, Email ID and Contact Number. Click on Create to complete adding the applicant for further processing.
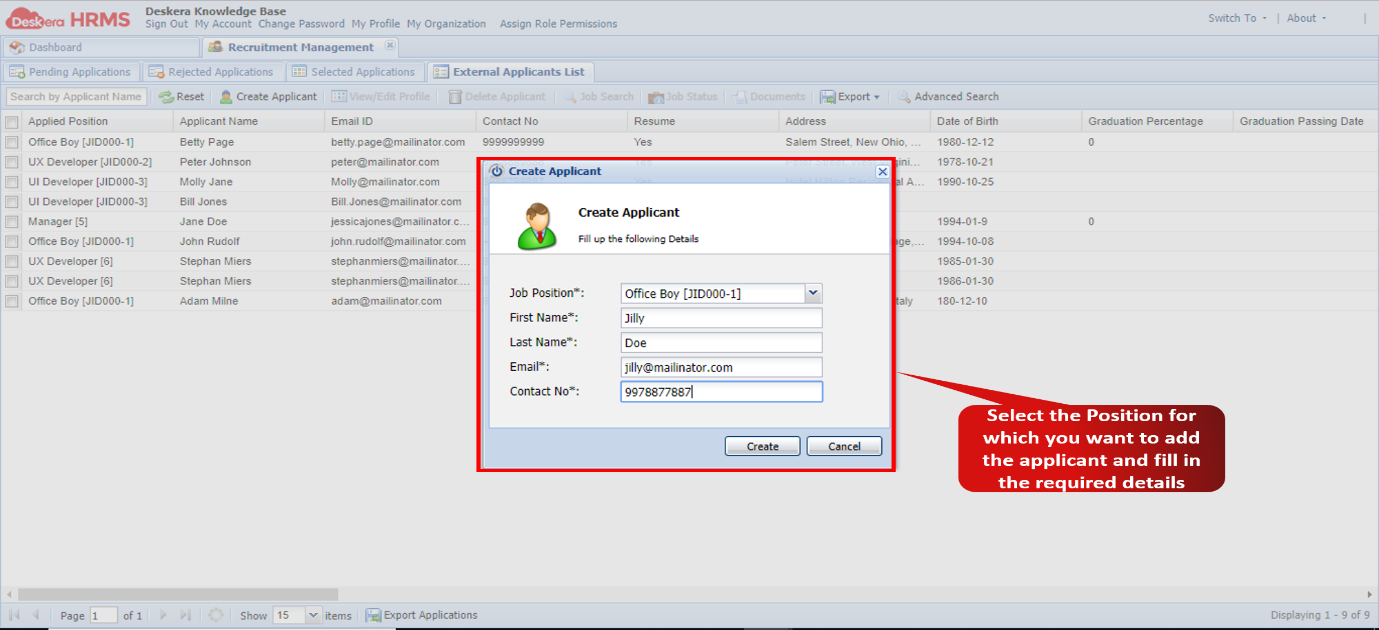
Figure 2.3.11 Create Applicant
Step 11: For this applicant created using the Create Applicant feature, the user now needs to add important details and upload the resume. Select the candidate and click on the View Edit Profile feature on the External Applicants List window.

Figure 2.3.12 View/Edit Profile
Step 12: Fill in all the necessary details for the applicant. Ensure that you add the resume of the candidate as well. Then tick the checkbox in the Disclaimer stating “I have read & agree to the legal disclaimer” and click on Submit Resume to continue with the application process.
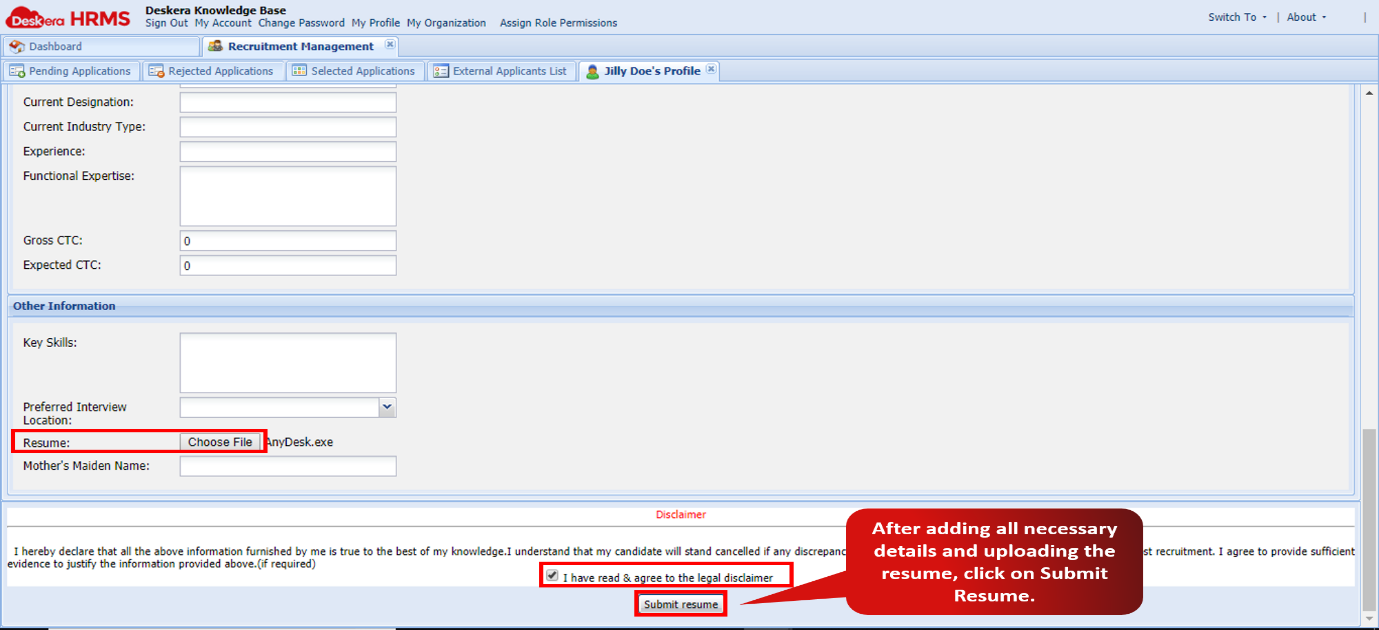
Figure 2.3.13 Submit Resume
Step 13: Now for the applicant entered in the list using Create Applicant feature, the user needs to map him/her to a job. Select the applicant and click on the Job Search feature on the External Applicants List window.
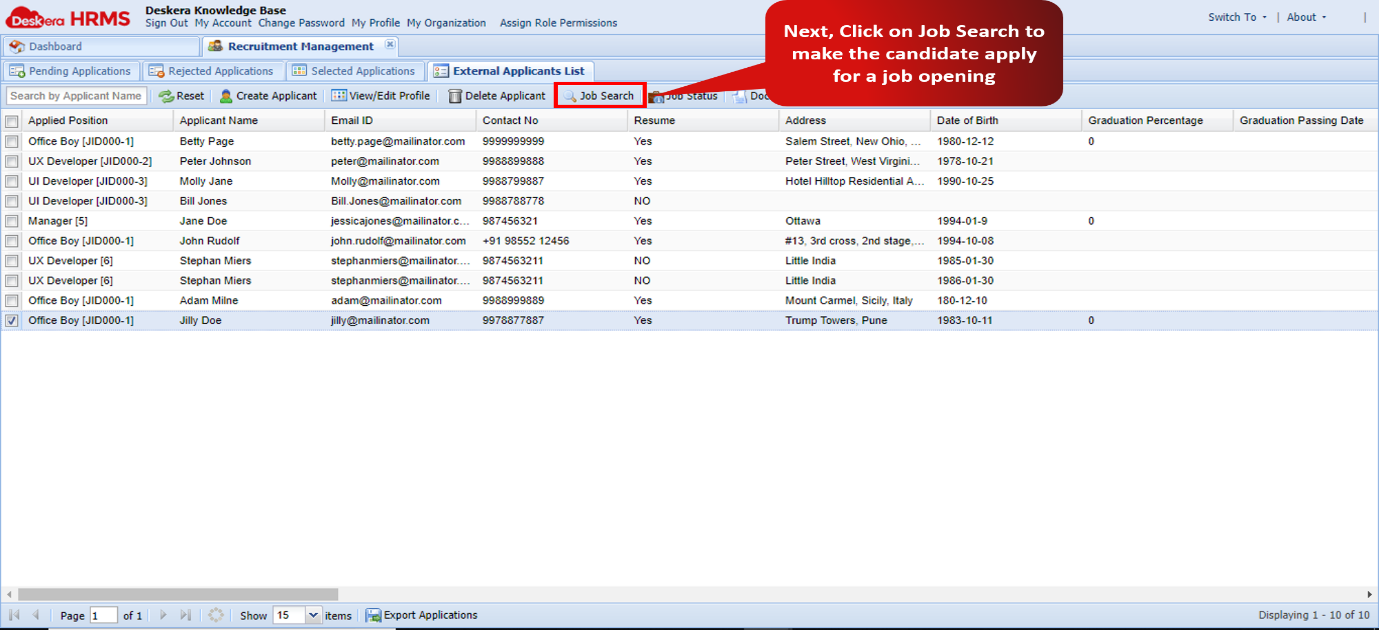
Figure 2.3.14 Job Search
Step 14: Select the Job you wish the candidate to apply to and select Apply For Job feature. The candidate will now appear under the Pending Applications window.
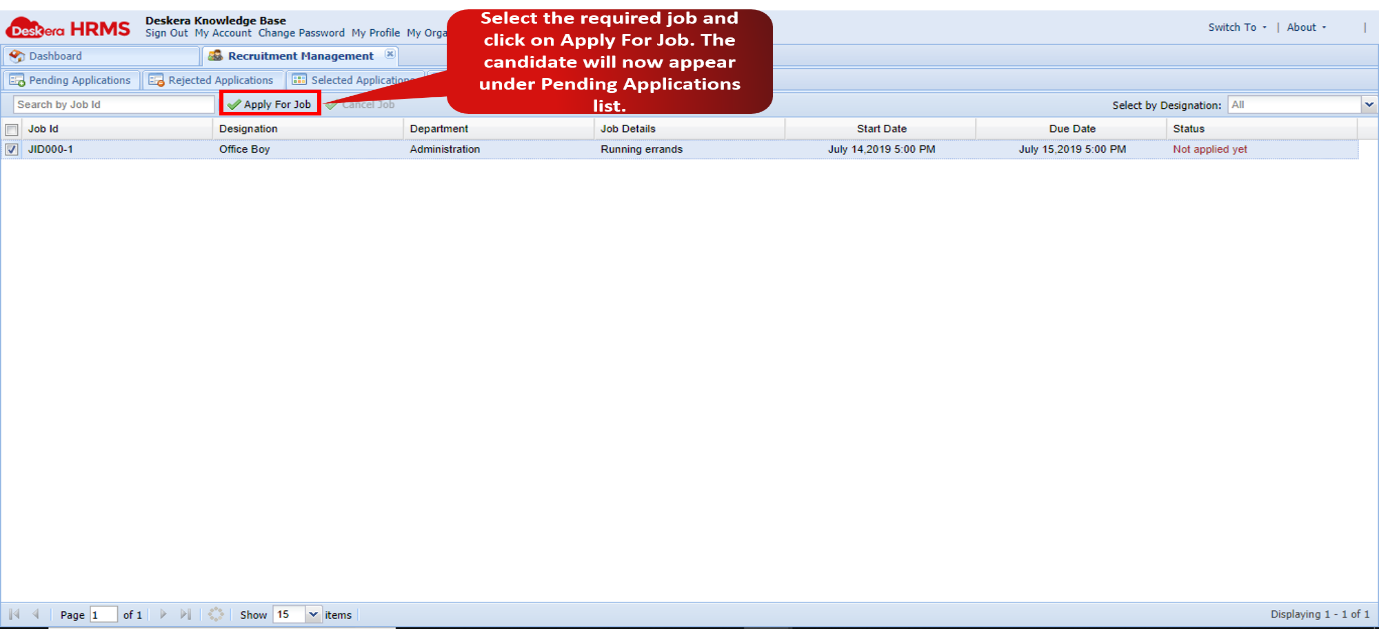
Figure 2.3.15 Apply For Job
Step 15: To shortlist a candidate for processing him/her for further rounds, select the desired candidate on the Pending Applications window and click on the Edit Prospect button.
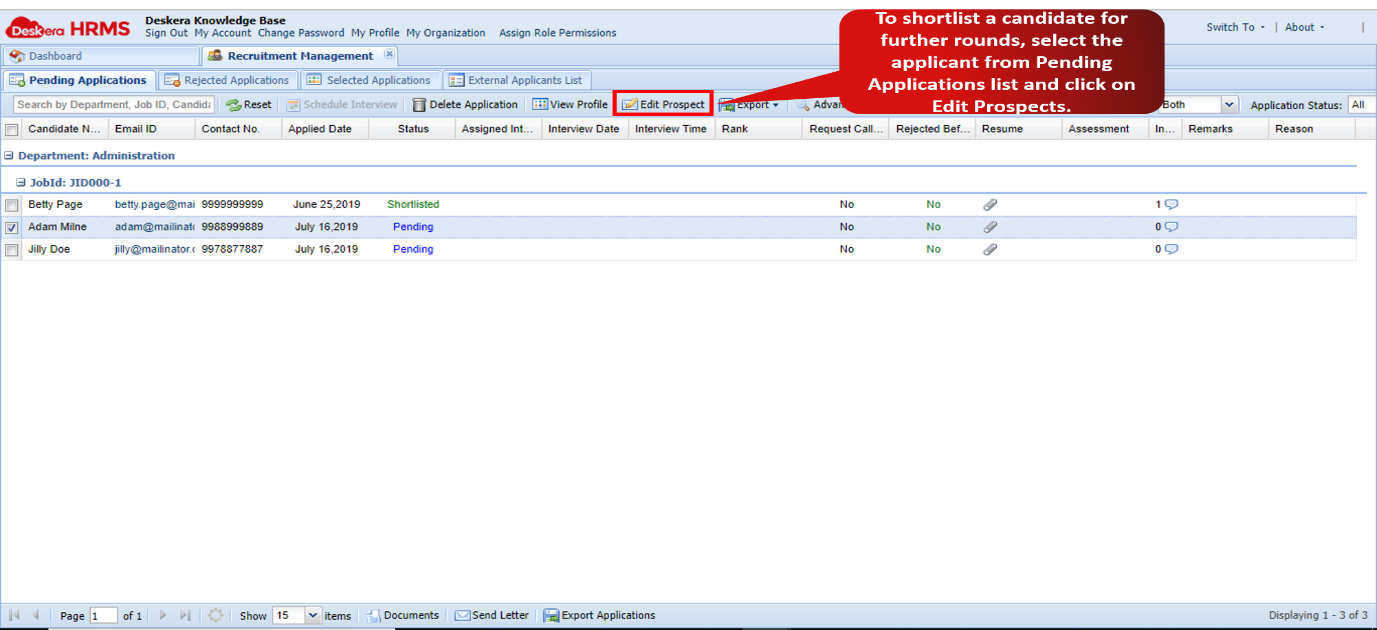
Figure 2.3.16 Edit Prospect
Step 16: On the Edit Prospect window that pops up, change the status to Shortlisted and fill in the other required details. Then click on Save. You can now Schedule and Interview for the shortlisted candidate.
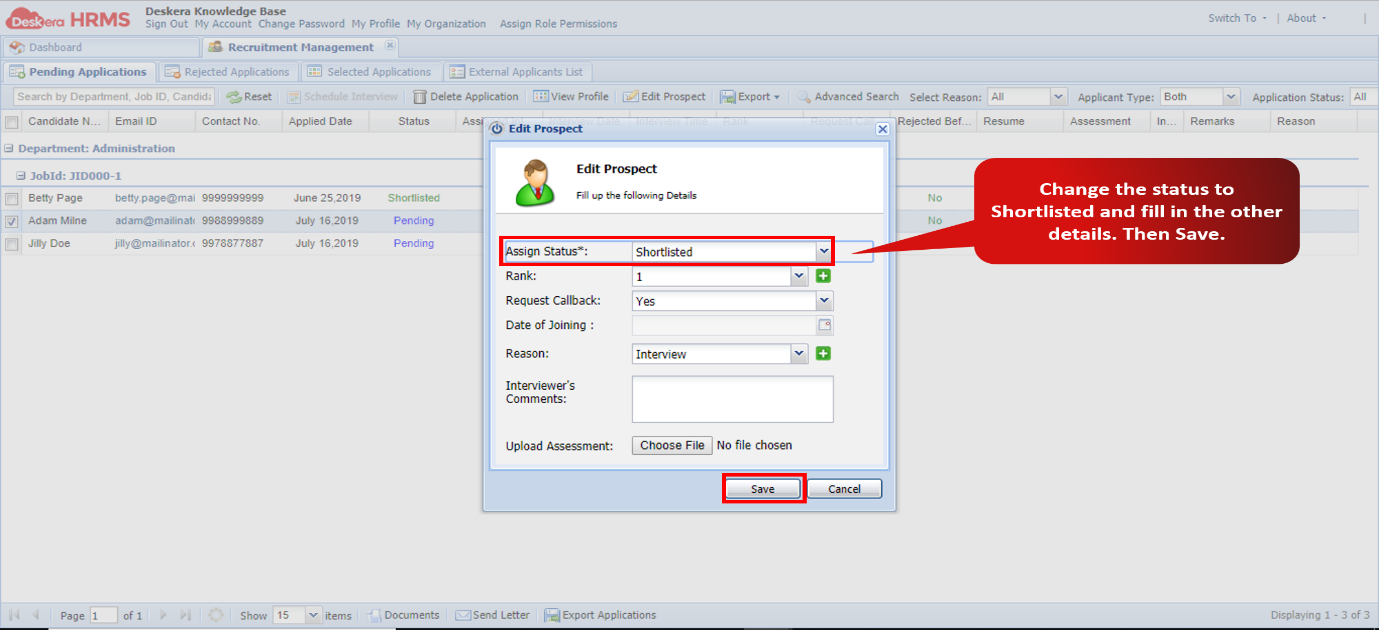
Figure 2.3.17 Edit Prospect
Step 17: Now the user can schedule an interview for the shortlisted candidate. Select the candidate on the Pending Application window and click on the Schedule Interview feature. In the Schedule Interview pop-up window that follows, fill in the details of the interview such as date, time, location etc. Check the tick-box against the Send Email option to send the interview details to the applicant. Then click on Save.
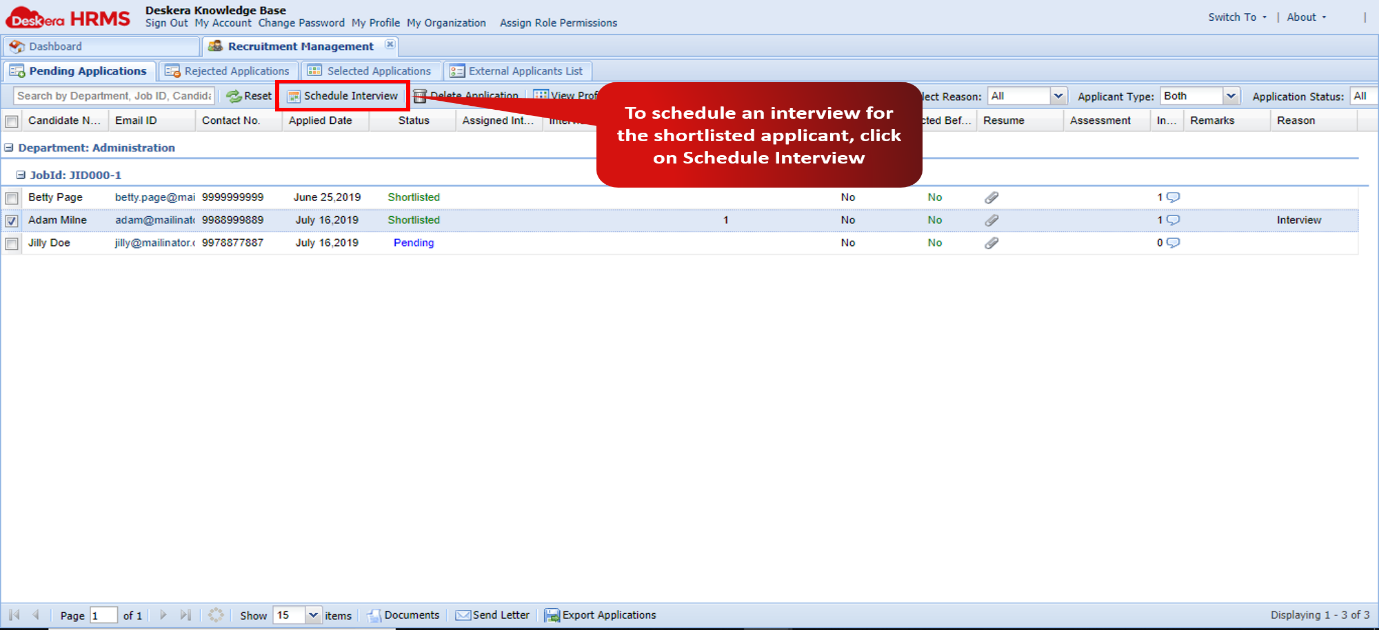
Figure 2.3.18 Schedule Interview
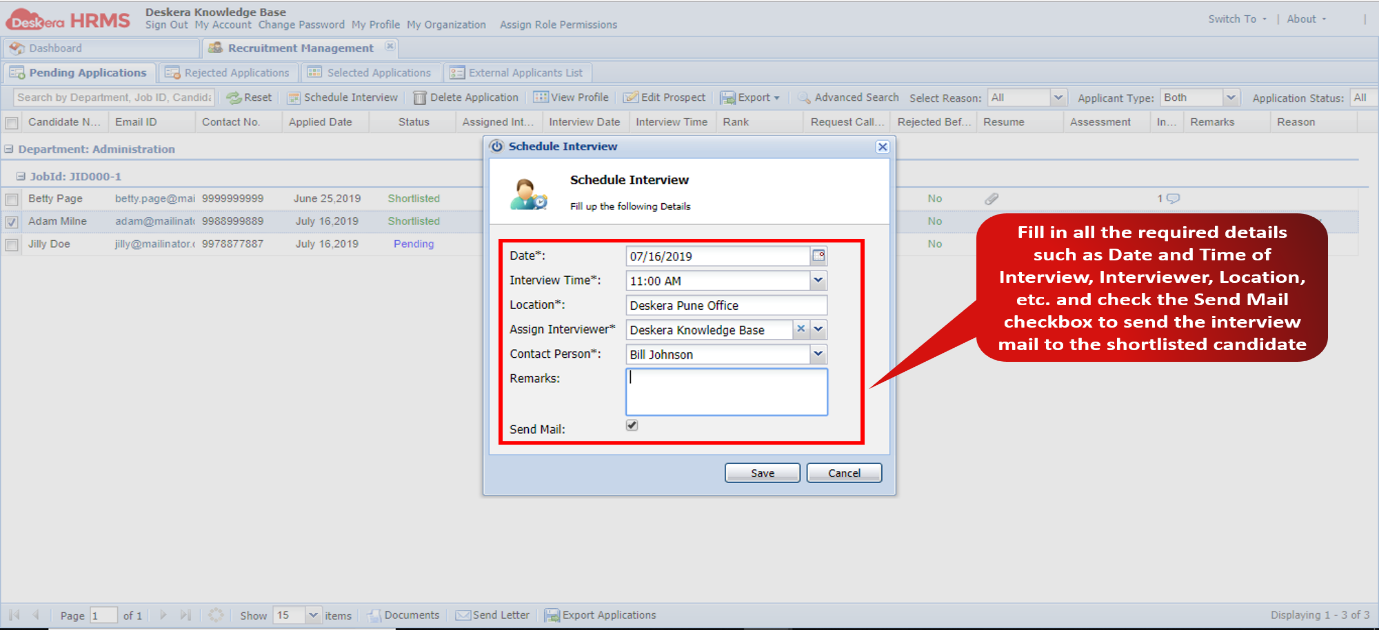
Figure 2.3.19 Schedule Interview
Step 18: After conducting the interview if the interviewer decides to select the candidate, then on the Pending Applications page the user has to change the Assign Status to Selected, fill in the other required details and click on Save. The candidate will now appear under the Selected Applications page.
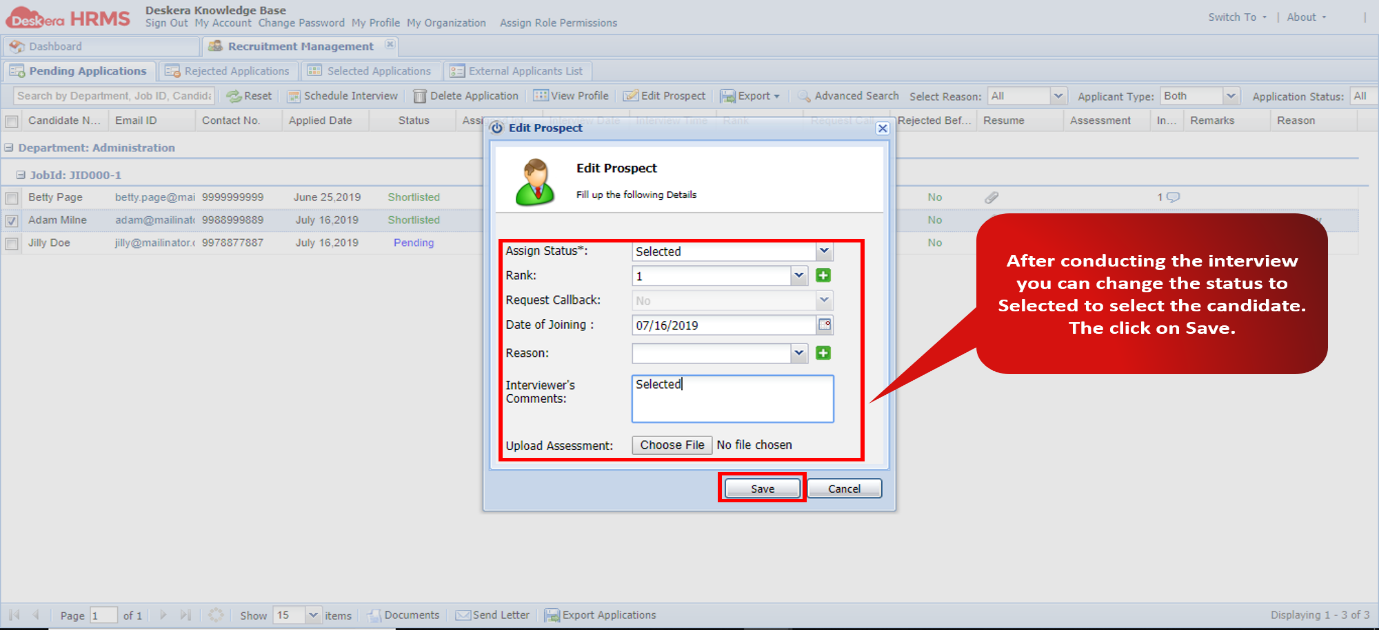
Figure 2.3.20 Selected
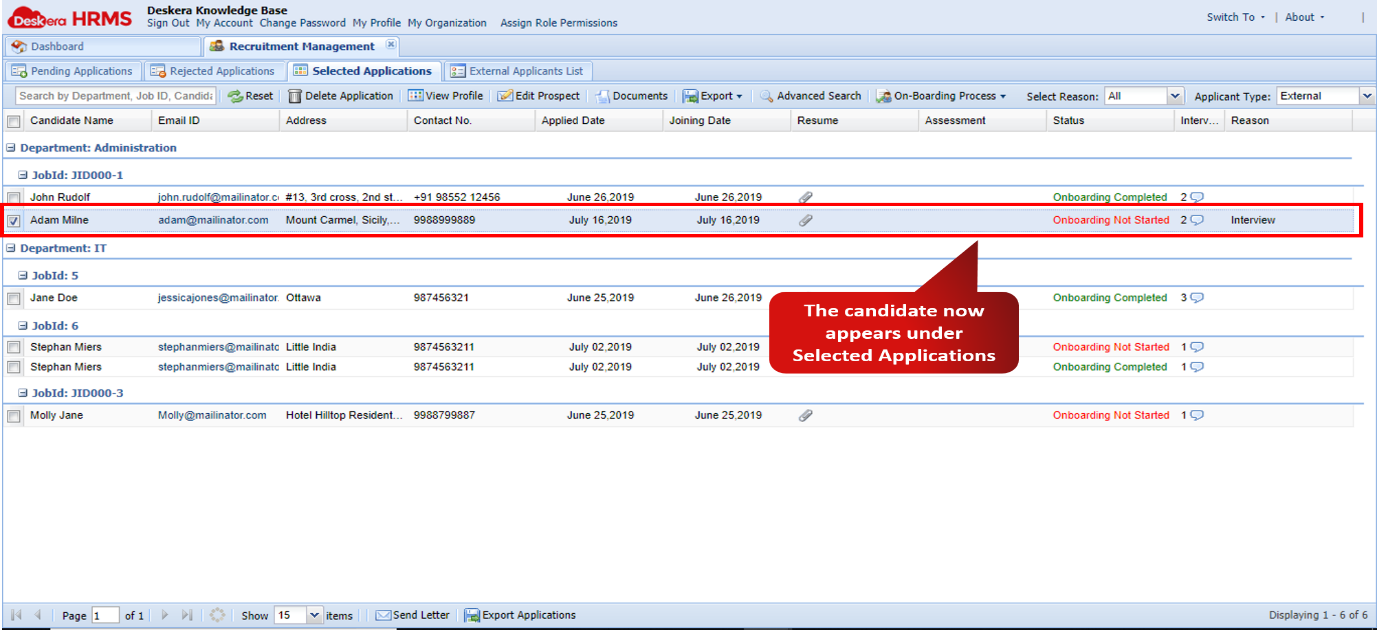
Figure 2.3.21 Selected Applications
Step 19: To On-Board the selected candidate into the company, select the candidate. Then click on the On-Boarding Process feature and select Initiate On-Boarding.
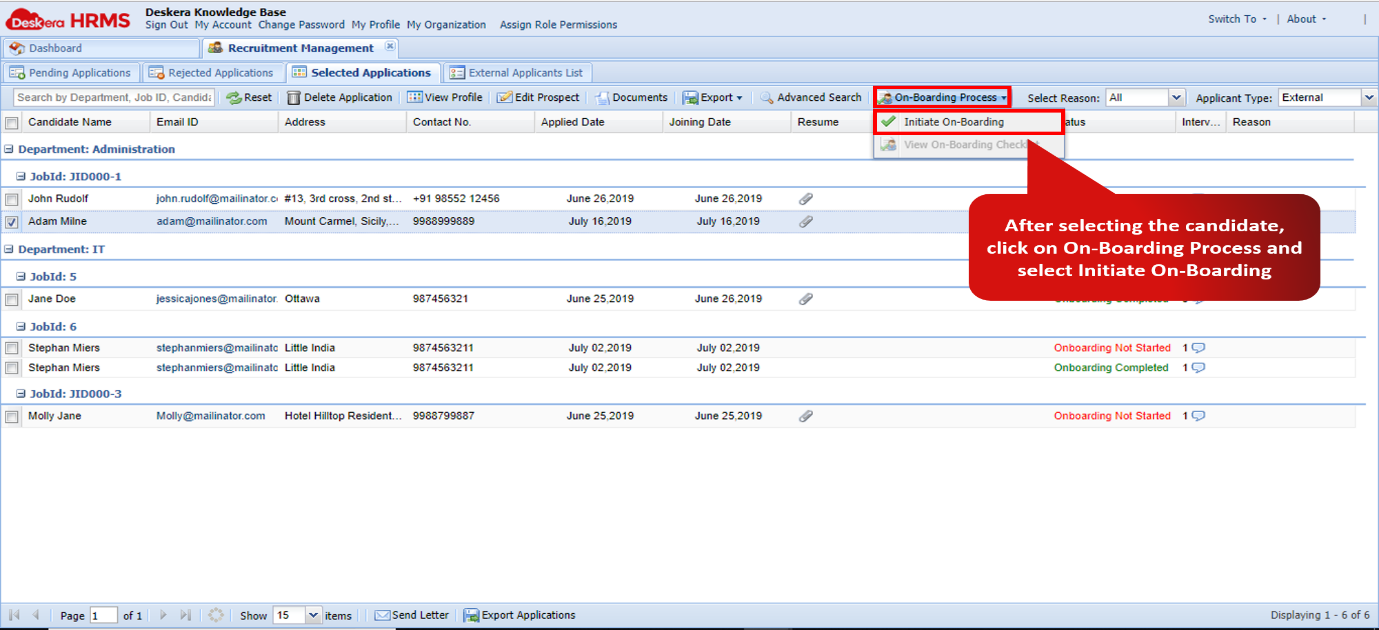
Figure 2.3.22 Initiate On-Boarding
Step 20: Now select the candidate whose On-Boarding was just initiated and select View On-Boarding Checklist.
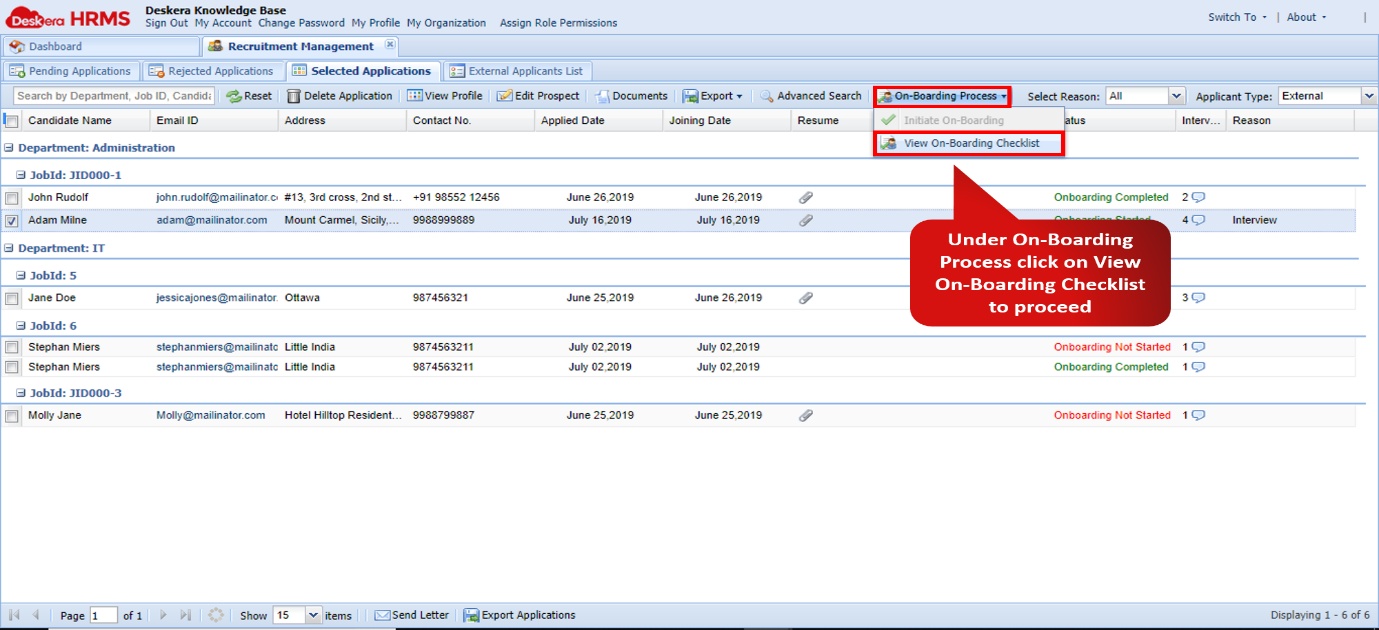
Figure 2.3.23 View On-Boarding Checklist
Step 21: Tick all the checkboxes against the respective onboarding tasks, then click Next.
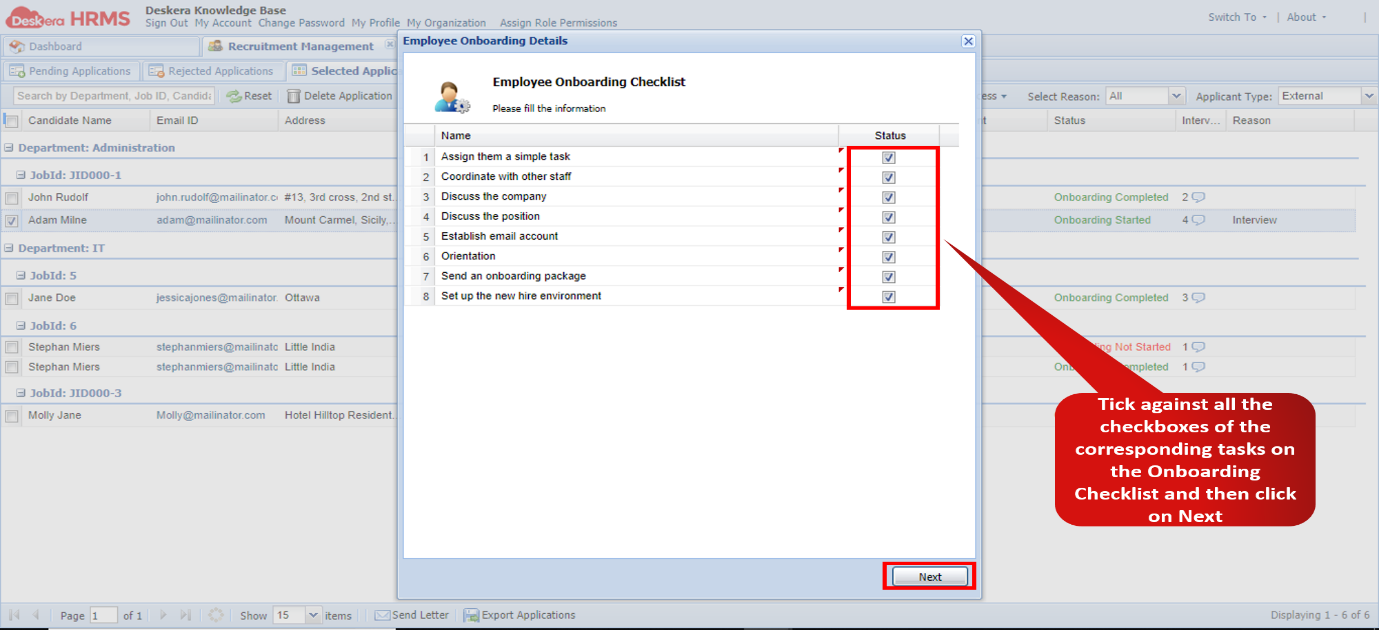
Figure 2.3.24 Employee Onboarding Checklist
Step 22: Fill in the required details for the applicant being on-boarded and select on Create Employee. The employee has successfully been on-boarded and is now visible under the User List found under the User Administration sub-module on the Dashboard.
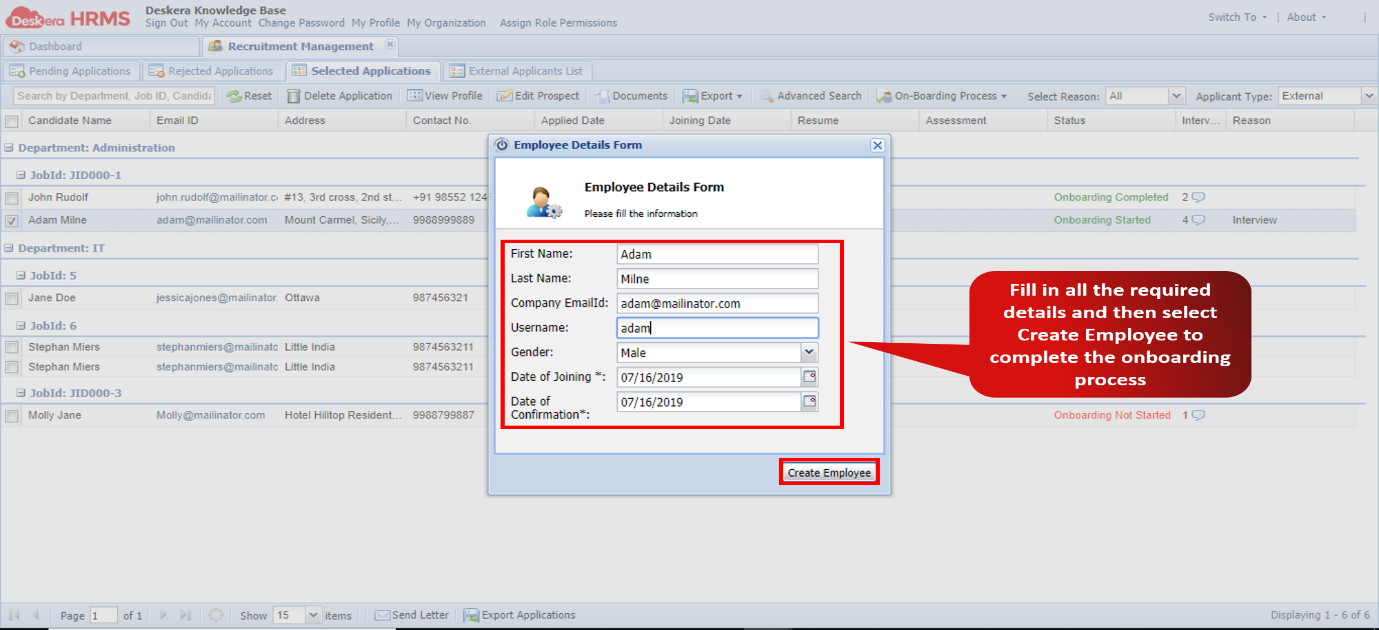
Figure 2.3.25 Create Employee
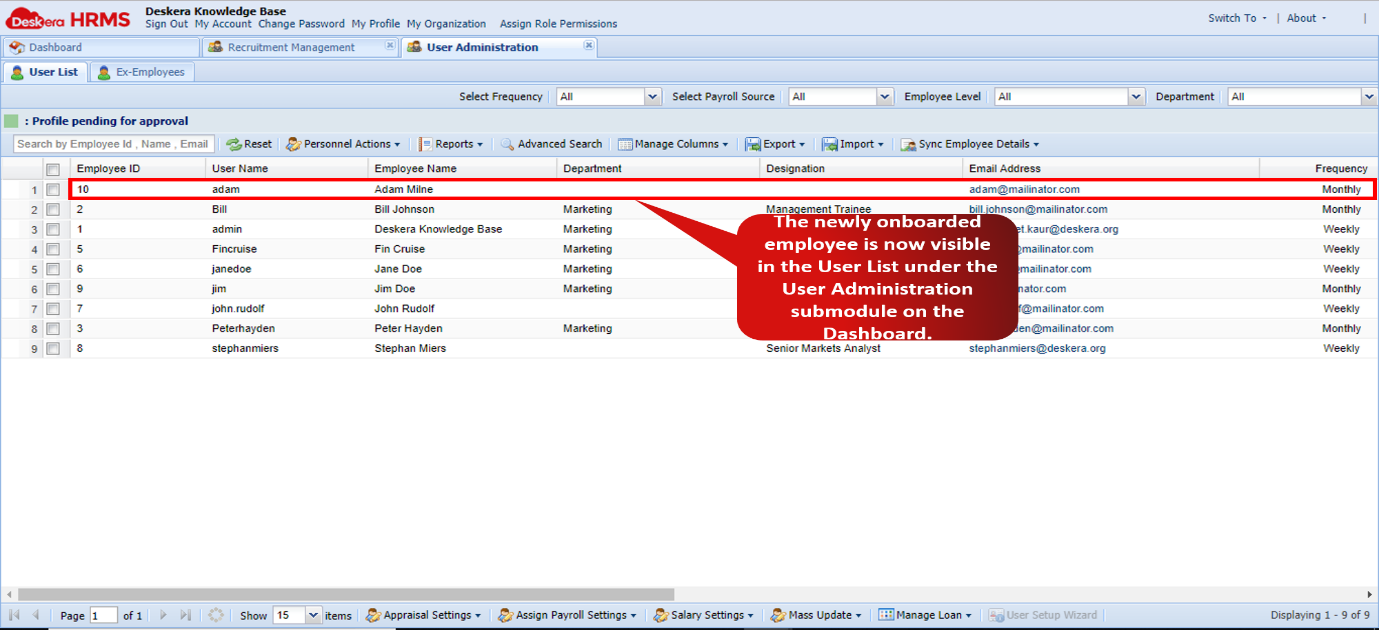
Figure 2.3.26 User List
This concludes the recruitment process for a candidate.
Comments
0 comments
Please sign in to leave a comment.