
This article helps in understanding the entire flow of an advance claim request and approval. The process starts with an advance claim request being submitted by the applicant to approving the claim by the designated approver and processing of the claim by the accounts executive.
Prerequisites:
1. Ensure you have your Deskera eClaims application URL in place.
3. Ensure good internet connectivity
New Advance Application
Step 1: Go to Request New Advance under Advance Claims on eClaims Dashboard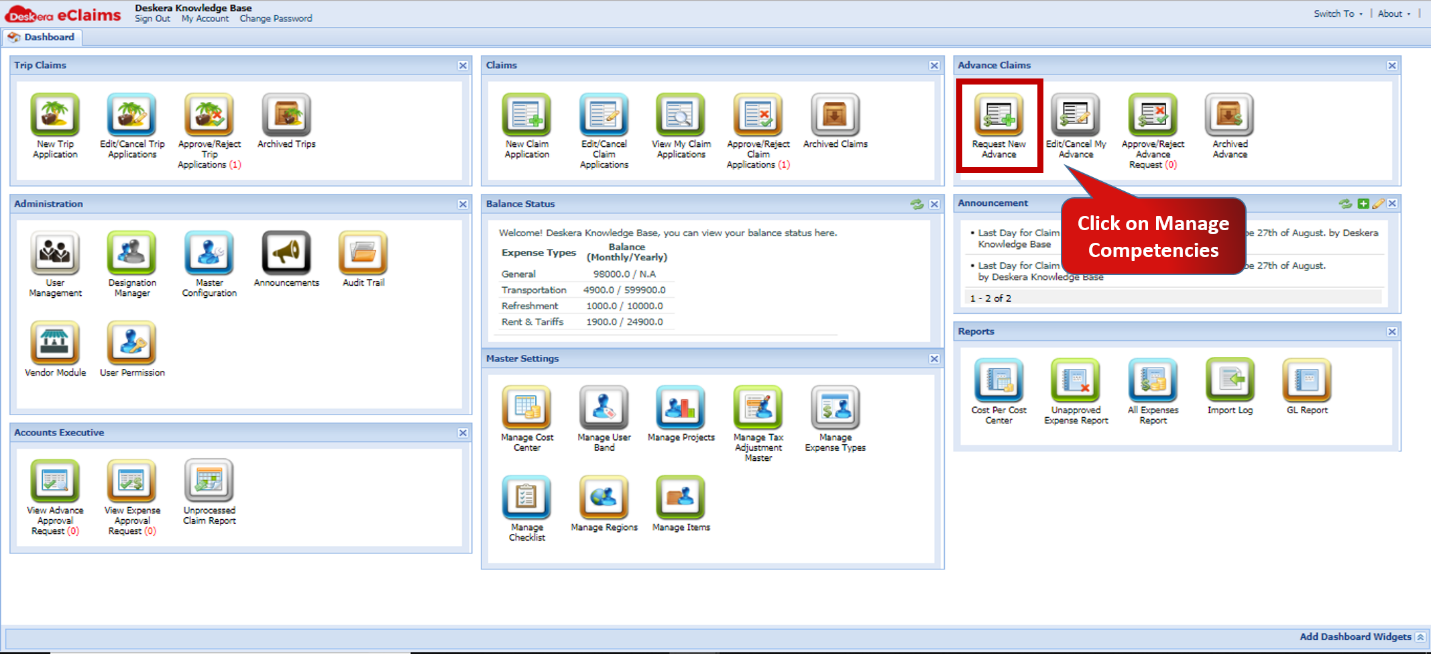 Fig.4.4.1 eClaims Dashboard
Step 2: Choose Cost Centre, Trip or Project and select the same from drop-down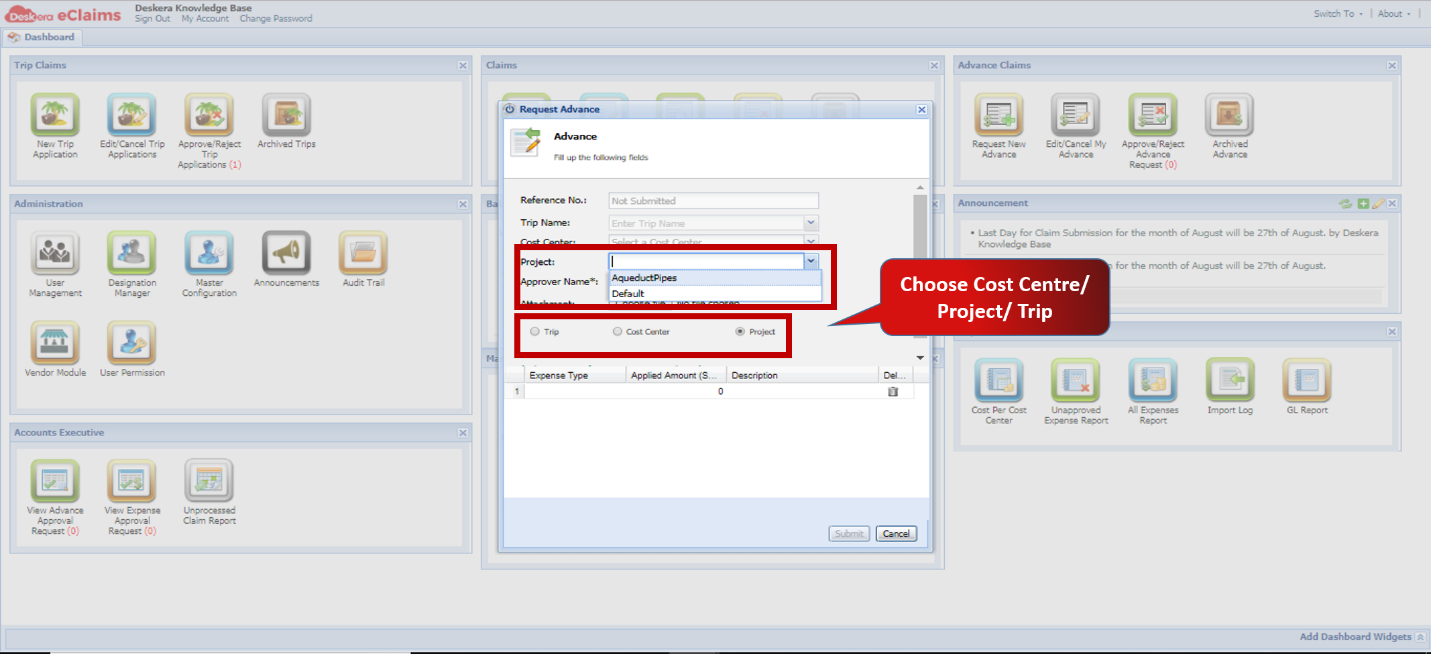 Fig.4.4.2 Master Configuration
Step 3: Select attachments if any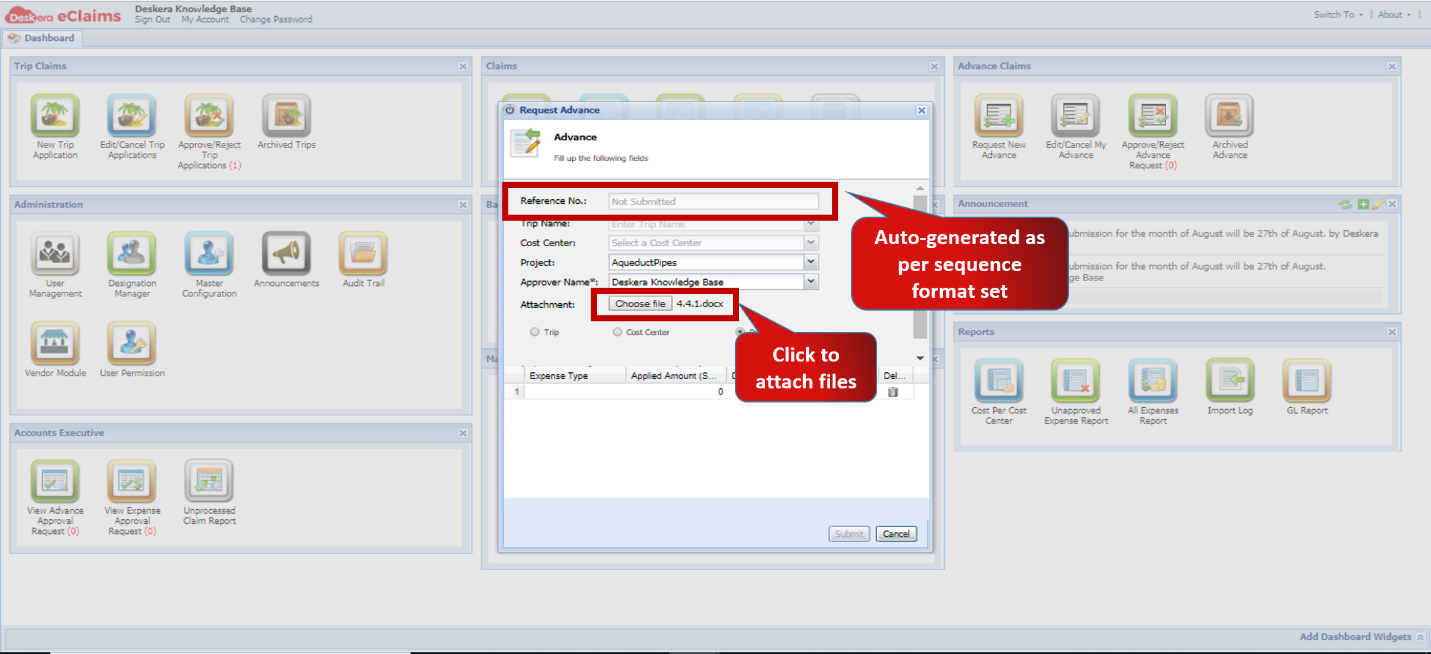 Fig.4.4.3 Master Configuration
Step 4: Enter Expense Details and Click on Submit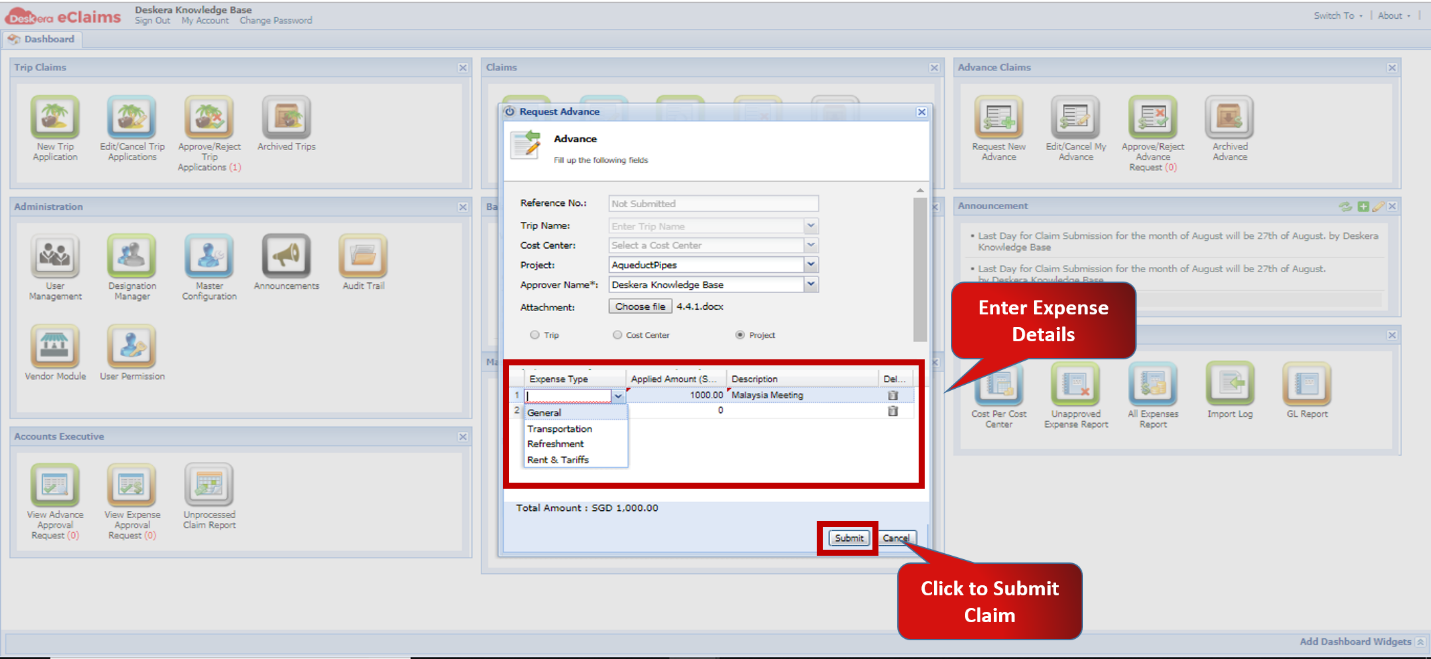 Fig.4 4.4 Master Configuration
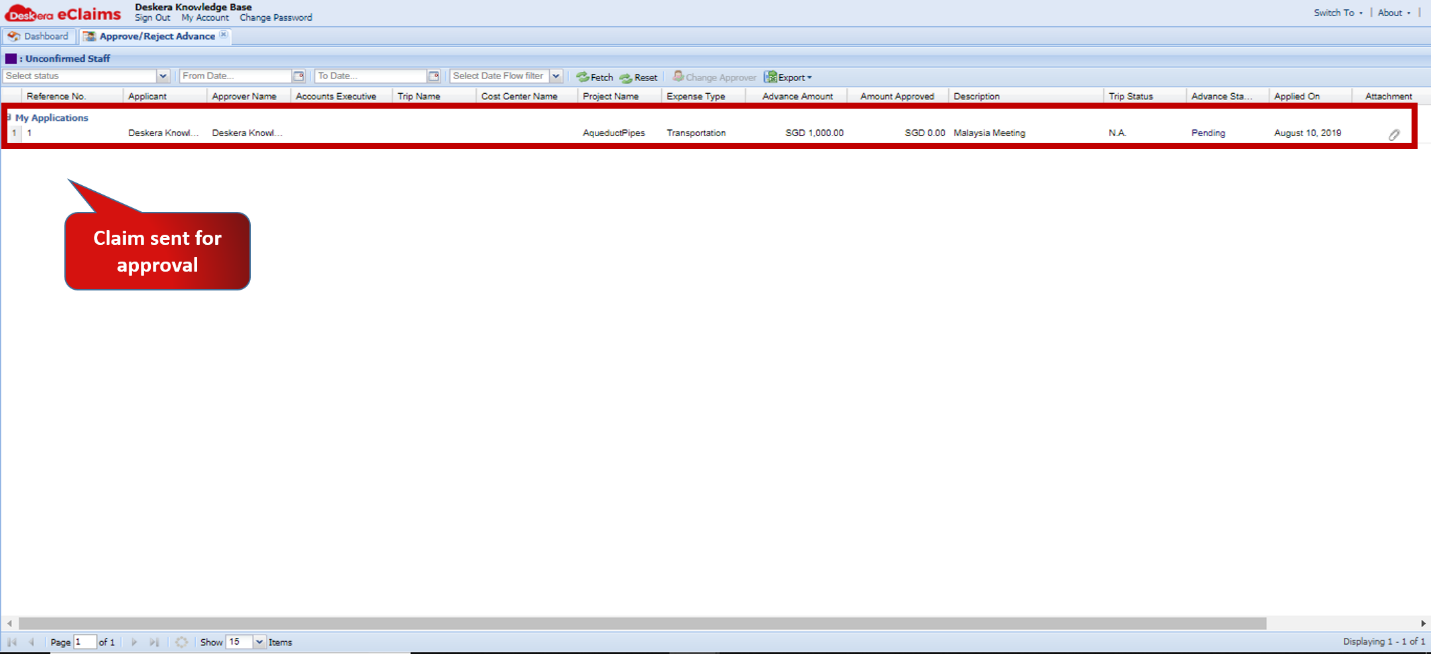 Fig.4.4.5 Master Configuration
Advance Claim Approval
Note: Ensure that you are signed in as the designated approver of the particular claim.
Step 1: Go to Approve/Reject Advance Claims under Advance Claims on eClaims Dashboard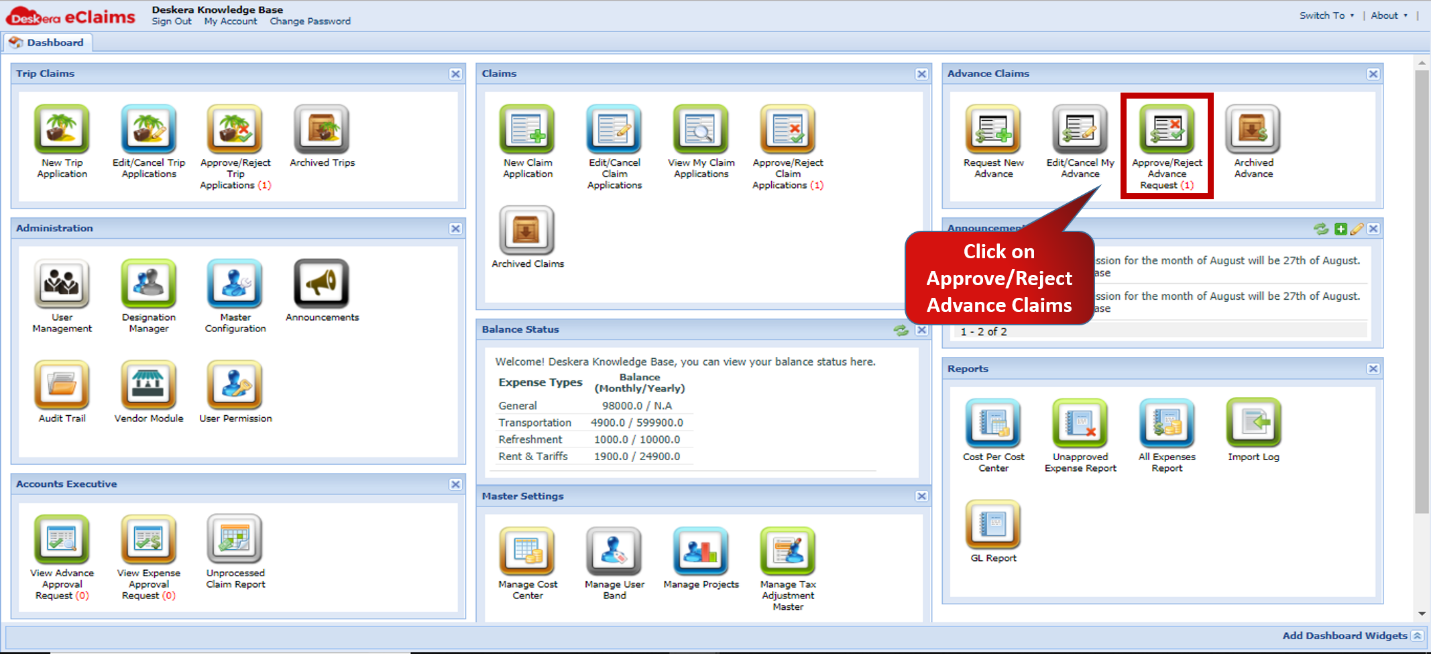 Fig.4.4.6 eClaims Dashboard
Step 2: Select the claim you wish to approve/reject and click on Approve/Reject under Status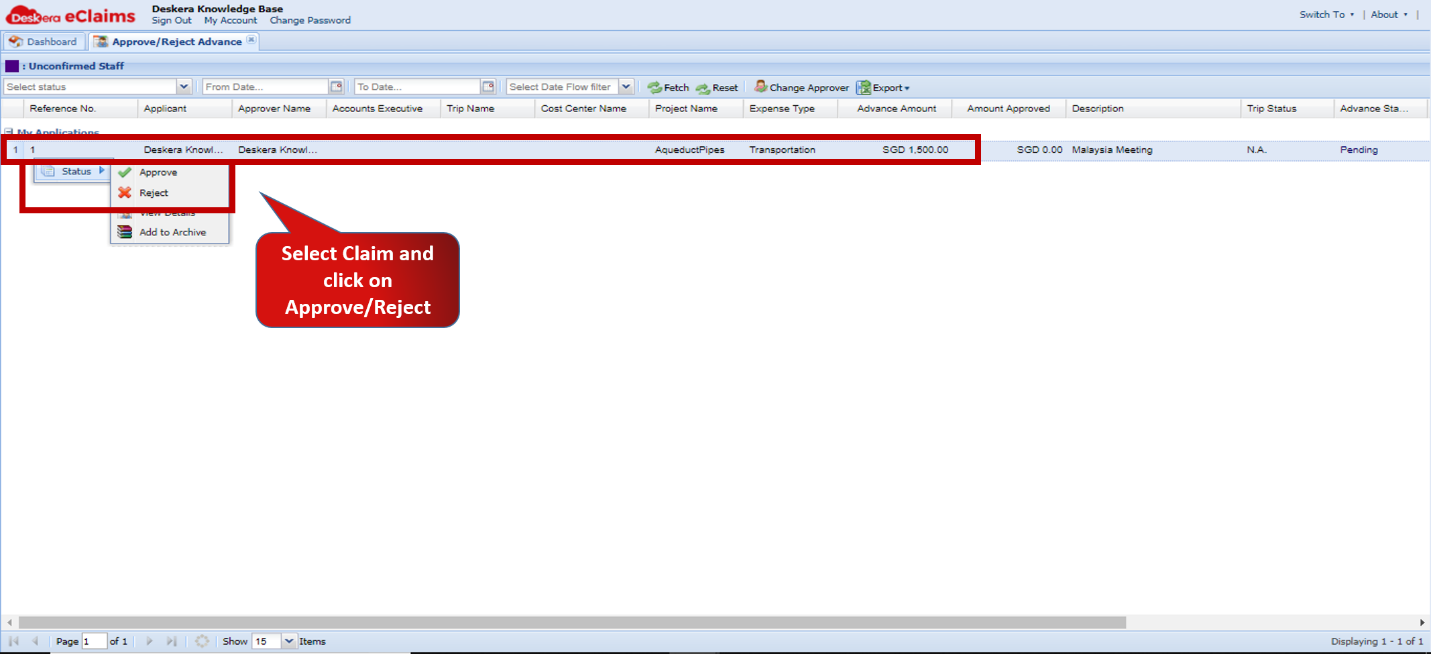 Fig.4.4.7 Approve/Reject Advance Claim
Step 3: Choose the Account Executive and Click on Approve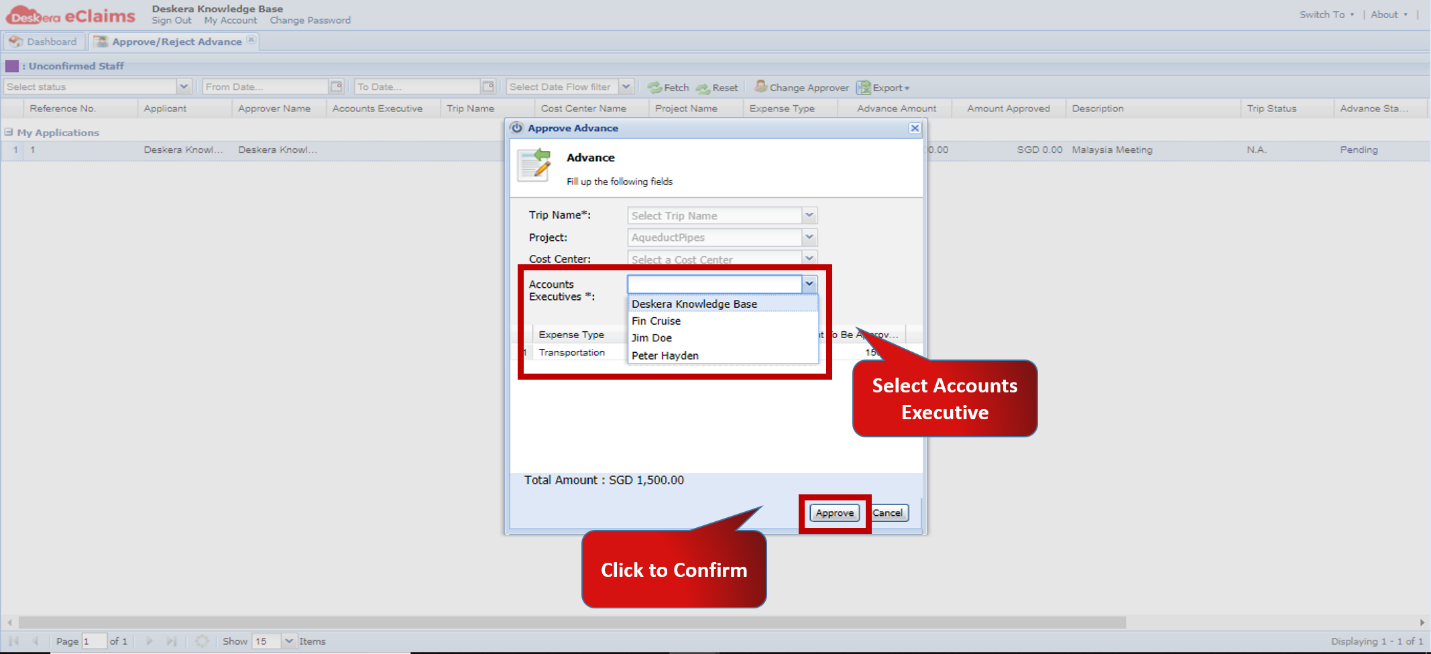 Fig.4.4.8 Approve/Reject Advance Claim
Accounts Executive Approval
Note: Ensure that you are signed in as the Accounts Executive of the particular claim.
Step 1: Go to View Advance Approval Request under Accounts Executive widget in eClaims.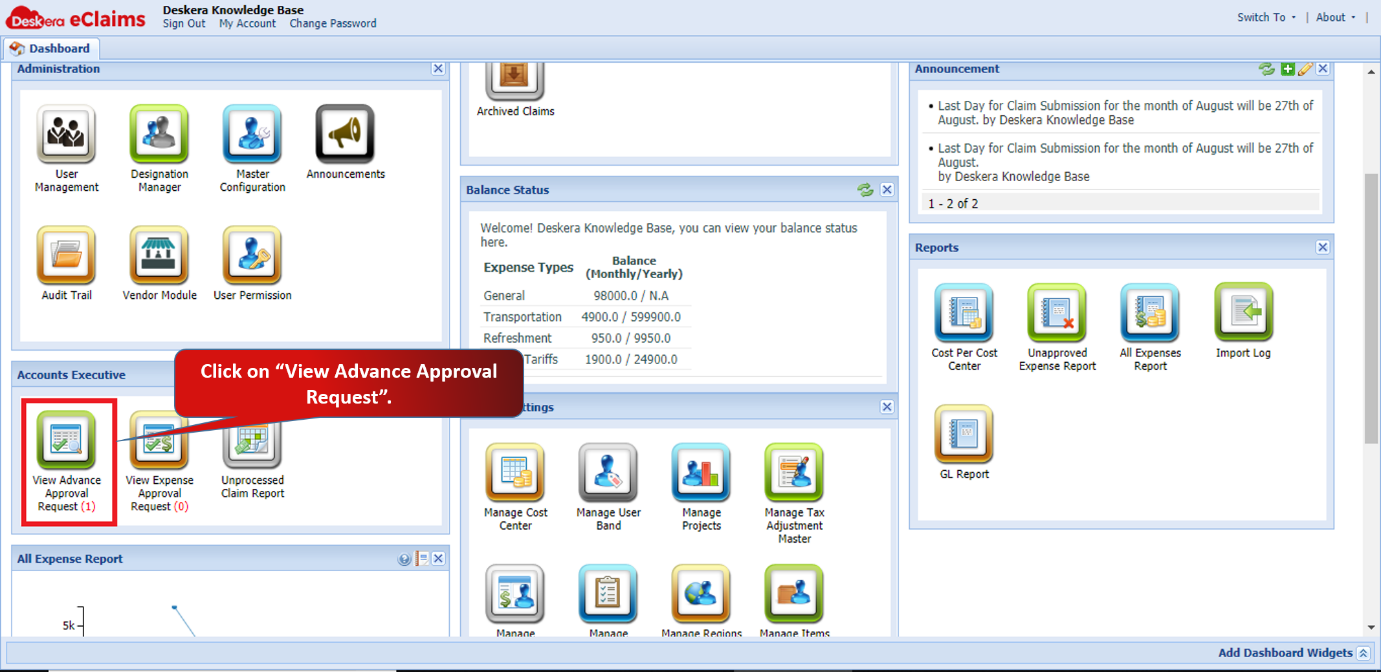
Fig 4.4.9 eClaims Dashboard
Step 2: Select the filters to fetch the required data. Select the claim which you want to review and approve. Right click on the claim and click on Approve.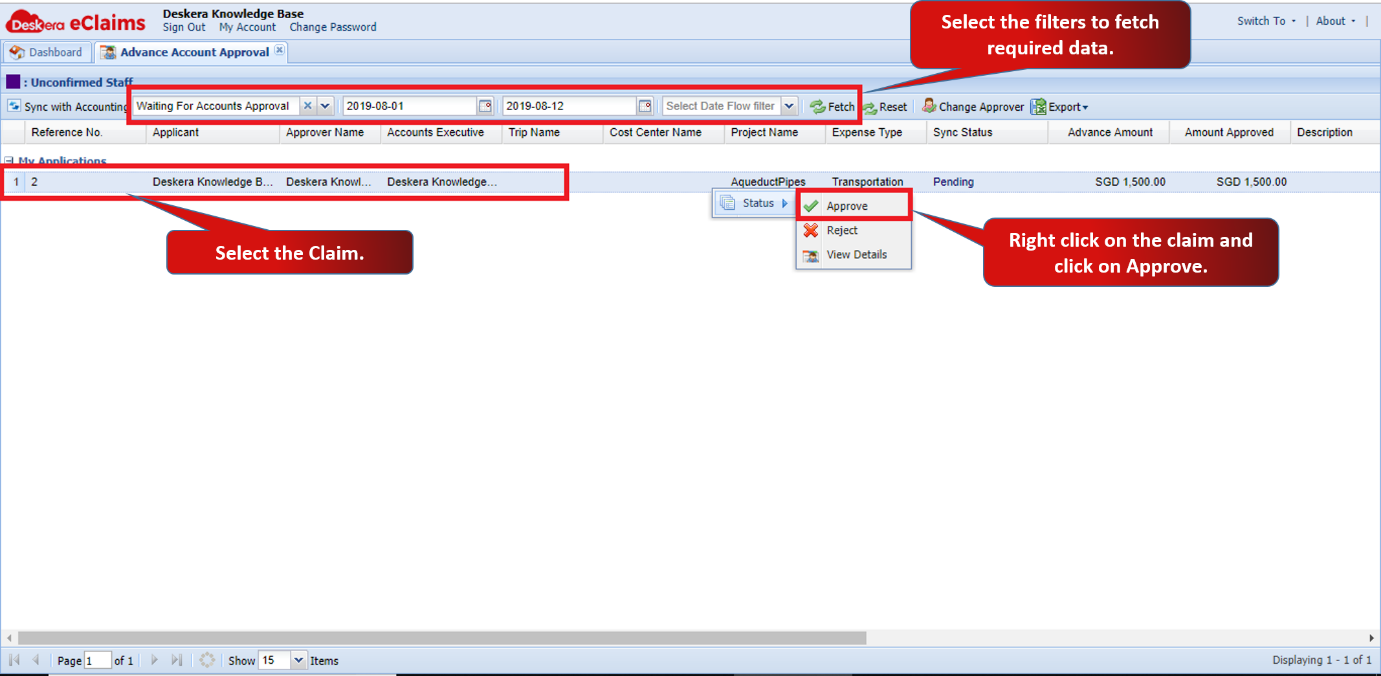 Fig 4.4.10 Approve Claims
Step 3: Click on Make Payment to approve the advance claim.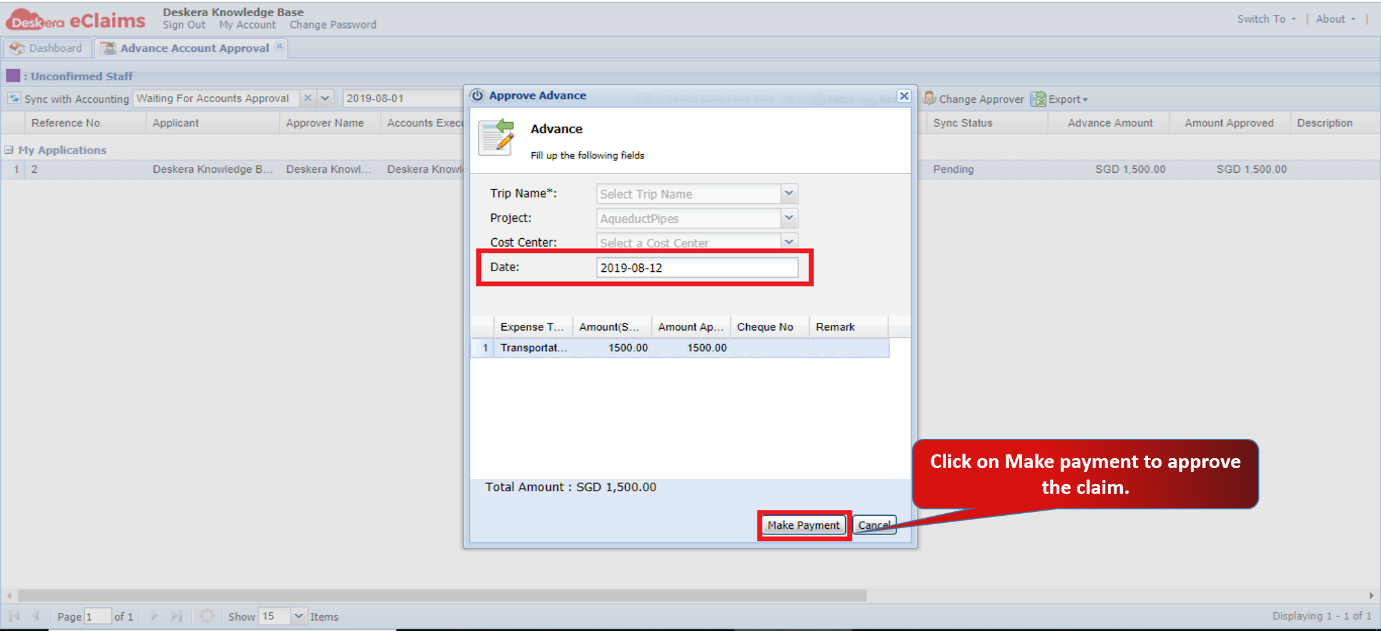 Fig 4.4.11 Approve Claims
The advance claim will be approved. 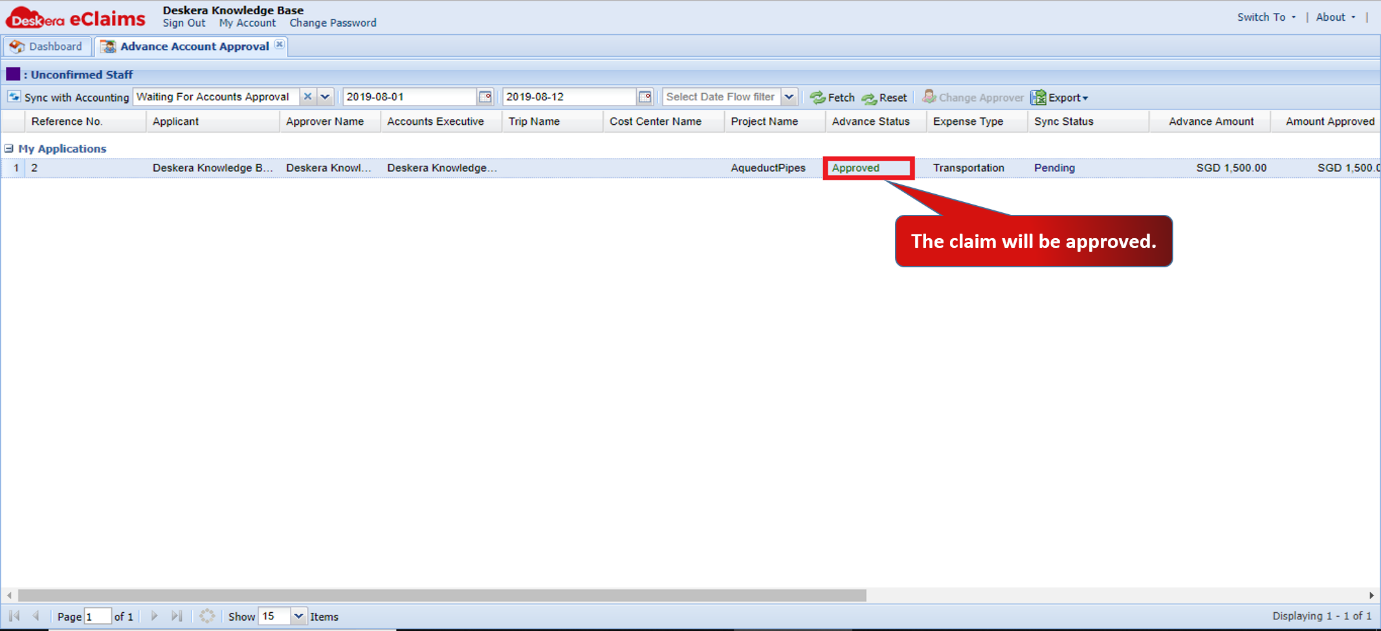 Fig 4.4.12 Approve Claims
Comments
0 comments
Please sign in to leave a comment.