
This document explains the steps to be followed to enable leave encashment, apply for leave encashment, approve leave encashment, add payroll component, generate payroll and view calculated encashment amount. Once leaves are encashed, the leave balance will adjust automatically to reflect the updated number.
The article is broken into four sections, corresponding to actions to be taken by different roles including Admin, User, Manager and HR
1. Admin Actions
Step 1: Click on Master Configuration on HRMS dashboard. Navigate to Integration with Deskera Applications and make sure eLeave Integration is ticket. 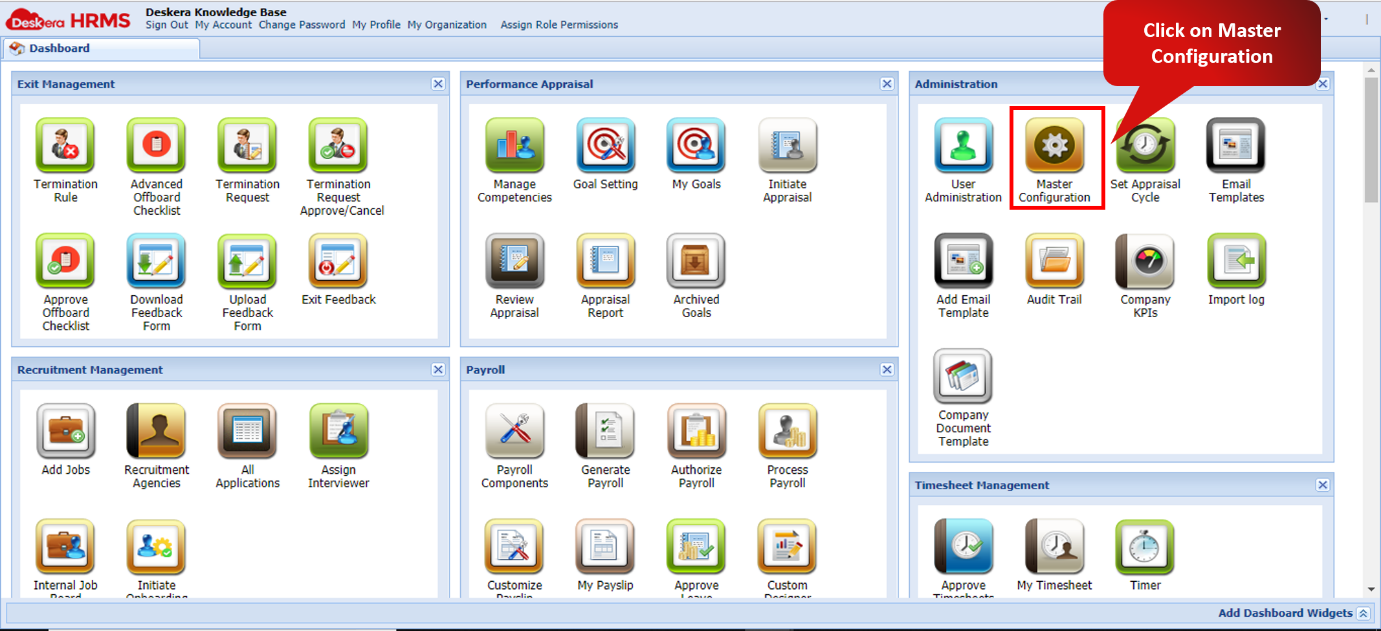 Fig. 3.5.2.1.1 Master Configuration
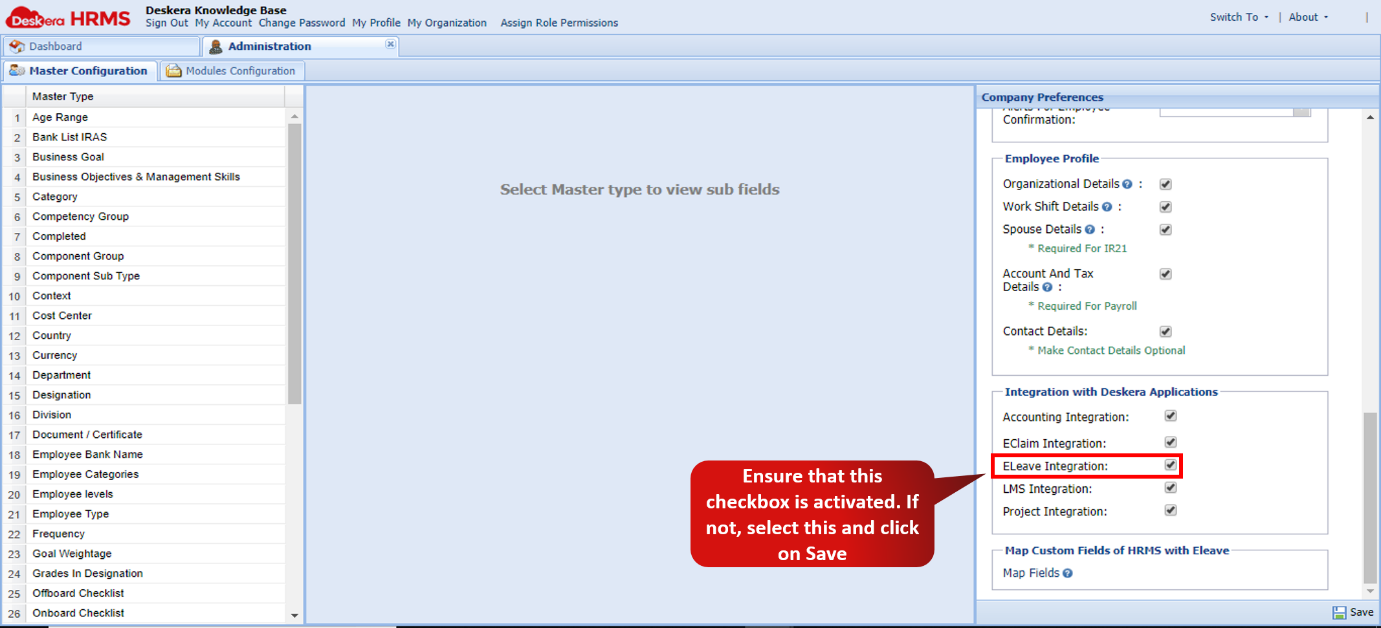 Fig. 3.5.2.1.2 Eleave Integration
Step 2: On the eLeave Dashboard, click on Manage Leave Type link under Leave Status.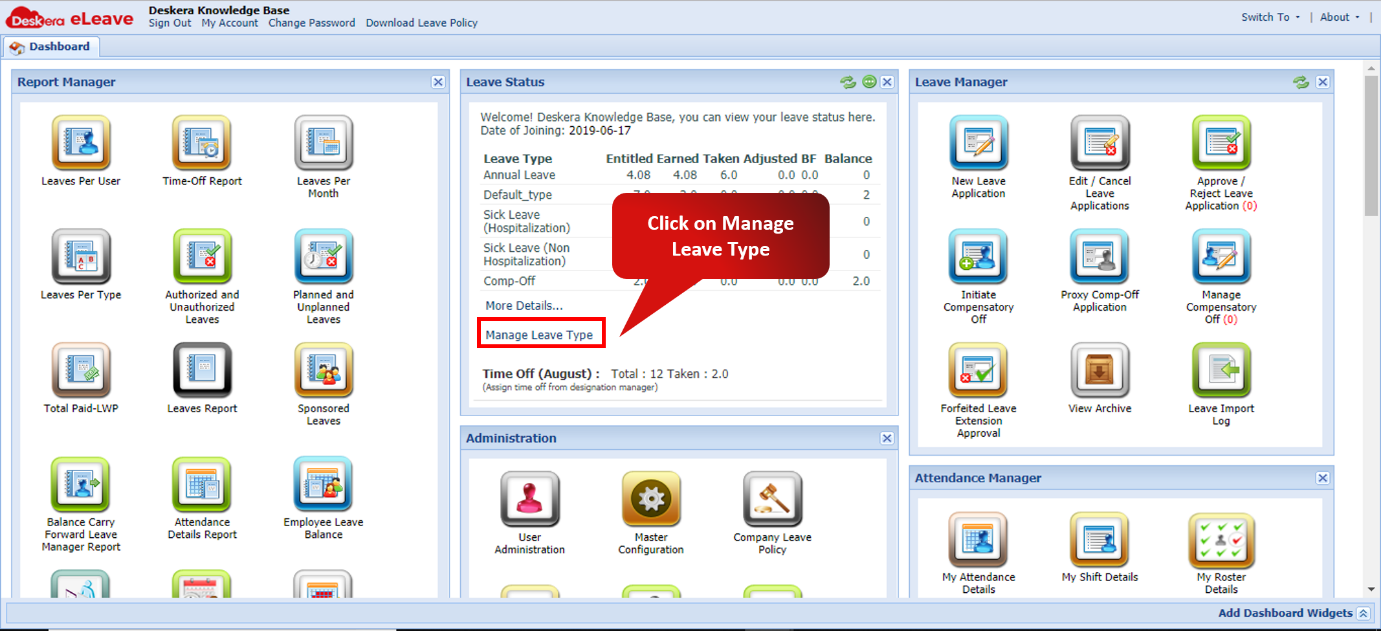 Fig. 3.5.2.1.3 Manage Leave Type
Step 3: Scroll horizontally to view Encashable Leave Type column and tick the checkboxes below this column. Then click Submit.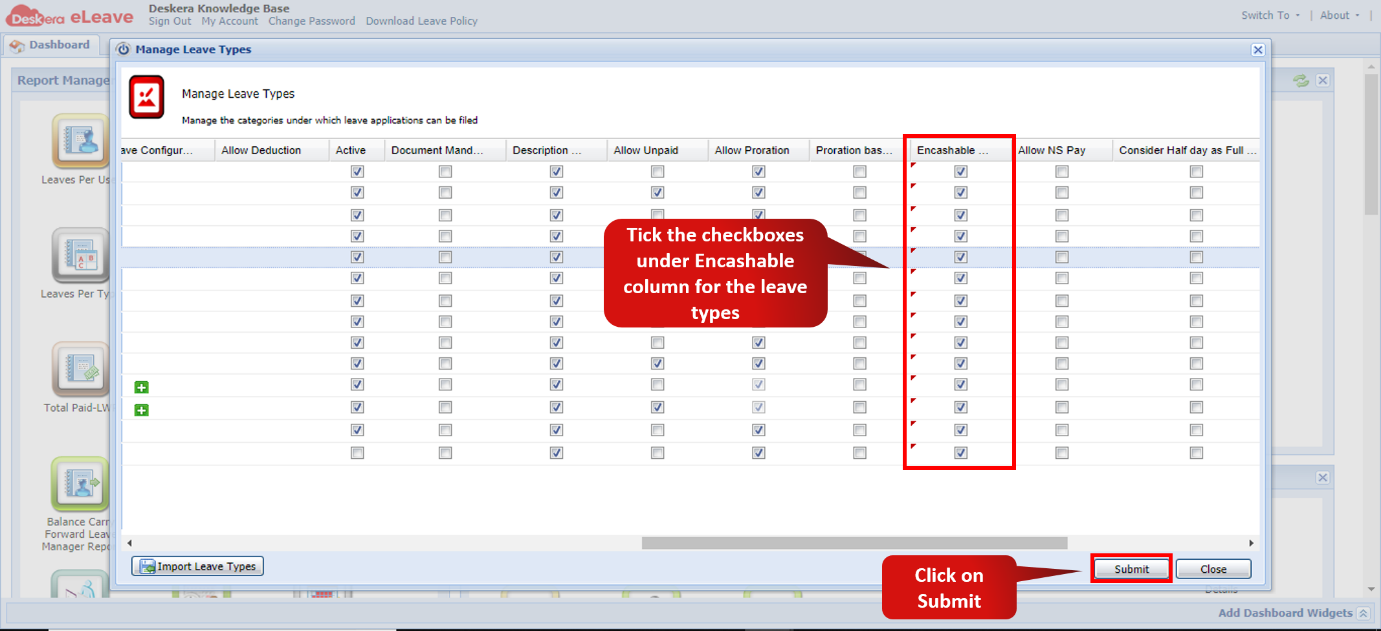 Fig. 3.5.2.1.4 Manage Leave Type
Step 4: On HRMS dashboard, go to User Administration, Select User and go to Assign Payroll Settings and set Leave Manager (for approval of leave encashment).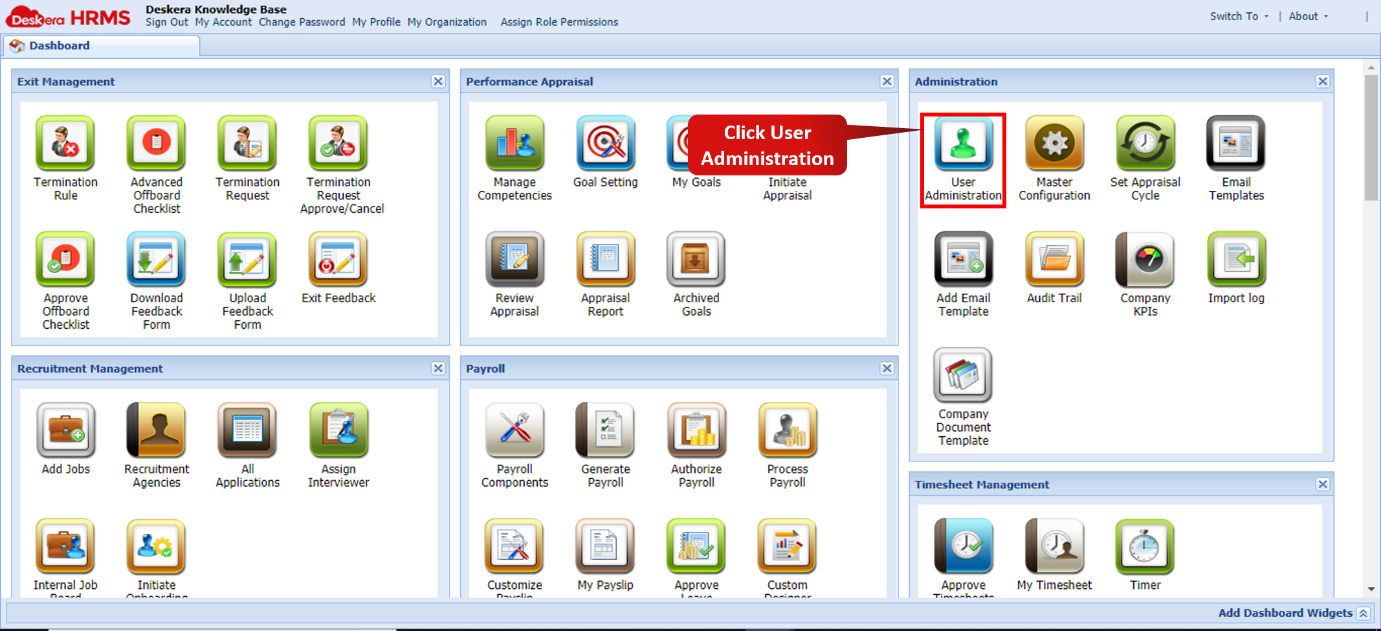 Fig. 3.5.2.1.5 User Administration
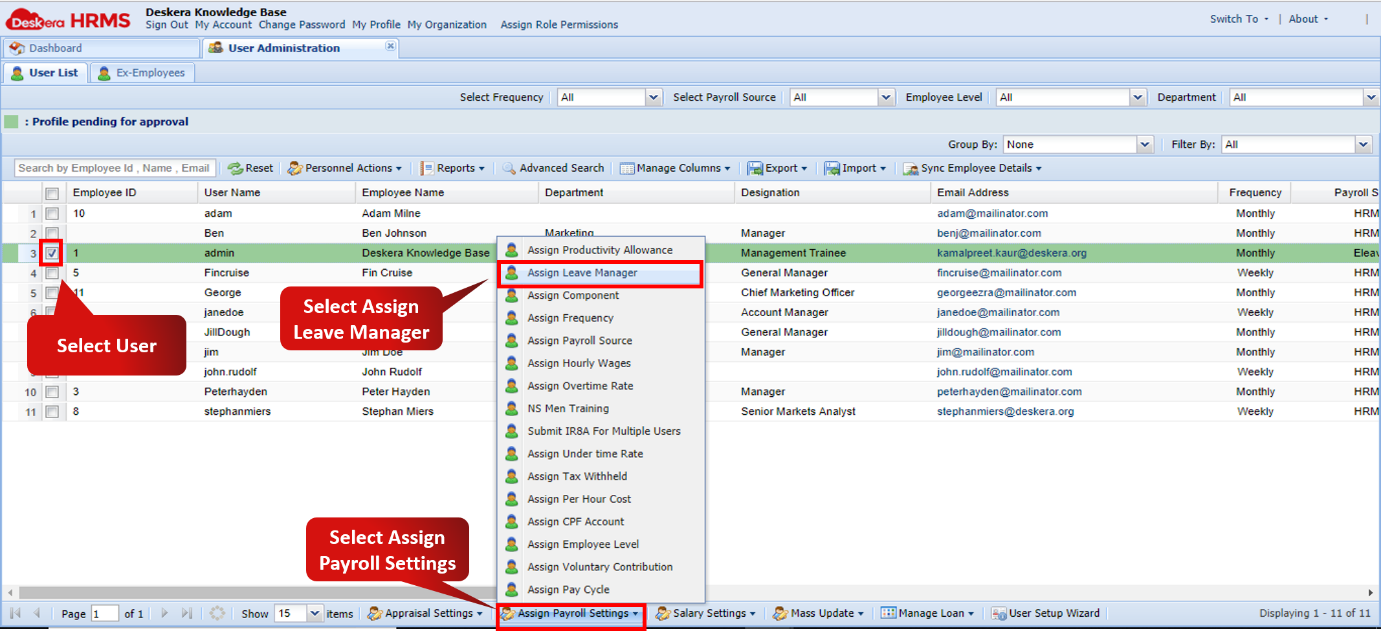 Fig. 3.5.2.1.6 Assign Leave Manager
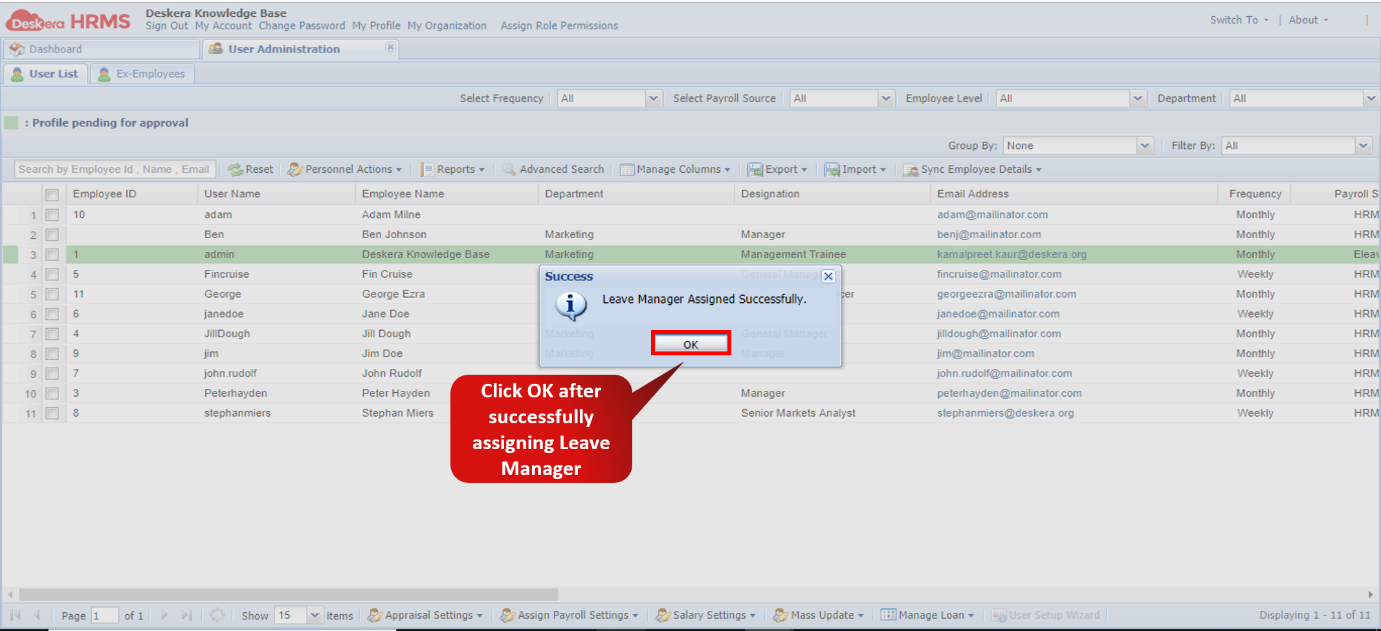 Fig. 3.5.2.1.7 Assign Leave Manager
2. User Actions
Step 1: Click on Apply for Leave Encashment icon on the dashboard. Leave Encashment pop-up window will open. Enter the details and click Submit. The application is submitted to the user’s assigned manager for leaves.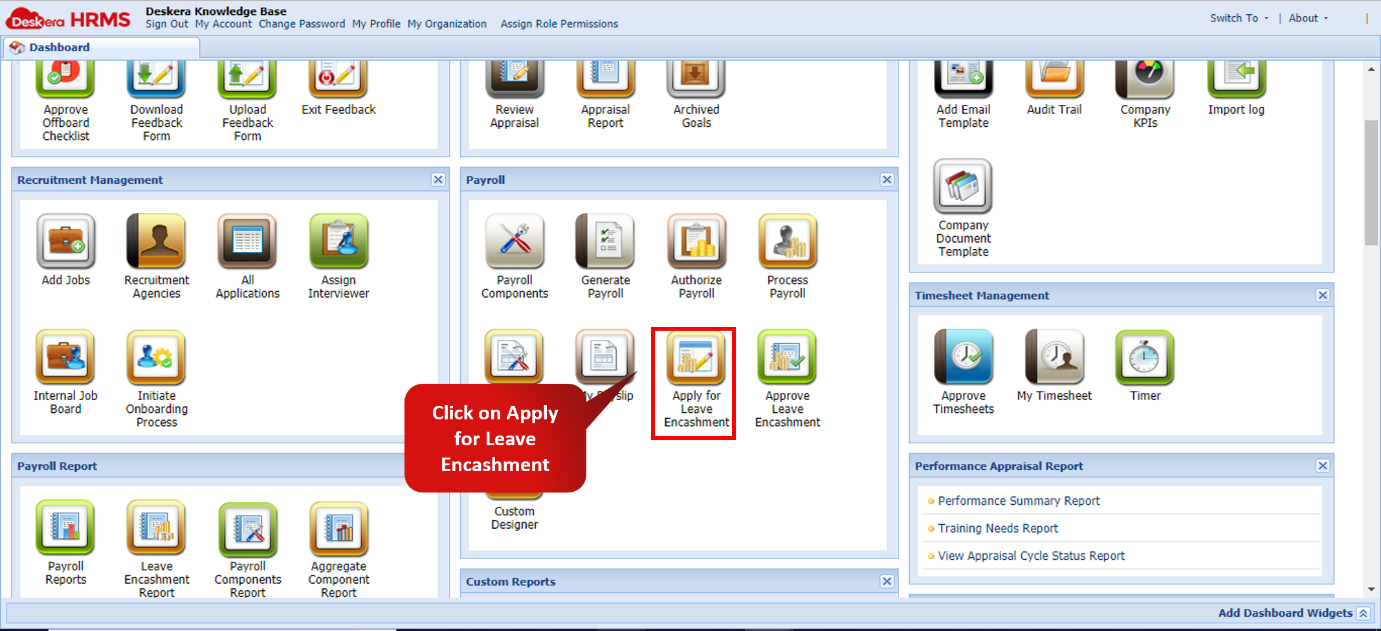 Fig. 3.5.2.1.8 Leave Encashment
 Fig. 3.5.2.1.9 Leave Encashment
3. Approving Manager Actions
Step 1: Click on Approve Leave Encashment icon on the dashboard.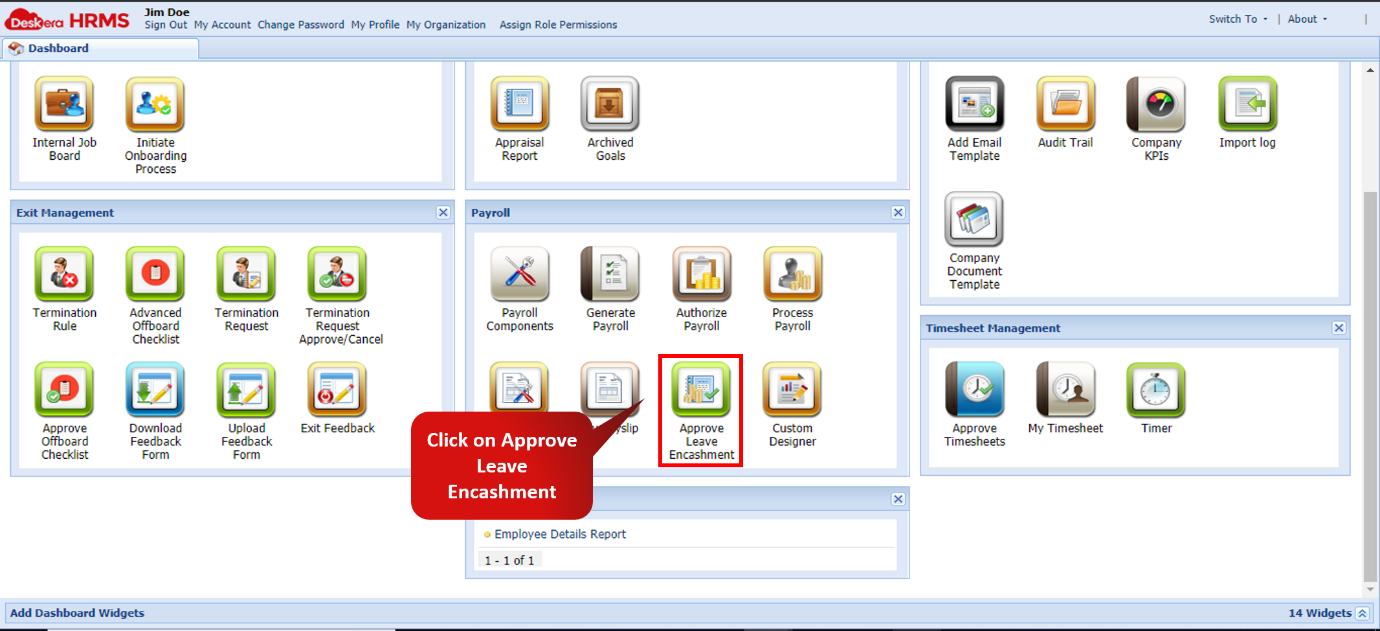 Fig. 3.5.2.1.10 Approve Leave Encashment
Step 2: Select the required record and click Approve Leave Encashment. An alert message will be displayed. Click on Yes to proceed.  Fig. 3.5.2.1.11 Approve Leave Encashment
 Fig. 3.5.2.1.12 Approve Leave Encashment
Step 3: Select the Status as Approved. The Leave Encashment request will be displayed with the Status having changed to Approved. Fig. 3.5.2.1.13 Approve Leave Encashment
4. HR (Payroll Processor)
Follow the payroll generation process as usual. In Entered status, select the desired record and click Review Details. Details will open. View the calculated encashment amount. Processing the salary as usual will result in the Leave Encashment component being a part of the processed salary of the employee. Fig. 3.5.2.1.14 Leave Encashment
 Fig. 3.5.2.1.15 Approve Leave Encashment
Comments
0 comments
Please sign in to leave a comment.