
The Master Types in HRMS are arranged according to alphabet and each of them is used for different modules. This article will go through them not in alphabet order but by the modules that they are linked to.
User Administration
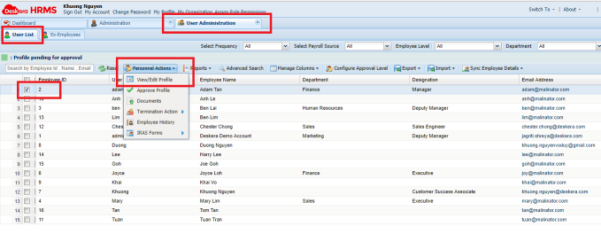
To access User Administration, click on the User Administration under Administration widget from the HRMS Dashboard. When you are at the User Administration page, you can select an employee from User List tab and choose View/Edit Profile under Personnel Actions.
This will pop out a new tab for the employee’s profile, which comprises of more sub-tabs, namely Personal Details, Contract and Work Shift Details, Organizational Details, etc
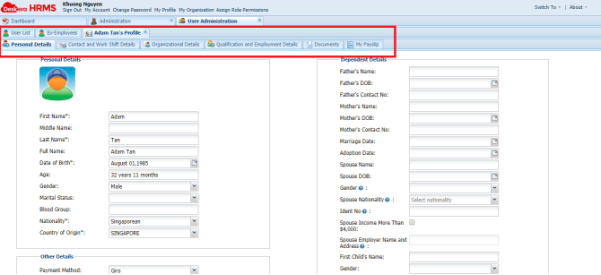
These sub-tabs allow you to view and edit the information for the employee’s profile. And some of these fields are in the format of a dropdown list which is configured from the Master Types under Master Configuration. The following sections will discuss each of such fields.
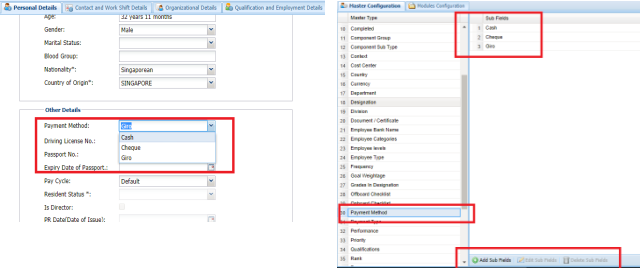
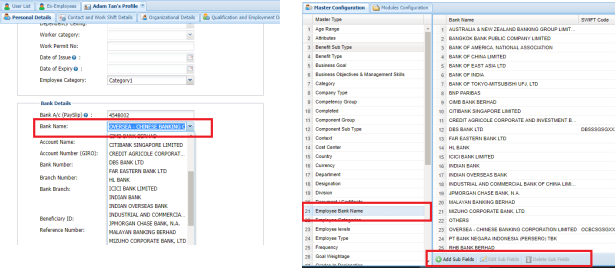
Under Personal Details tab, there are three fields that are configured by Master Types. The first one is Payment Method. To configure Payment Method, you can go back to the Master Configuration tab and allocate Payment Method in the list and select Add Sub Fields at the bottom
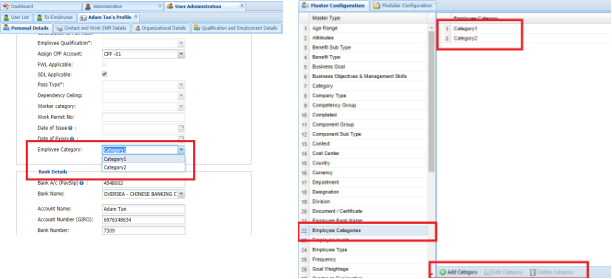
Similarly, you can configure Employee Category and Bank Name in the Master Configuration list
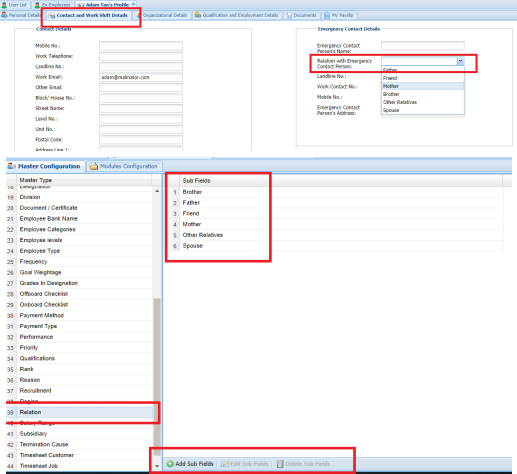
Under Contract and Work Shift Details, there is only one field: Relation with Emergency Contact Person which is linked to Relation
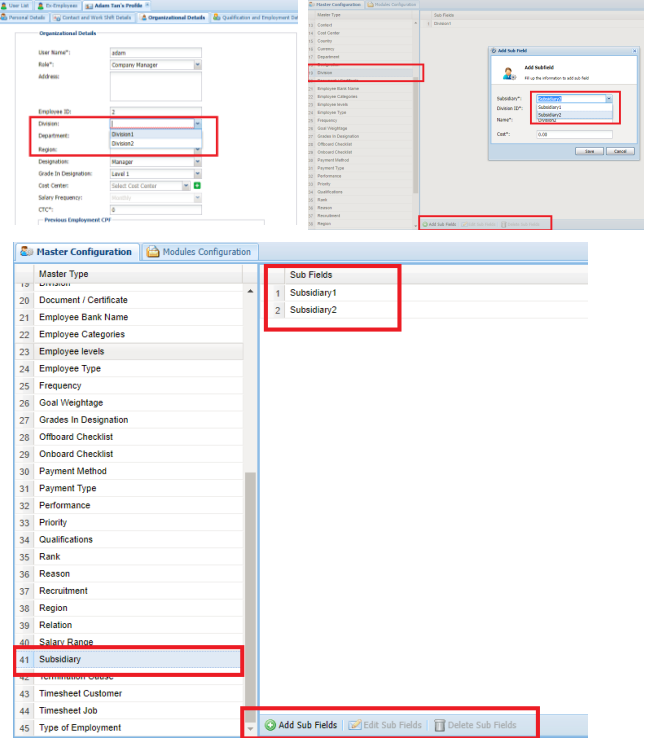
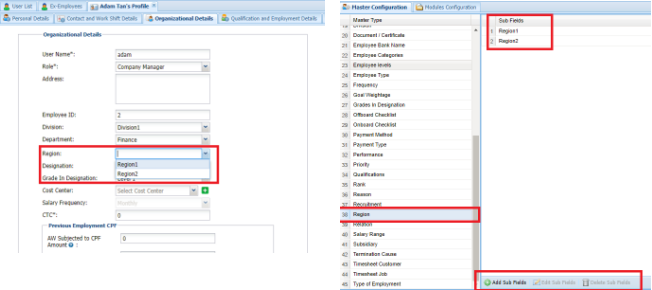
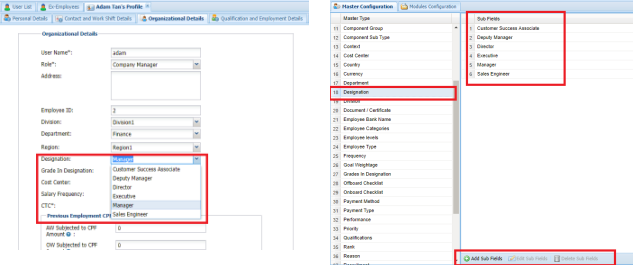
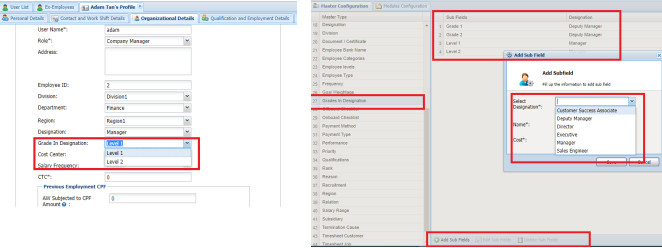
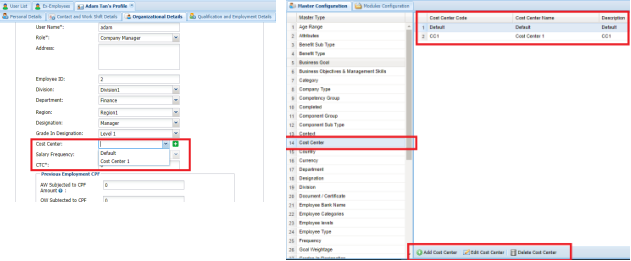
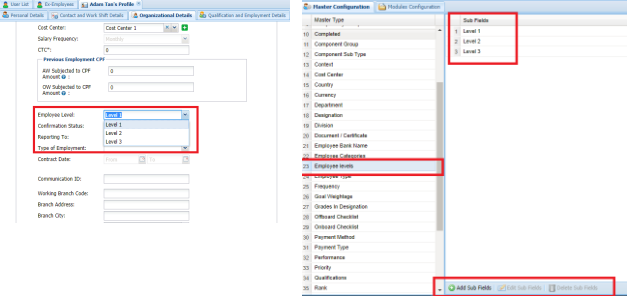
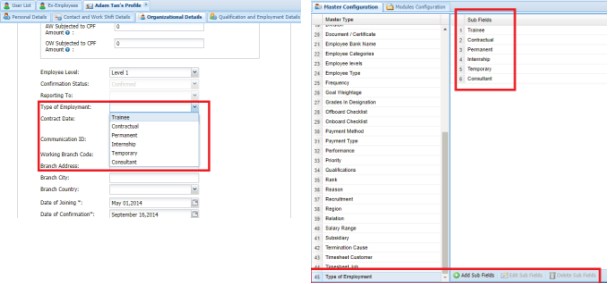
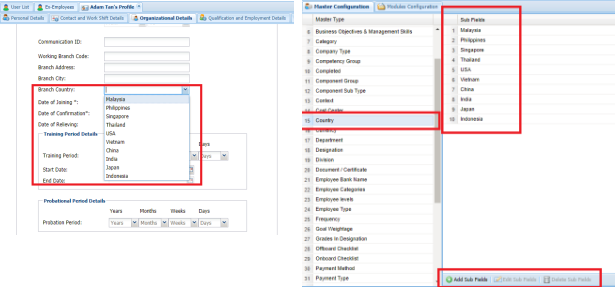
Under Organization Details, there are 9 fields that can be configured by Master Configuration, which are tabulated in the table below and shown in the subsequent pictures
|
Field in Organization Details |
Master Types |
|
Division |
Division |
|
Department |
Department |
|
Region |
Region |
|
Designation |
Designation |
|
Grade in Designation |
Grades in Designation |
|
Cost Center |
Cost Center |
|
Employee Level |
Employee Levels |
|
Type of Employment |
Type of Employment |
|
Branch Country |
Country |
Division:
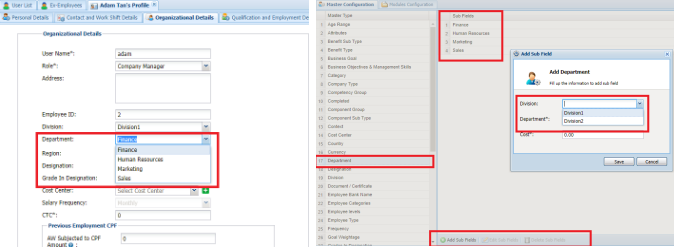
Department:
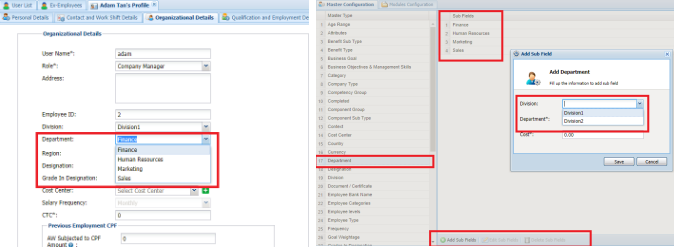
Region:
Designation:
Grade in Designation:
Cost Center:
Employee Level:
Type of Employment:
Branch Country:
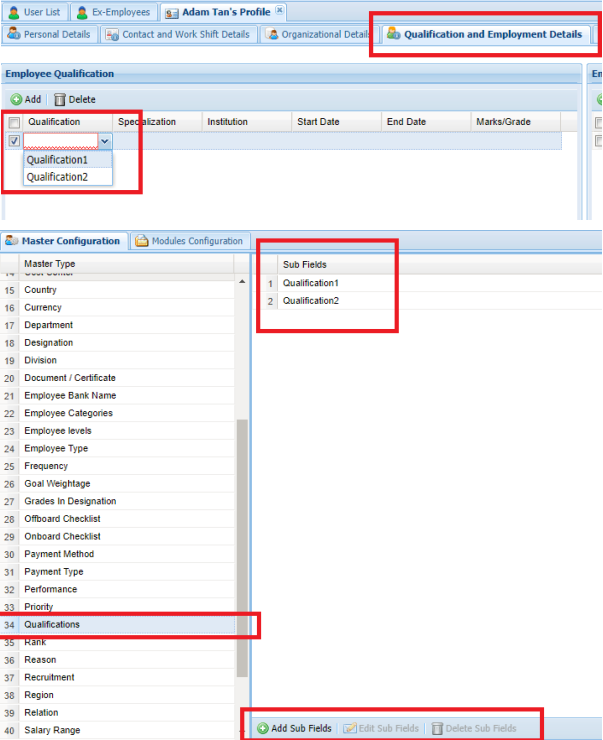
Under Qualification and Employment Details tab, you can add qualification by choosing from the dropdown list which is configured by the Master Configuration
Performance Appraisal
The next Module we are going through is Performance Appraisal. Under Performance Appraisal widget, you can add competencies by clicking on the Manage Competencies. Please take note that, you need to first check on Competencies checkbox under Modules Configuration tab .
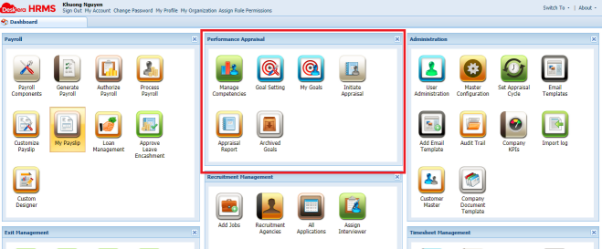
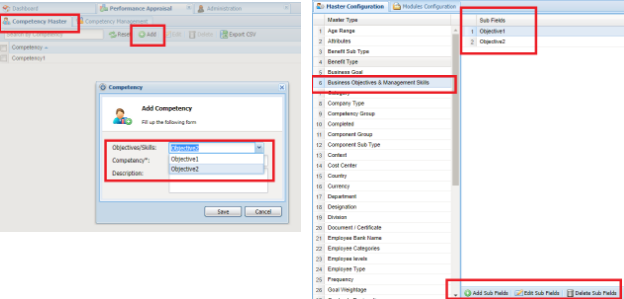
When you select the Manage Competencies, a new Performance Appraisal tab will open with two sub-tabs: Competency Master and Competency Management. To add new competency, you can click Add under Competency Master tab and fill in the detail. The objectives are configured by Business Objectives & Management Skills
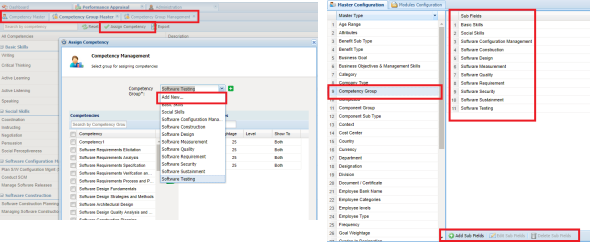
However, when you enable Competency Group Flow under Modules Configuration, you would see three sub-tabs instead and you can combine the competencies into group under Competency Group Master. To add sub-field for competency group you can either go back to Master Type or you can directly do so at the pop-up window by clicking Add New
Additionally, you can assign goals to employee by choosing Goal Setting under Performance Appraisal widget. Please take note that, you need to first check on Goals checkbox under Modules Configuration tab. A sub-tab named Assign Goal will pop out with a list of employees included. You can select any employee and click on Assign Goals
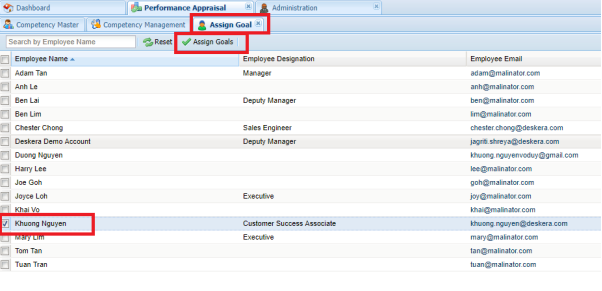
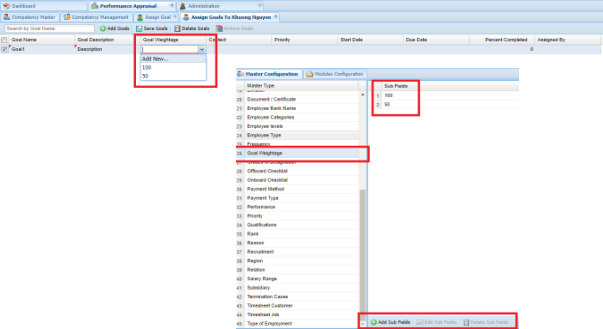
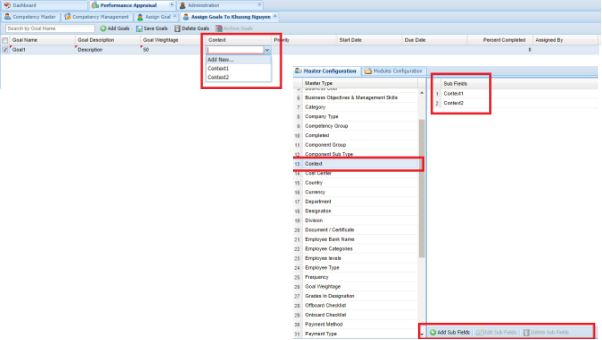
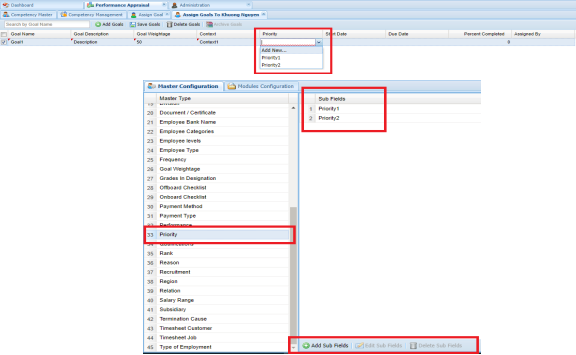
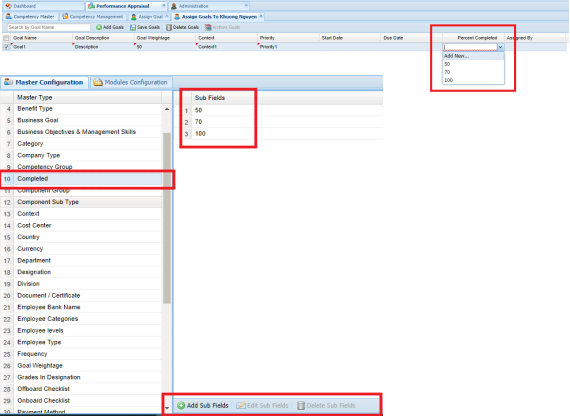
Next, a new sub-tab will pop up to allow you to add new goal for the employee. Under this sub-tab, there are 4 fields that can be configured by Master Types. These four fields are Goal Weightage, Context, Priority and Percent Completed. Nevertheless, you do not need to go back Master Configuration to add sub-fields, you can do that directly by choosing Add New and the sub-field will be auto-saved into the Master Configuration.
Goal Weightage:
Context:
Priority:
Percent Complete:
Payroll
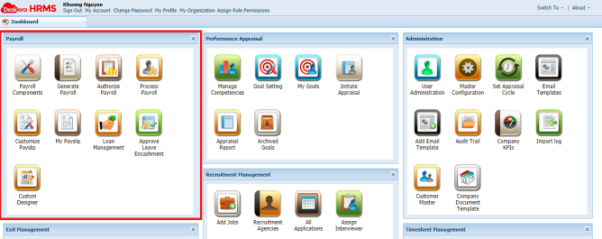
The next Module we are going through is Payroll. Under Payroll widget, you can add components to payroll by clicking on the Payroll Components
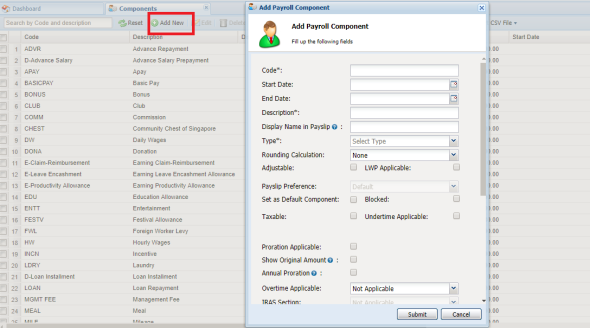
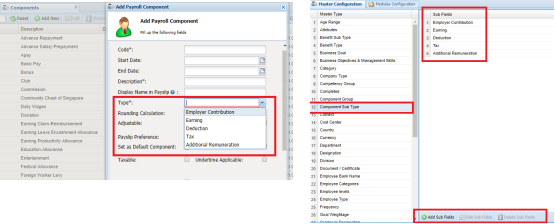
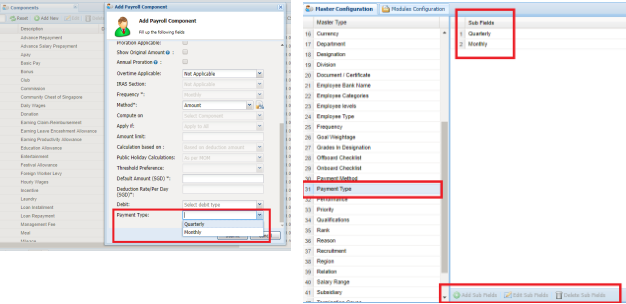
This will prompt out a new tab Components with a list of current payroll components. You can add more components by clicking Add New. A new window will pop out for you to fill in details. In this window, there are three dropdown fields that are configured by Master Types, namely Type, Debit and Payment Type
Type:
Debit:
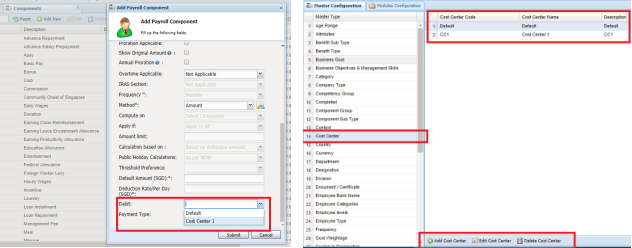
Payment Type:
Recruitment Management
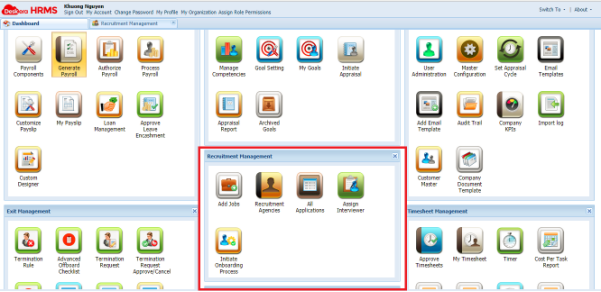
Under Recruitment Management Module, there are three Master Types linked to this module, namely Onboard Checklist, Rank and Reason.
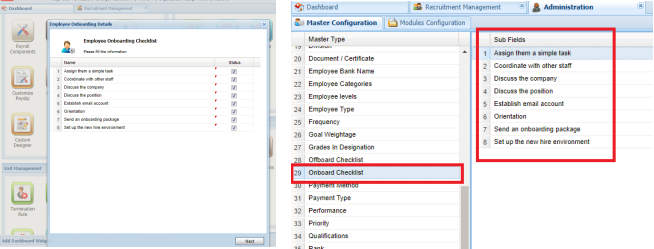
The Onboard Checklist will show up when you select Initiate Onboarding Process which can be found under Recruitment Management widget on the HRMS Dashboard. Please take note that you need first to enable Advance Onboarding under Modules Configuration for the Initiate Onboarding Process to show up under Recruitment Management
When you select Initiate Onboarding Process, a window will pop up for you to fill in the particulars of the applicant. When you press Next and new window will show up with the Onboard Checklist. This checklist is configured through Master Configuration
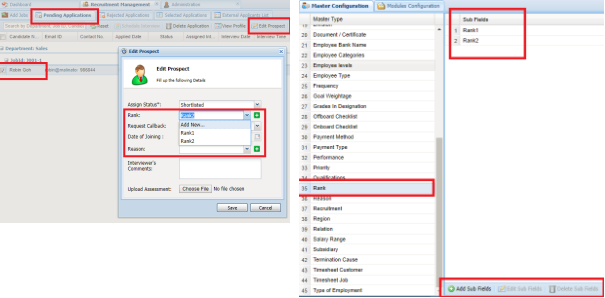
The other two Master Types are used when you want to edit prospect. You can do so by selecting All Applications under Recruitment Management widget. Under Pending Applications tab, you can select an applicant and choose Edit Prospect. A window will appear.
Rank:
Reason:
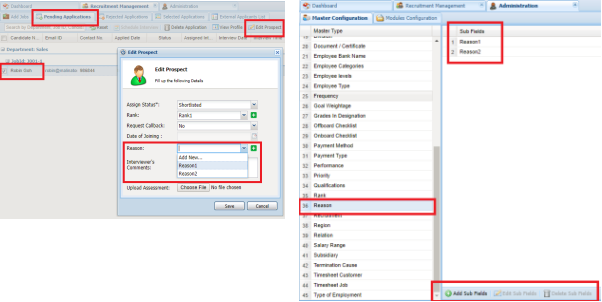
However, you do not need to go back to Master Configuration to add sub-fields for Rank and Reason as you can directly add more sub-fields by selecting Add New in the dropdown list.
Exit Management
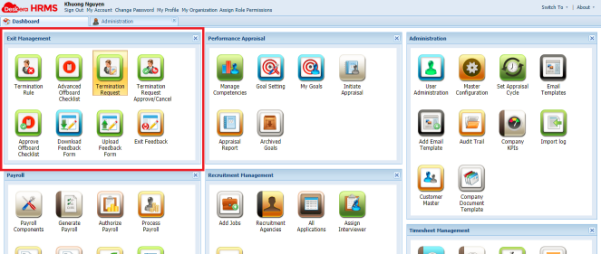
Under Exit Management, when you approve for a termination request, you would proceed to approve Offboard Checklist. You can find Termination Request Approve/Cancel and Approve Offboard Checklist under Exit Management widget on HRMS Dashboard
Timesheet Management
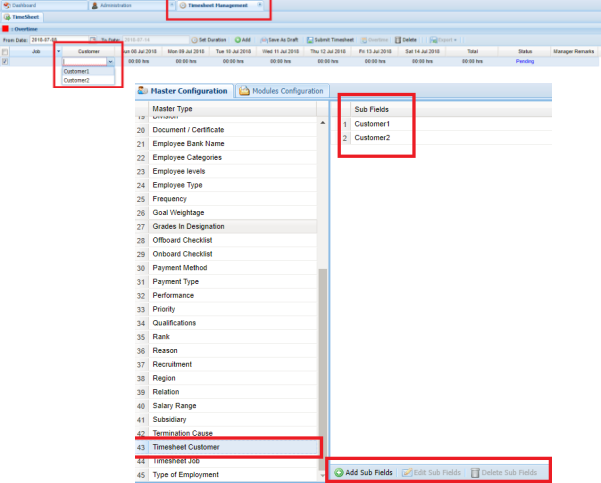
Under Timesheet Management, there are two Master Types that are used to configure setting in Timesheet Management module: Timesheet Customer and Timesheet Job. As the names suggest, they are used to add sub-fields into Job and Customer.
Timesheet Customer:
Timesheet Job
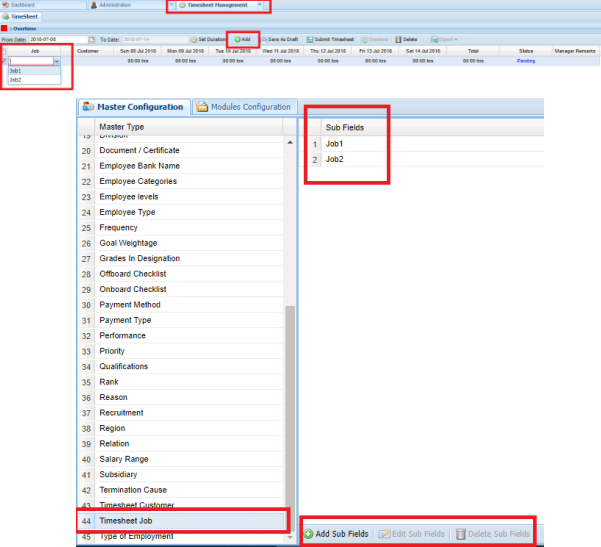
An employee can access into his or her own timesheet by selecting My Timesheet under Timesheet Management widget on HRMS Dashboard. Under this tab, he or she must set the duration first before can add and submit the timesheet. Please also take note that you must uncheck the Project Integration checkbox under Company Preferences so that you can select the Job and Customer from the dropdown list. Otherwise, the Timesheet will get data from Deskera Project Management.
 |
Run Your Business with Deskera |
Comments
0 comments
Article is closed for comments.